Before & After
Our project galleries help to tell the story of each project—from initial condition to repaired state. We've included a wide range of projects to reflect the work our market demands and the areas we specialize in.
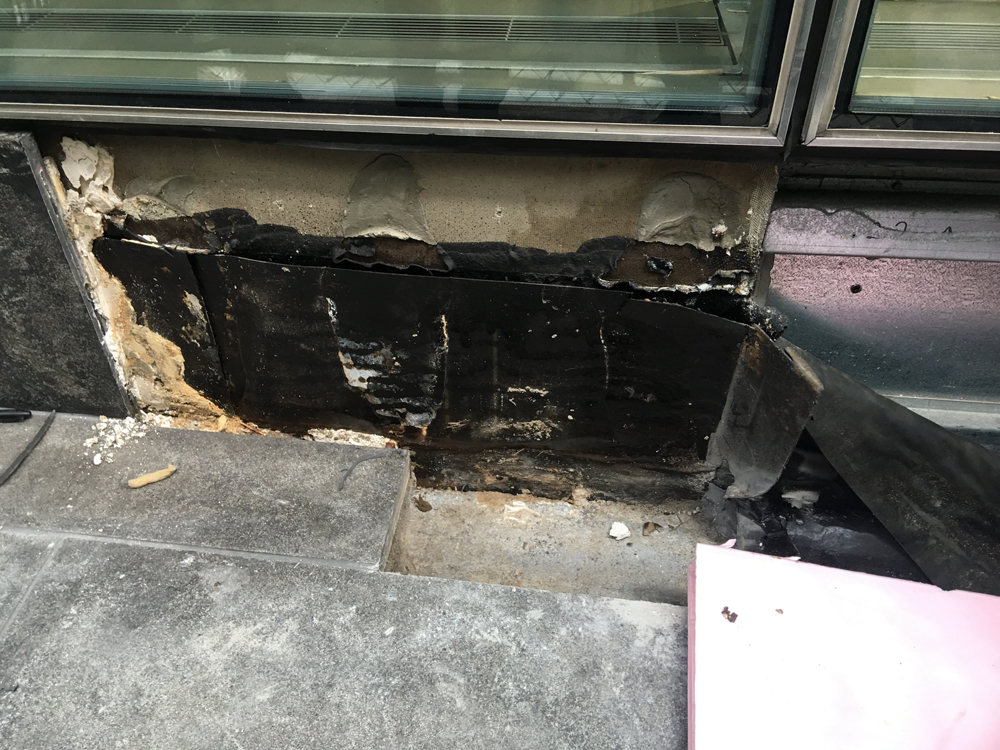
Initial Damage Uncovered
Deteriorated waterproofing and spalled concrete exposed beneath the window system.

Old Waterproofing Removed
Existing flashing and sealants peeled back to reveal compromised substrate and water infiltration points.

Substrate Exposure
Dismantlement of existing building envelope exposes original construction detailing and installation shortfalls.
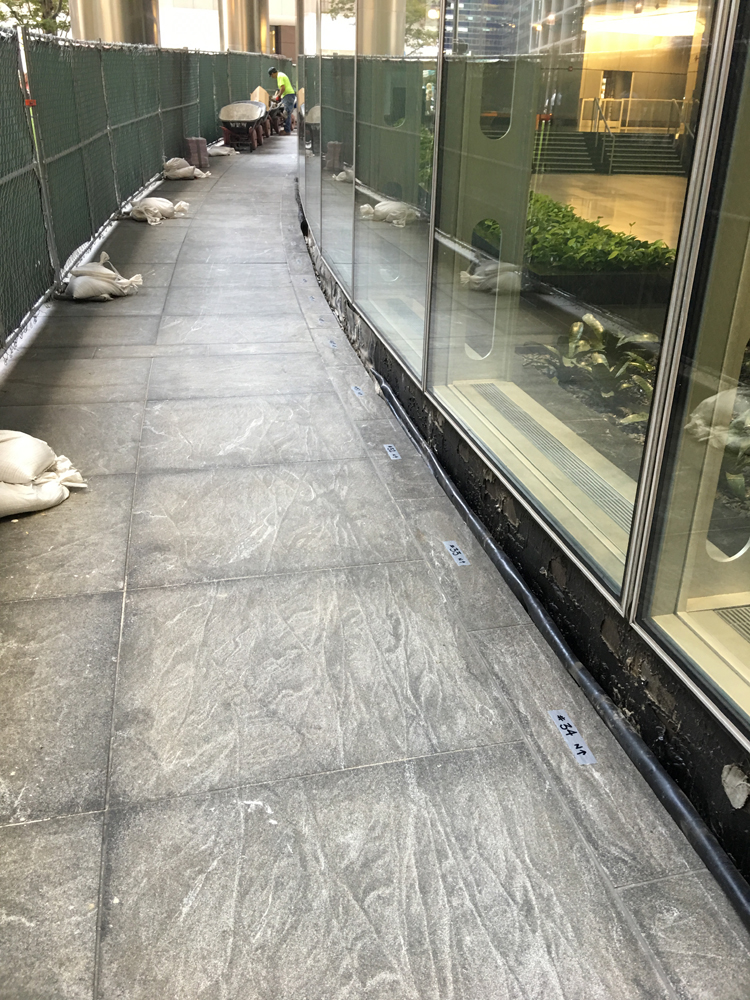
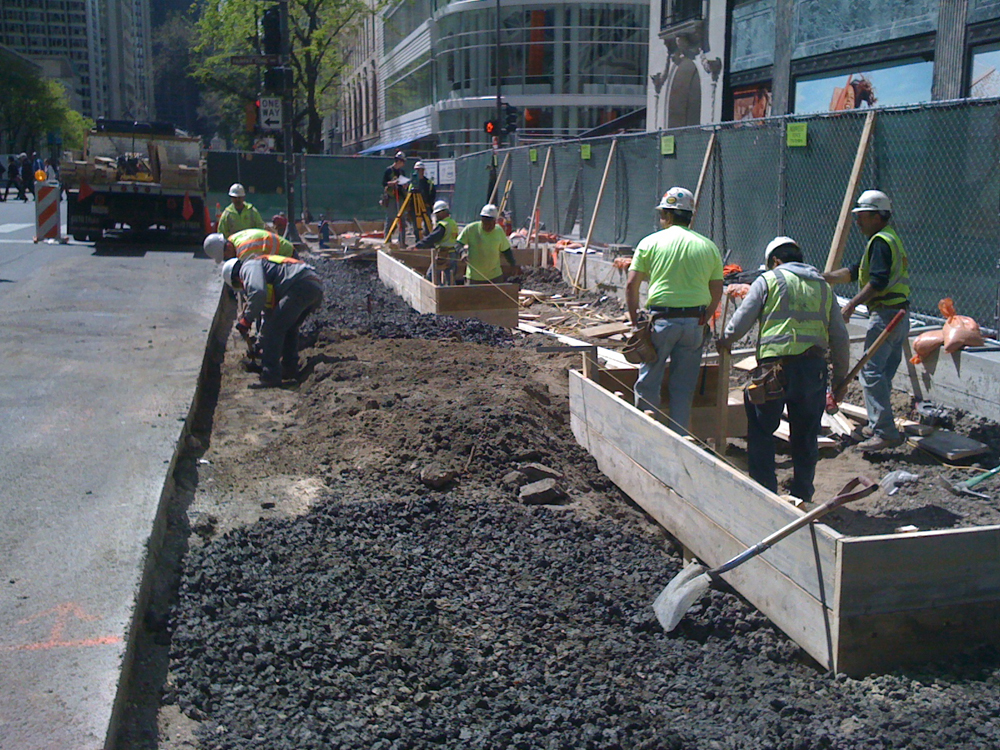
Site Safety and Stone Removal Preparations
Safety barricades erected, stone paving and base panels labeled for cataloging and temporary storage.
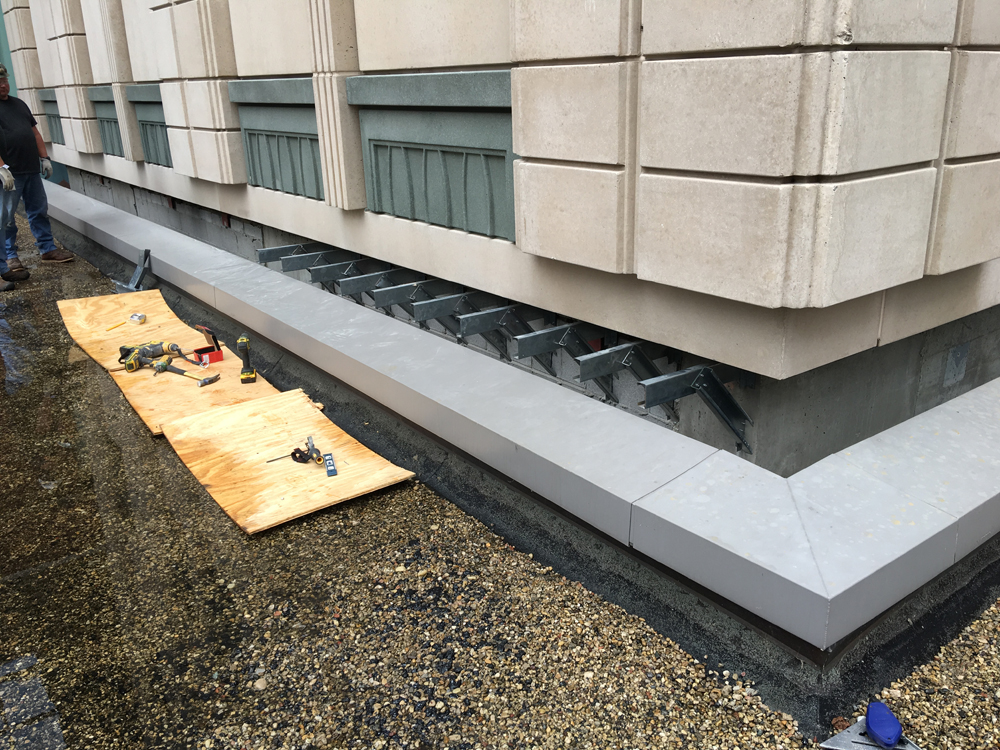
New Structural Wall Substrate Installation
New galvanized metal panels installed to provide a sound substrate for new stone anchors and waterproofing.
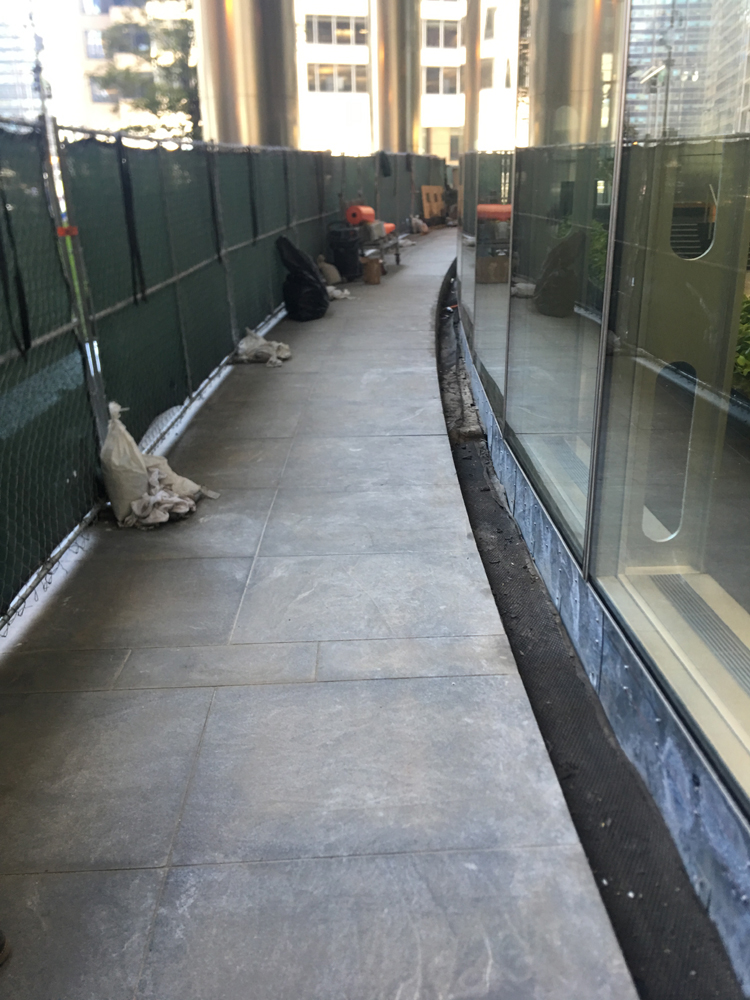
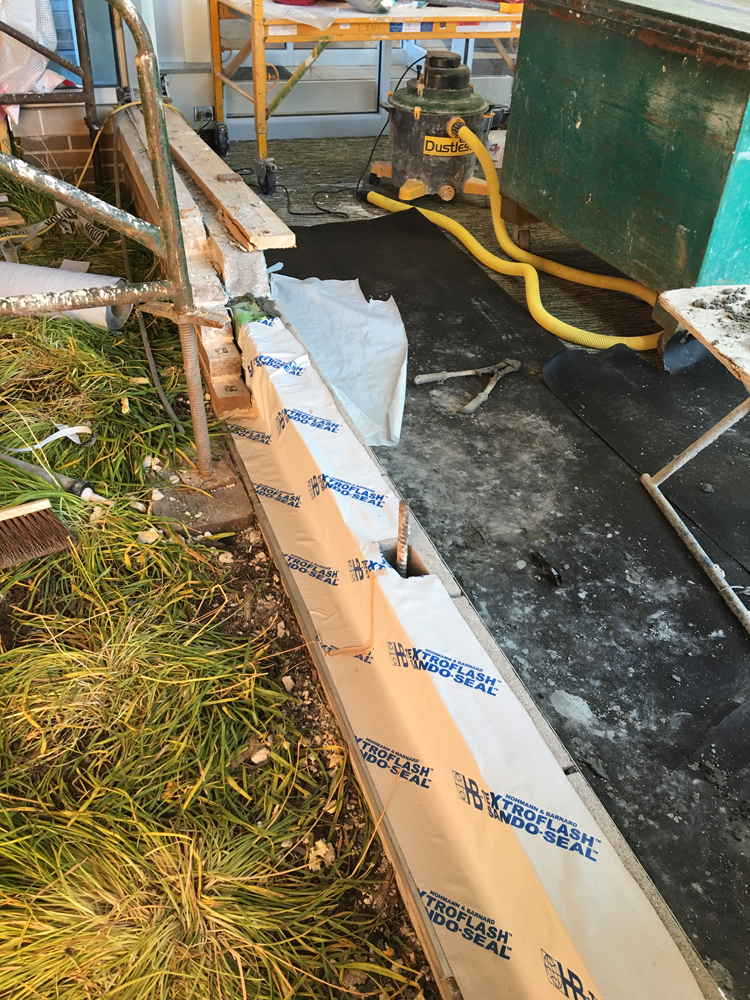
Waterproofing Barrier Applied
Fresh waterproof membrane and protective layers applied along the glass façade for long-term protection.
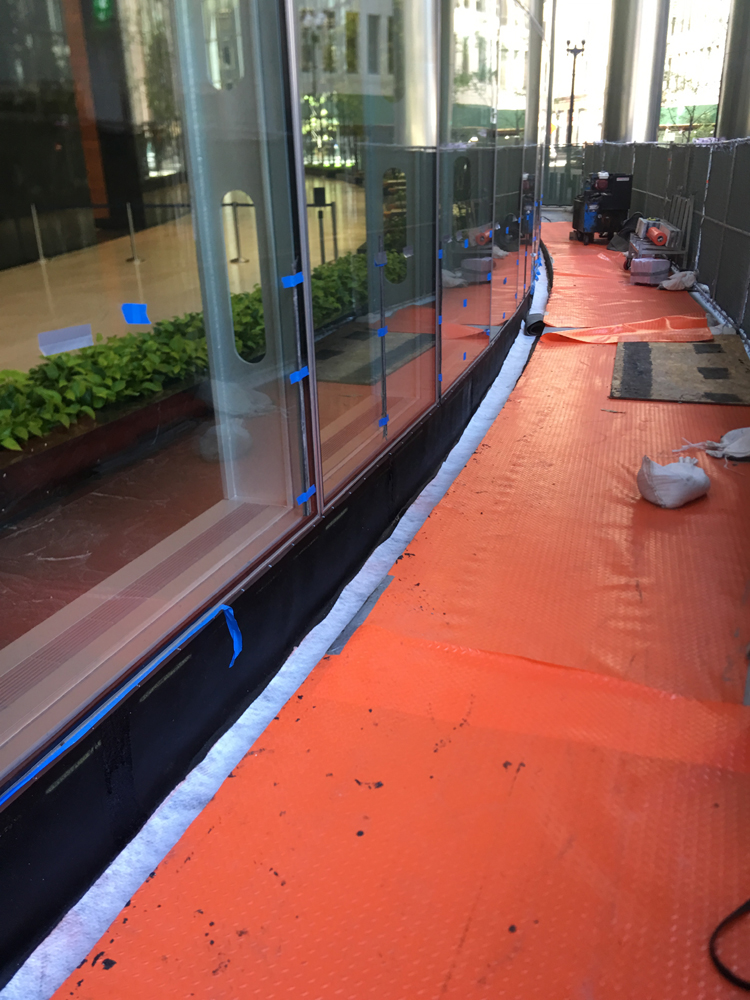
Detailing of Waterproofing and Protection
Completed waterproofing system secured and sealed at the base of the curtain wall, ensuring a watertight finish.
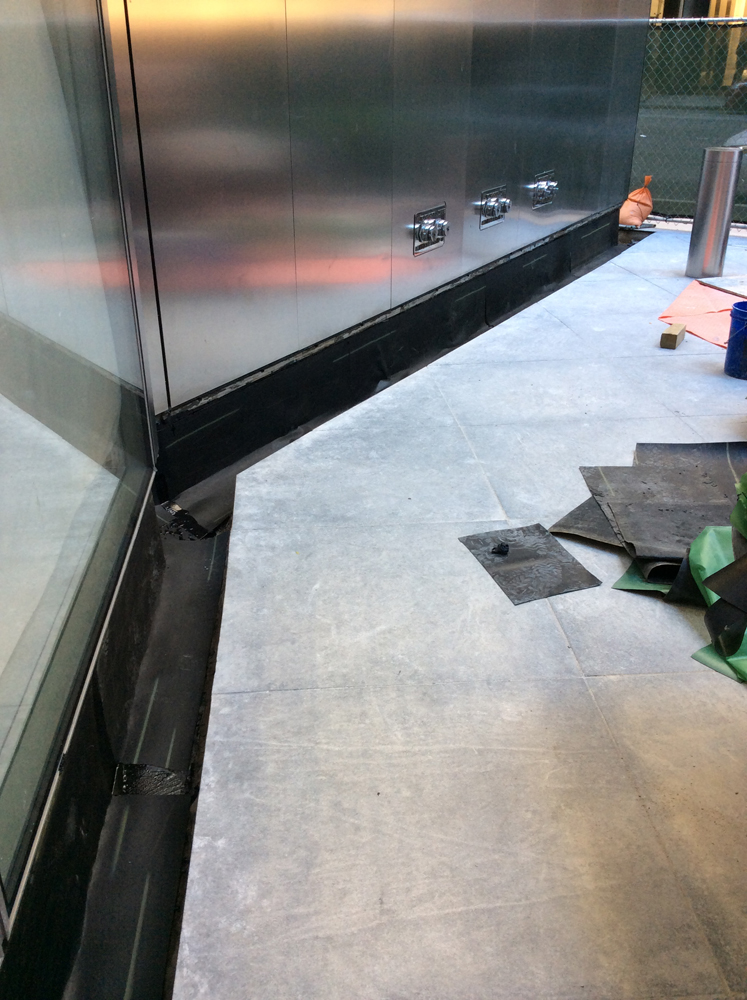
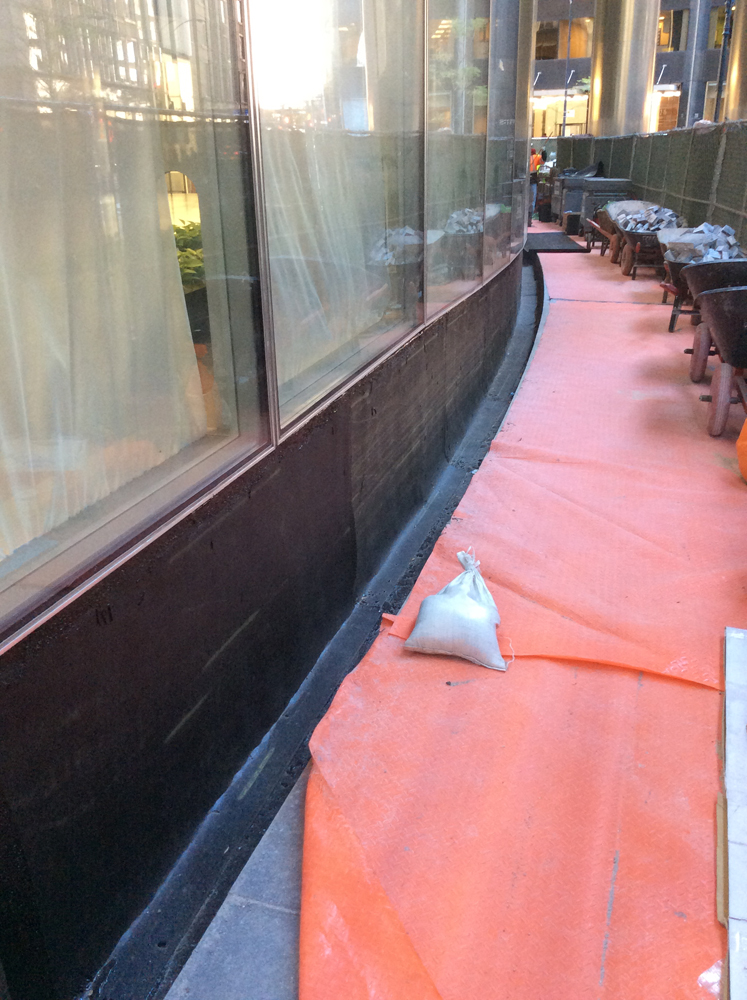
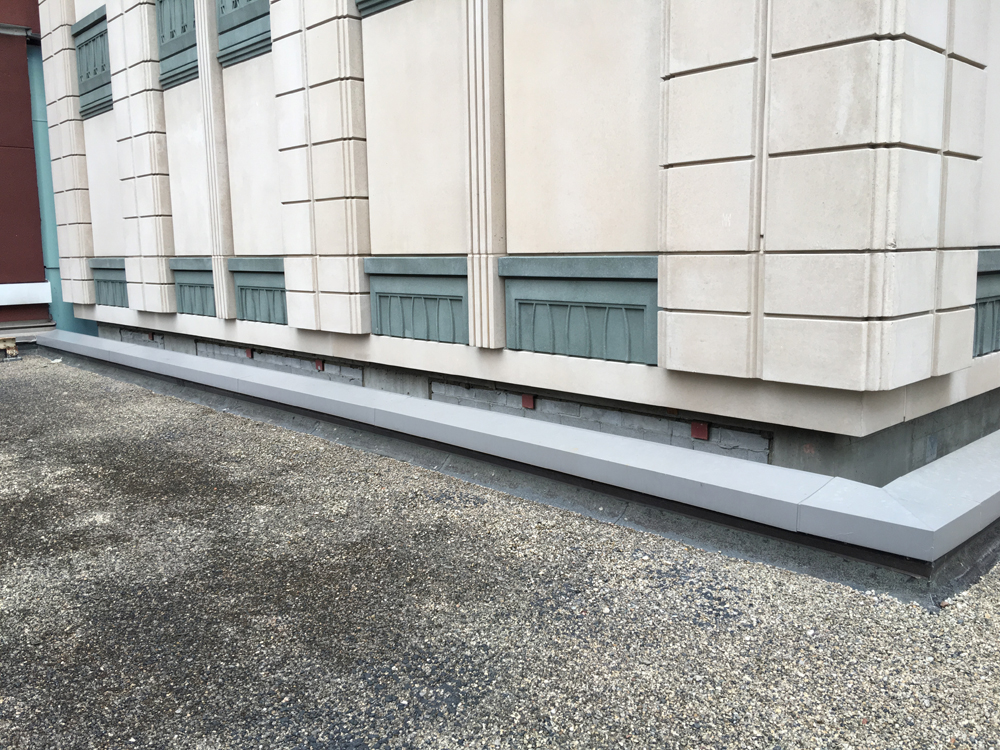
New Waterproofing Base
Protection course installed . Ready for reinstallation of stone paving system.
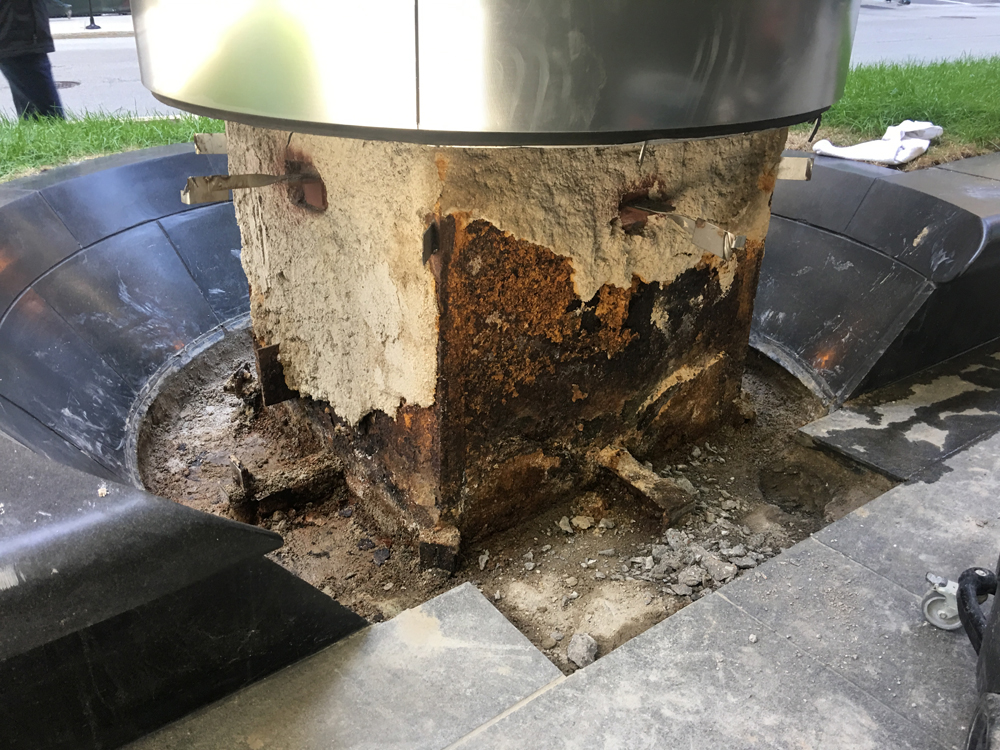
Column Base Covers removed for Inspection
Severe rust and concrete deterioration revealed after removing exterior cladding around the column base.

Column Bases Restored
Pack rust removed, epoxy coating applied, and concrete curbs placed in preparation of waterproofing application.

Waterproofing applied and Reinstallation of Stone Paving
New protective waterproofing installed around the repaired column base to prevent future water intrusion.
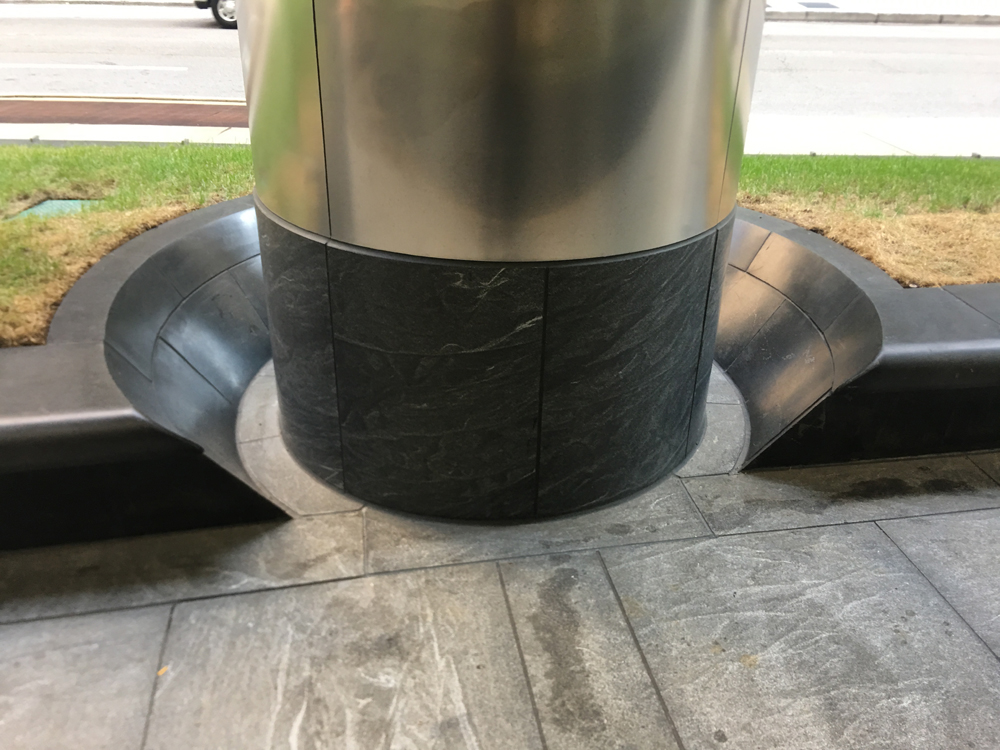
Stone Cladding Installed
Finished stone panels fitted seamlessly around the column, restoring its architectural appearance.
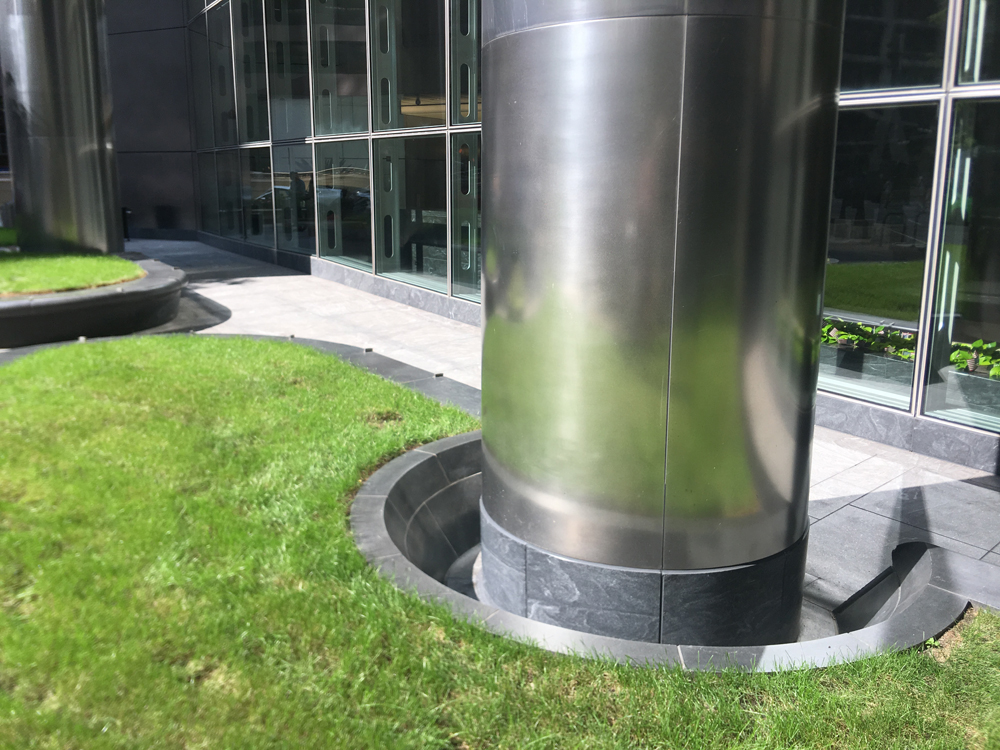
Completed Column Restoration
Final finish shows a fully repaired and visually integrated column base within the plaza setting.
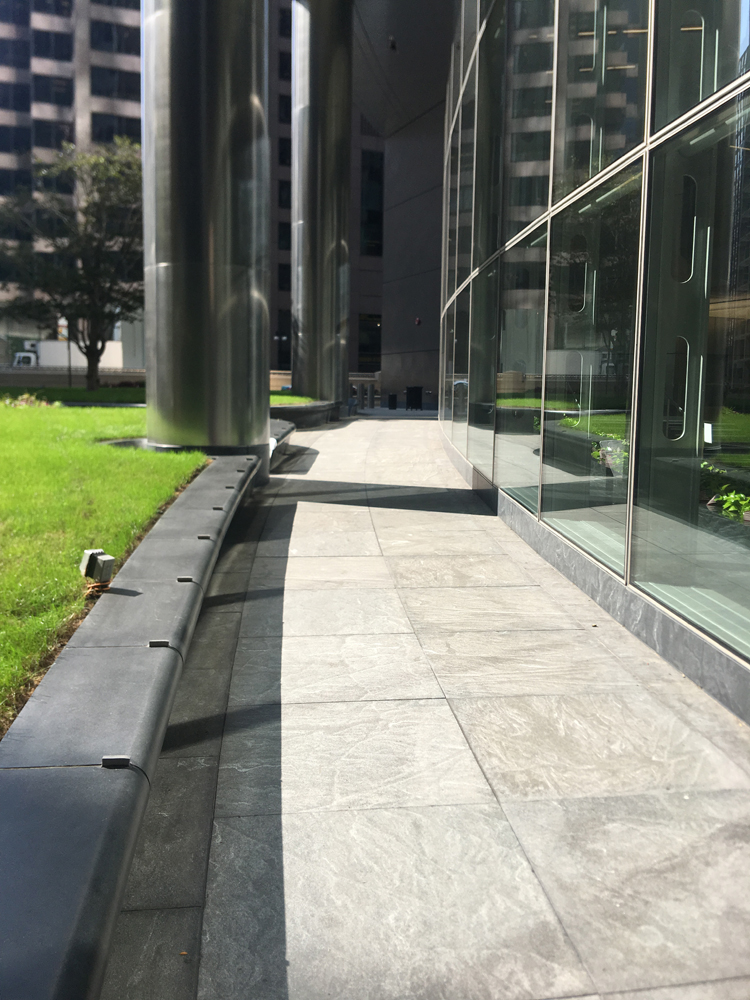
Plaza Restored
Walkways and landscaping completed, with the repaired façade and columns blending into the modern exterior.
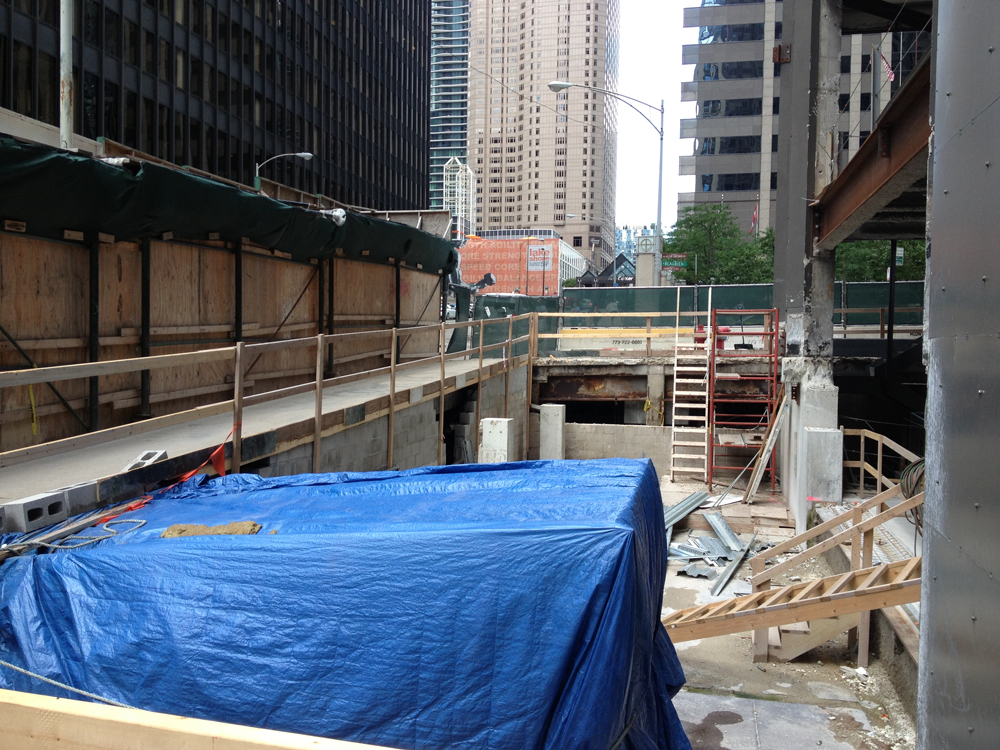
Initial Demolition
Existing structure is opened up and cleared for repair, with exposed concrete, beams, and temporary coverings in place.
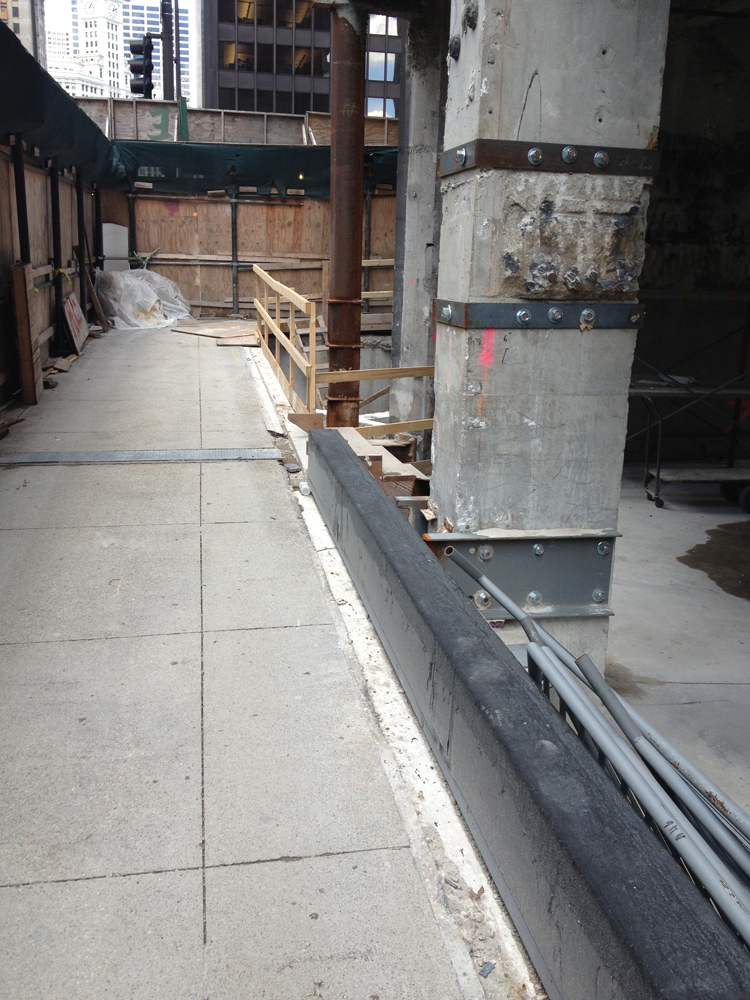
Shoring & Stabilization
Columns reinforced with steel plates and bolts to stabilize the structure during construction.
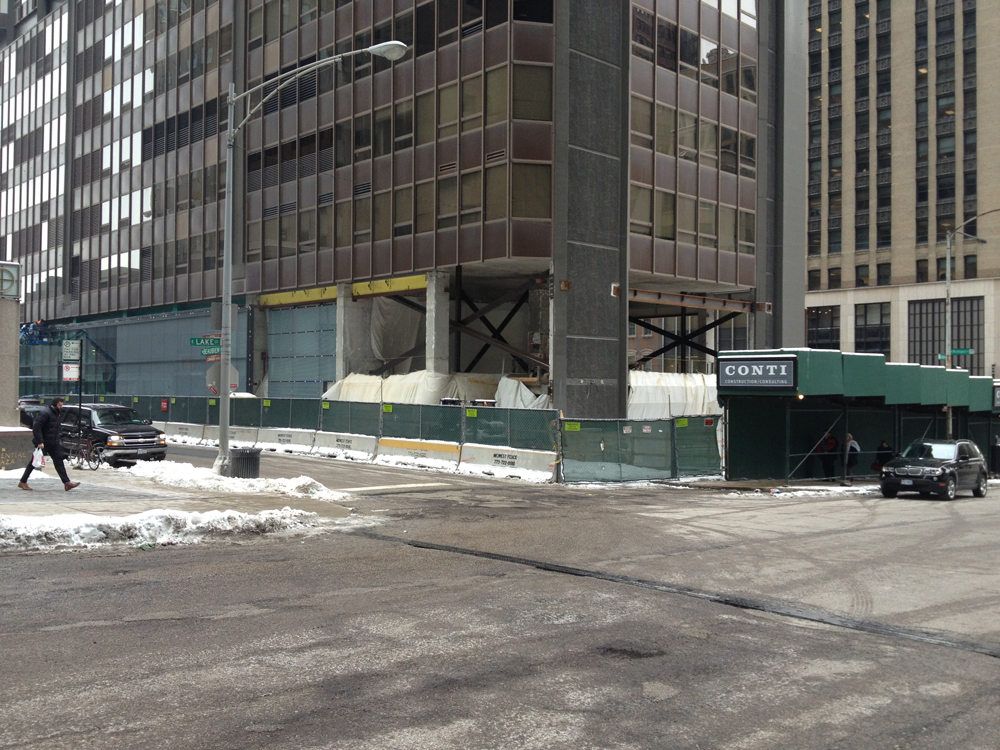
Exterior Secured
Perimeter fencing and protective enclosures installed around the damaged façade for public safety.
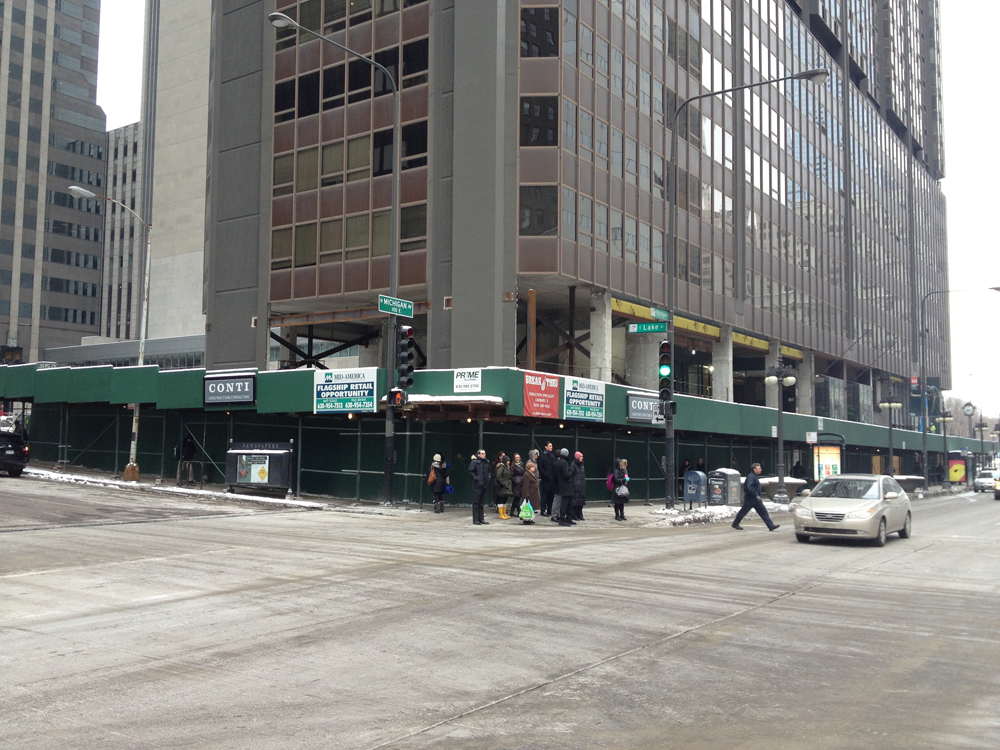
Street-Side Protection
Full scaffolding and sidewalk canopy erected along Michigan Avenue and Lake Street to shield pedestrians during work.
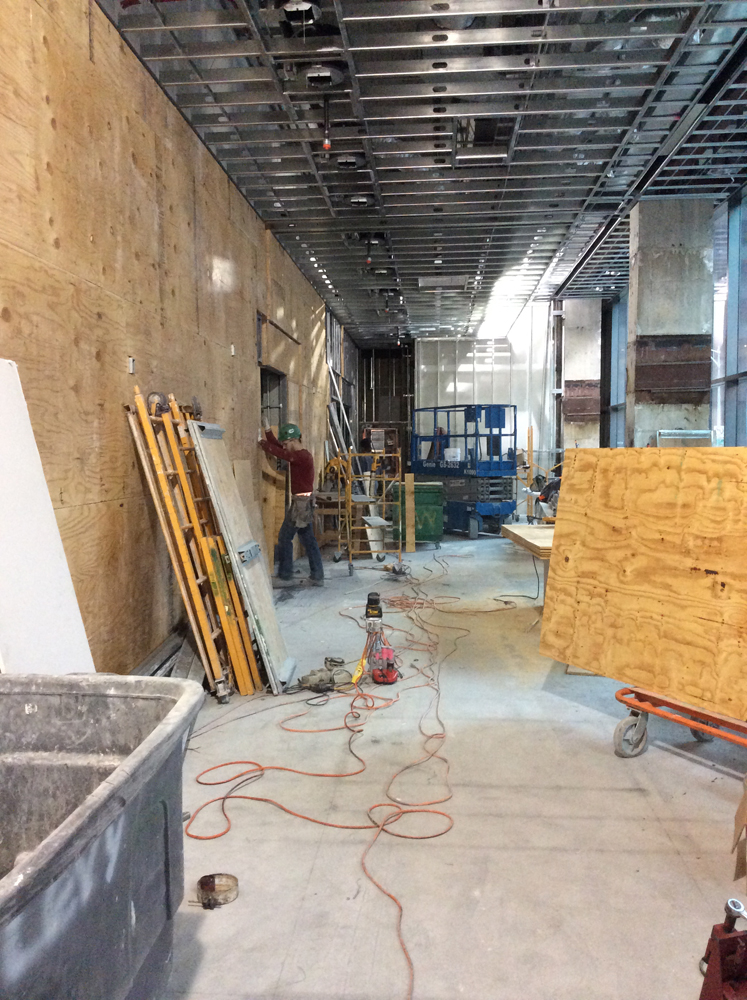
Interior Build-Out Begins
Workers begin framing and installing new mechanical systems within the gutted interior space.
Framing & Utilities
Wall and ceiling framing progresses with new conduits, ducts, and structural supports in place.
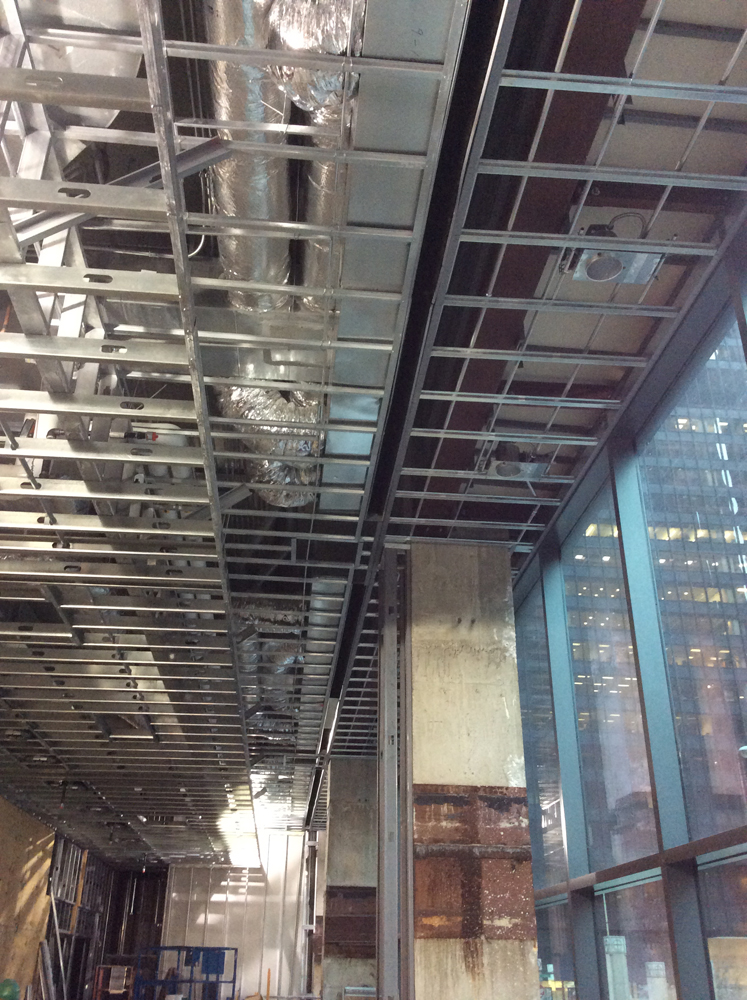
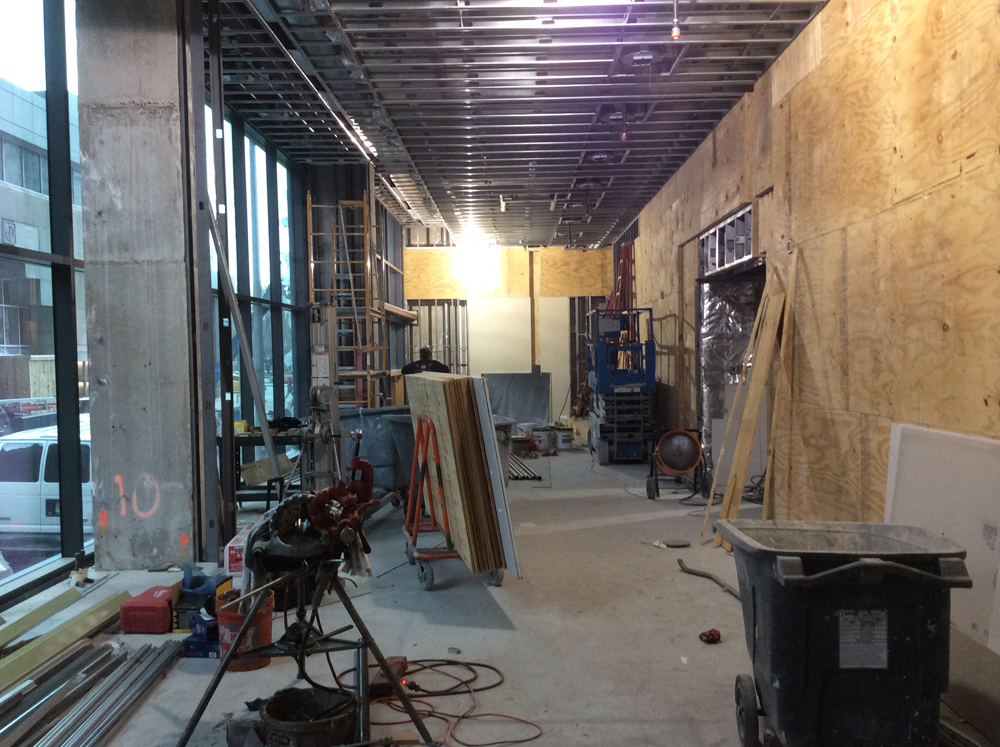
Mechanical Installation
Overhead ductwork and utility lines installed within the new ceiling grid system.
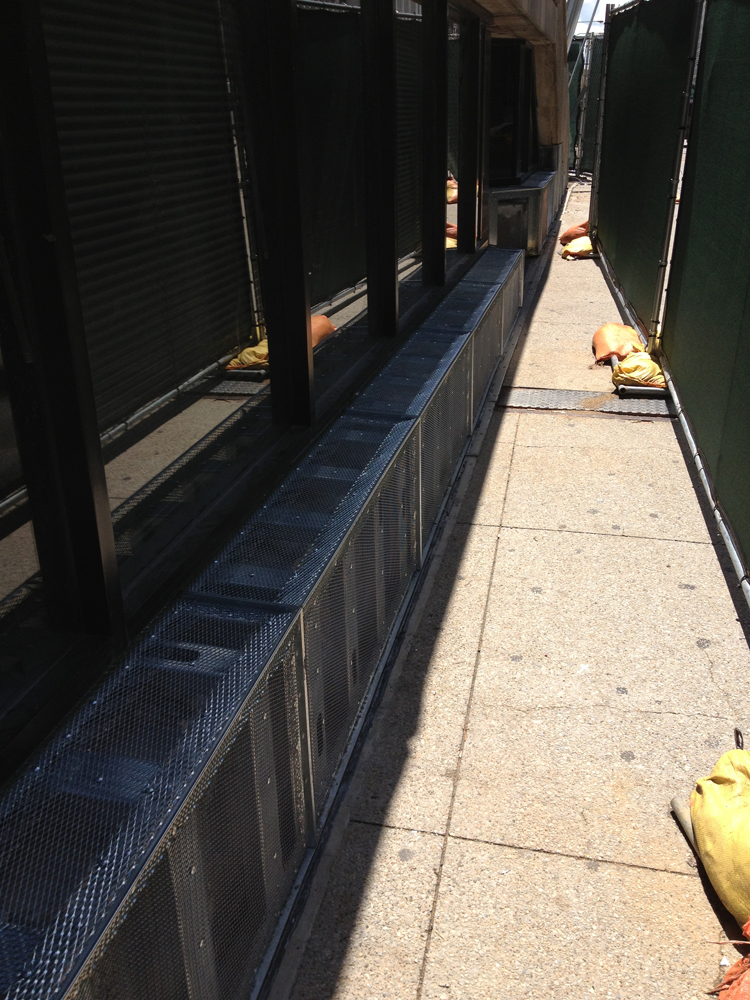
Exterior Cladding Preparation
New exterior plaster system components being installed at the building base, along the sidewalks.

Retail Storefronts
Storefronts ready for cement plaster finishes.
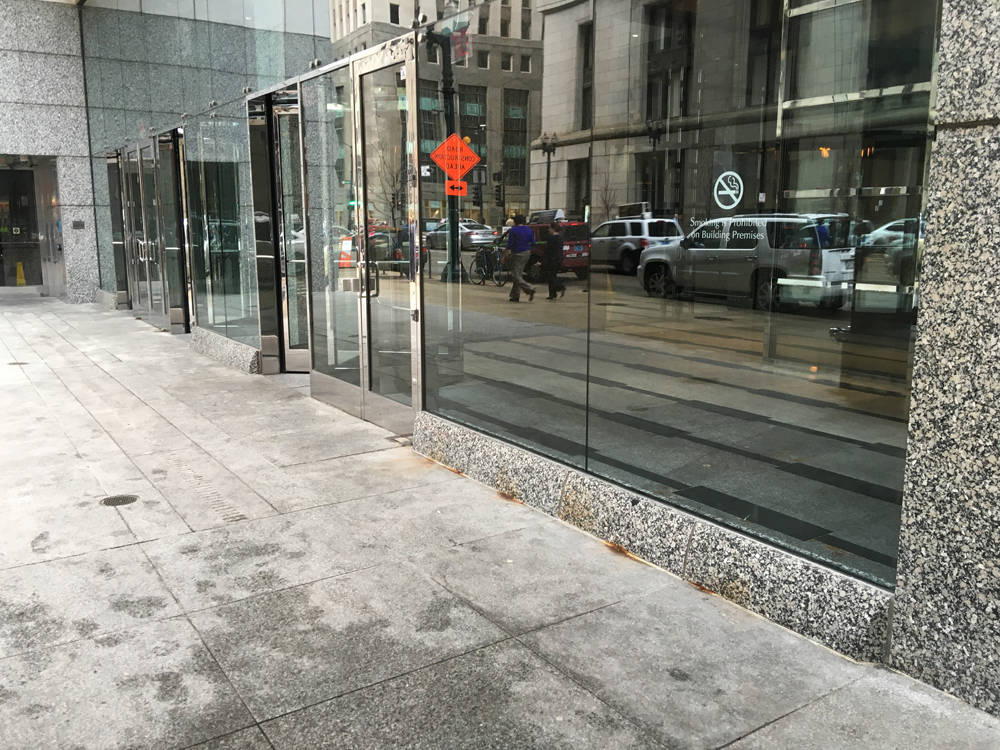
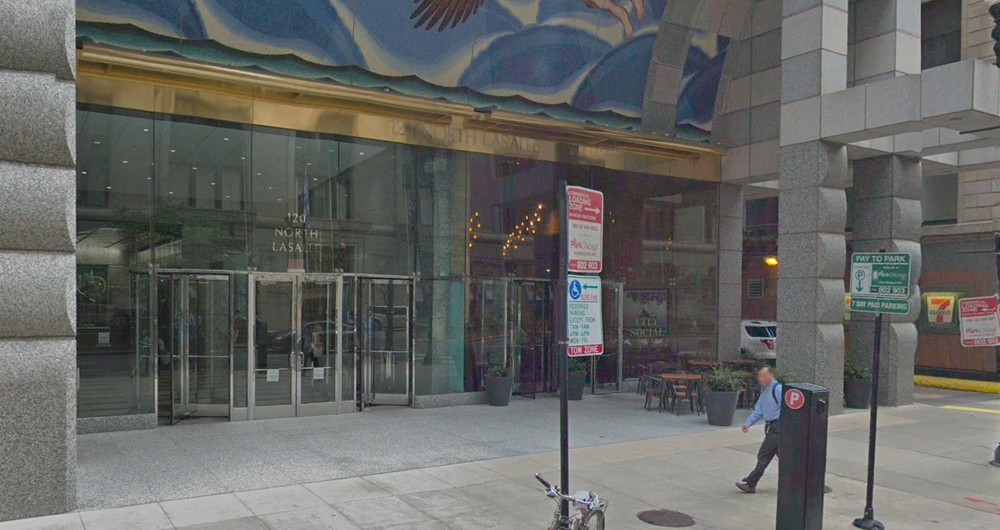
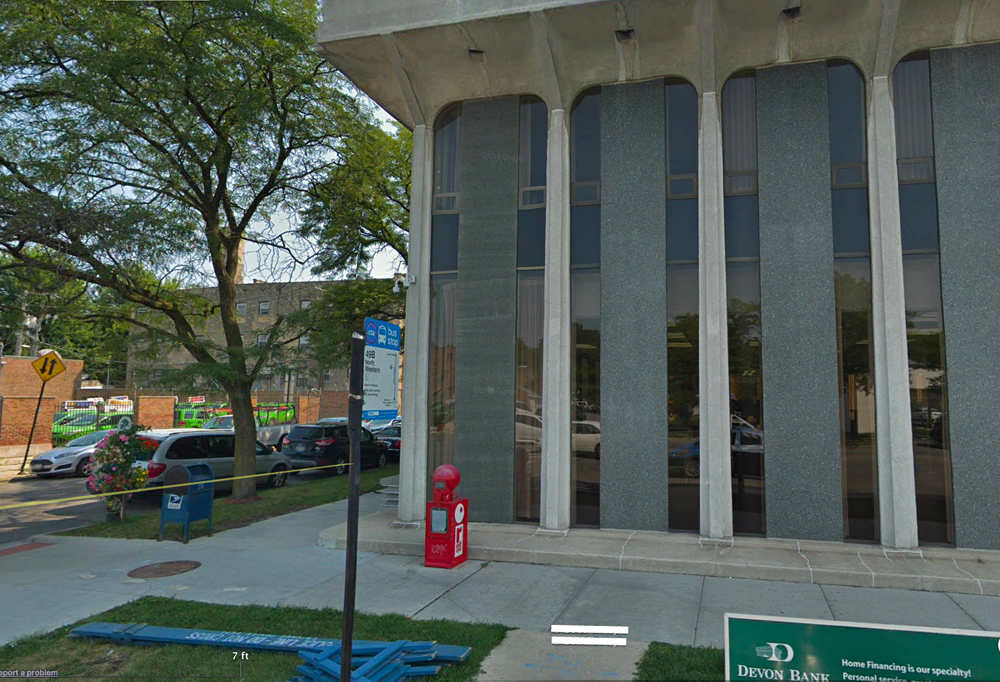
Existing Entry Condition
Building entrance and granite-clad façade prior to repair work.

Corrosion Exposed
Rust and deterioration visible at the base of the curtain wall system along the sidewalk.
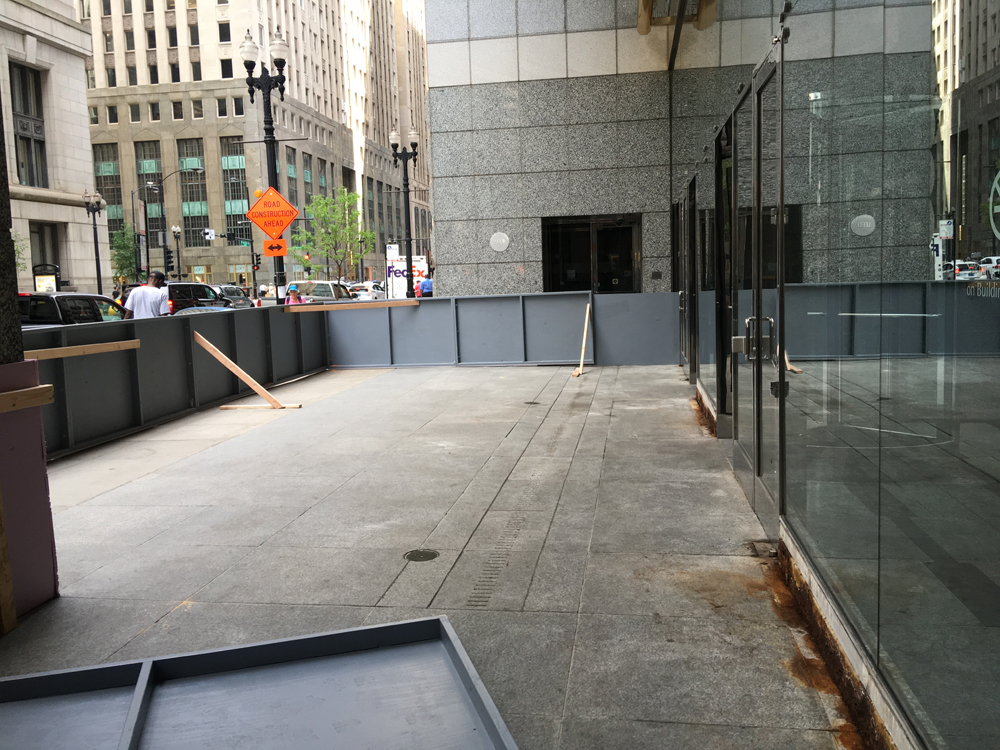
Work Zone Established
Temporary barricades installed to secure the worksite and protect pedestrians.
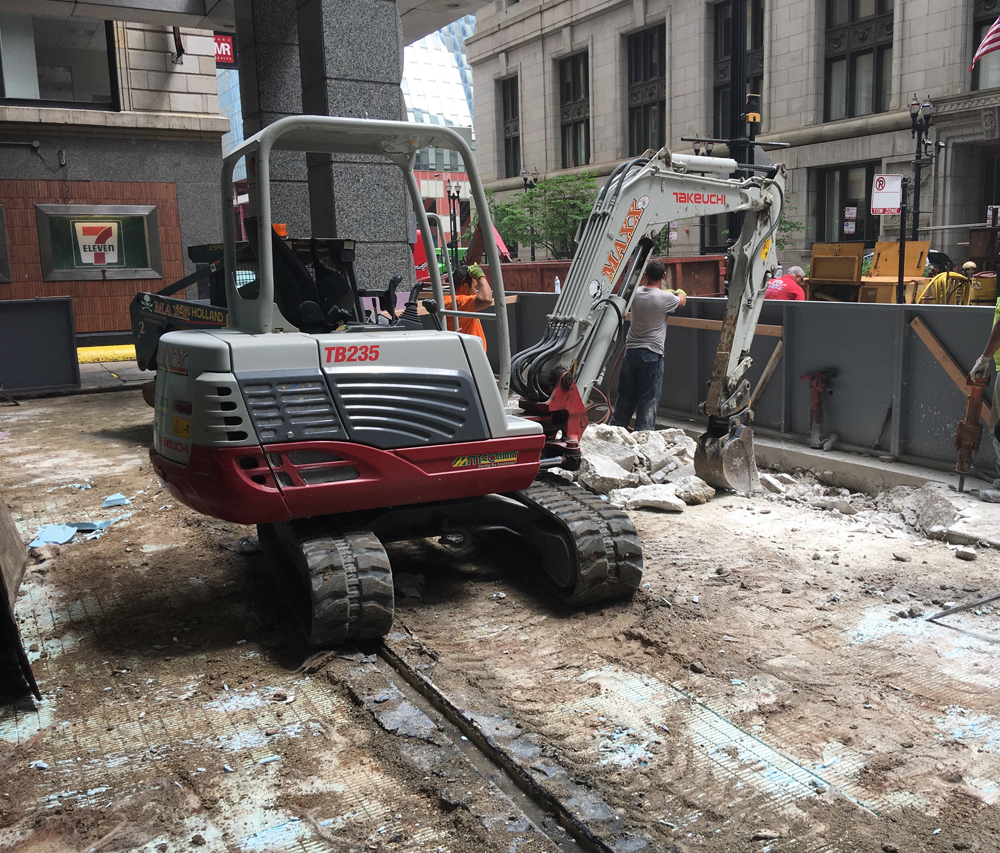
Demolition in Progress
Heavy equipment begins concrete demolition to expose underlying structural elements.

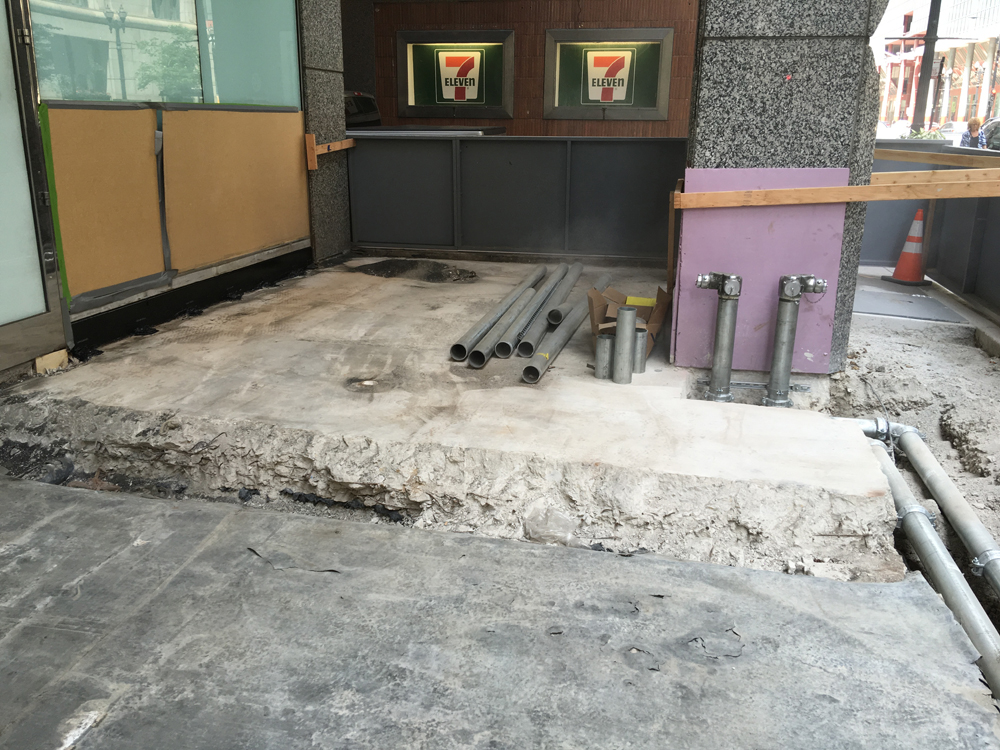
Surface Cleared
Old slab sections removed, revealing the entry foundation and corroded façade base.
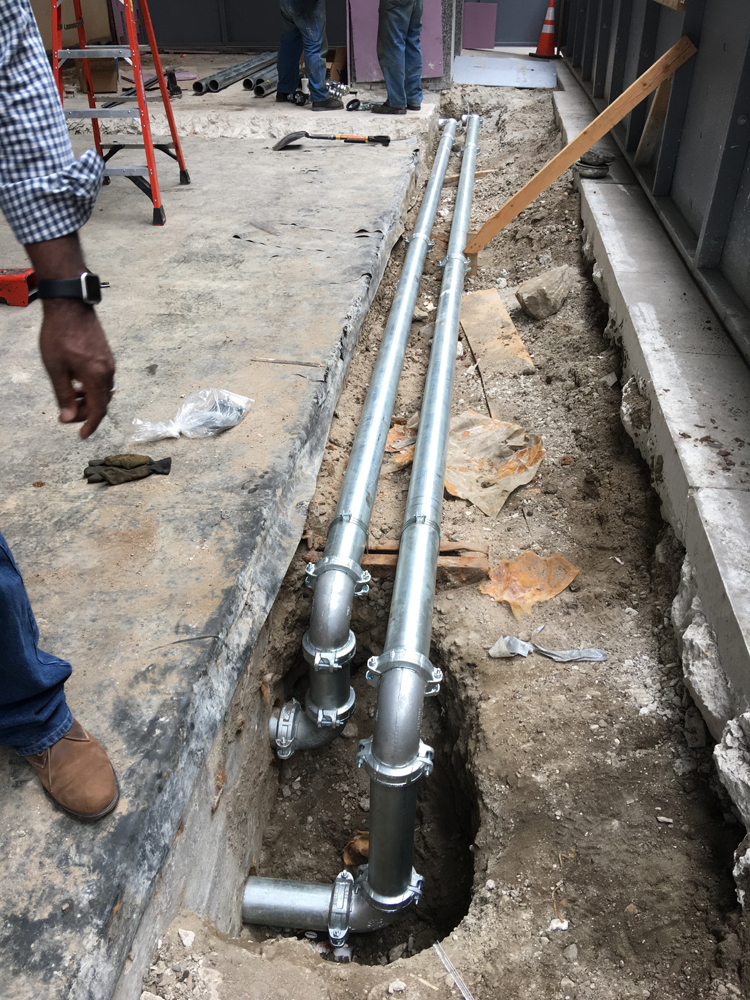
Underground Utilities Installed
New piping placed in trenching along the entrance to accommodate updated systems.
Utility Rough-In Complete
Conduits and piping set securely in place, ready for backfill and concrete pour.
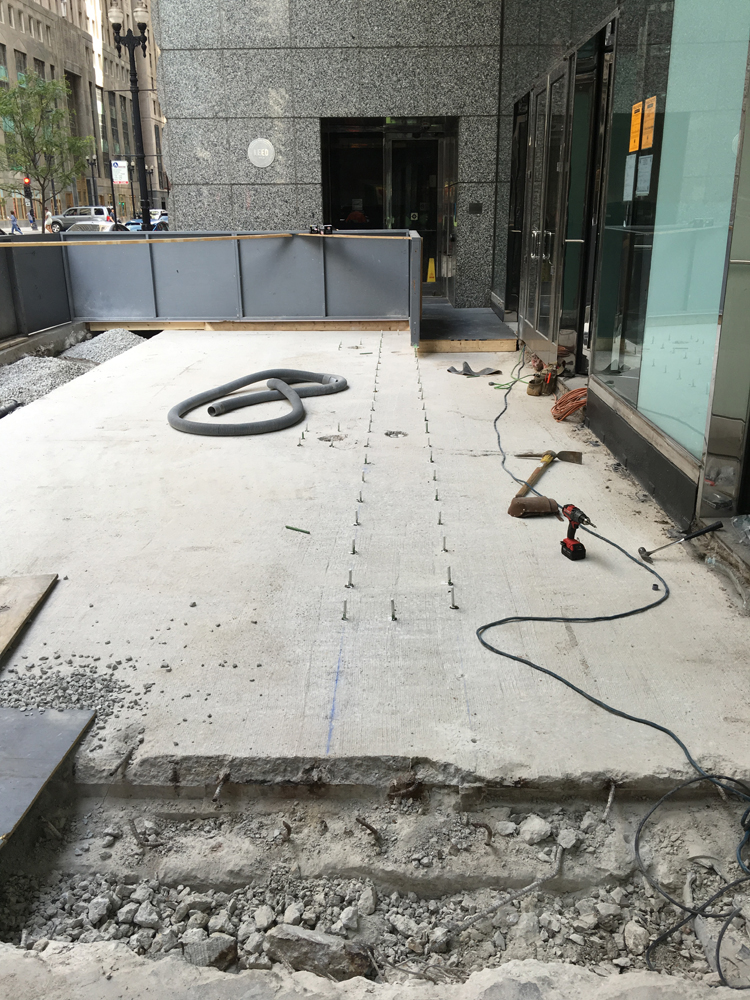
Slab Preparation
Excavation and reinforcement work underway, with anchor bolts set to tie in the new concrete.

Waterproofing and Drain Setup
New membrane and drainage assemblies installed to protect the plaza deck and guide water away from the structure.
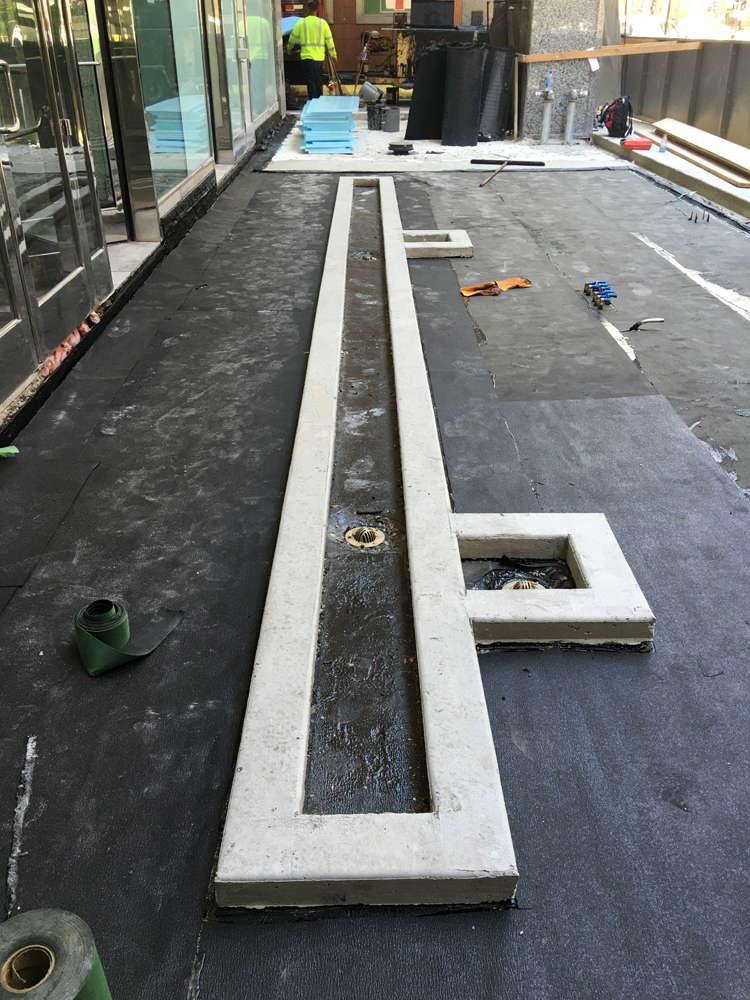
Drainage Channel Formed
Concrete curbs poured to create recessed drain channels along the entryway.

Snow-Melt System Installed
Heated tubing carefully laid out across the slab area to prevent ice accumulation during winter months.

Mechanical Room Tie-In
New boiler and piping system installed to power the snow-melt system and coordinate with building infrastructure.
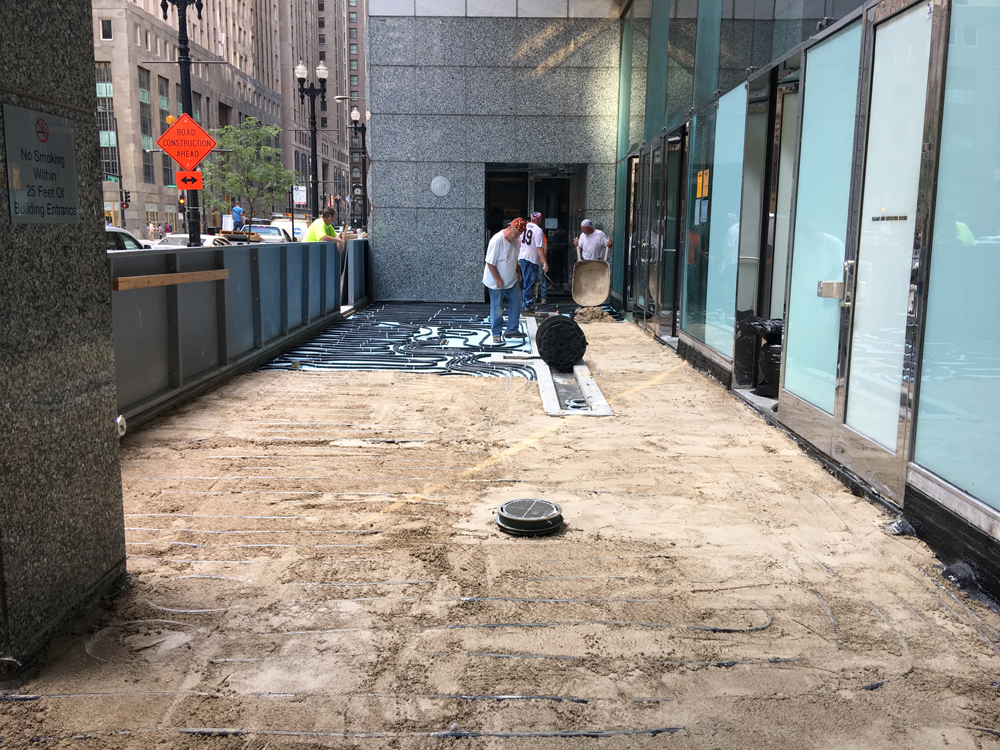
System Backfill
Tubing covered with protective layers and sand base, preparing for final concrete pour and stone installation.
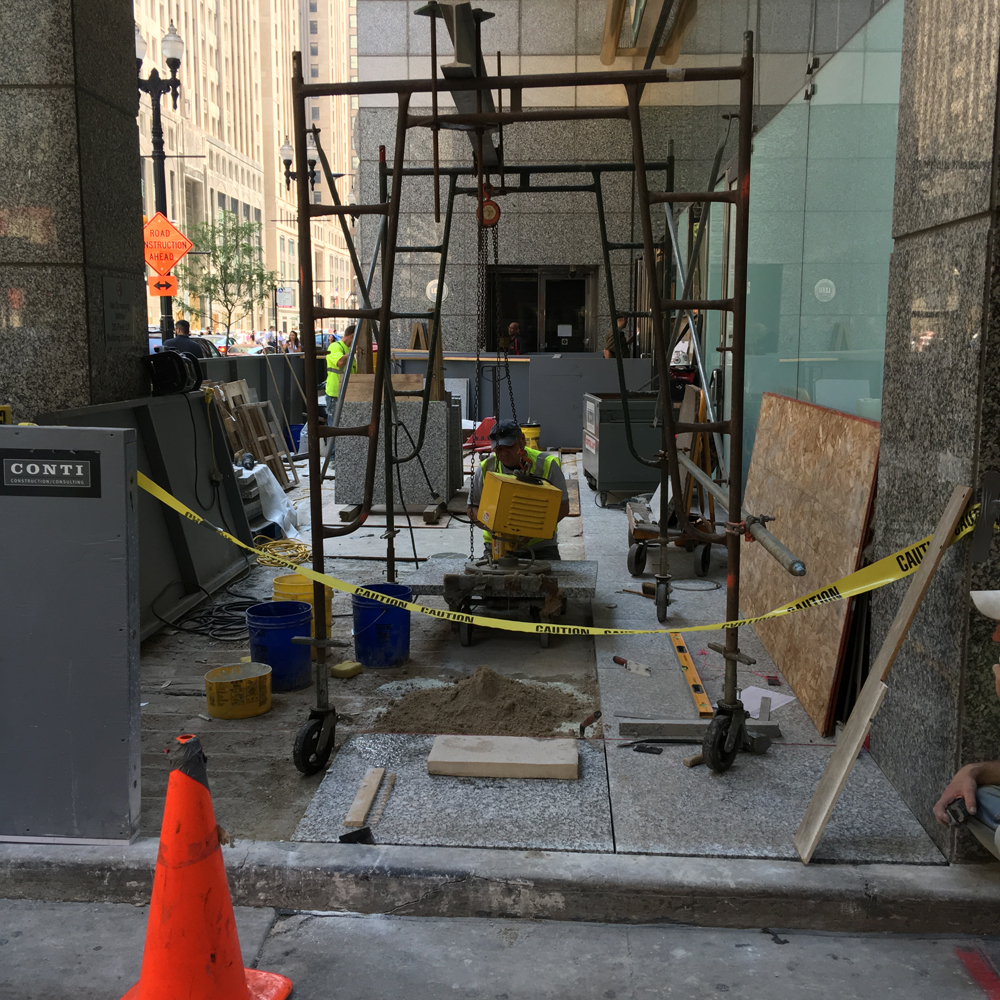
Granite Slab Installation Begins
Workers set the first granite pavers into place, ensuring alignment with façade and structural layout.
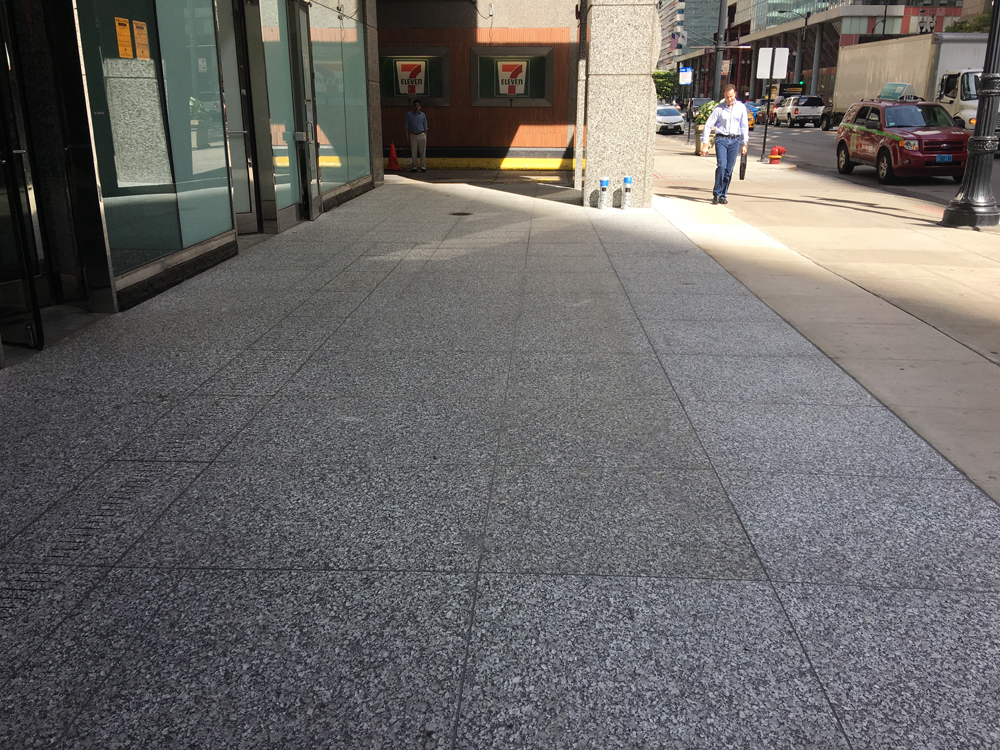
New Plaza Surface Completed
Finished granite walkway restores a clean, uniform surface at the building entrance.
Final Condition
Completed entry at 120 North LaSalle, with restored stone plaza and integrated snow-melt system fully operational.
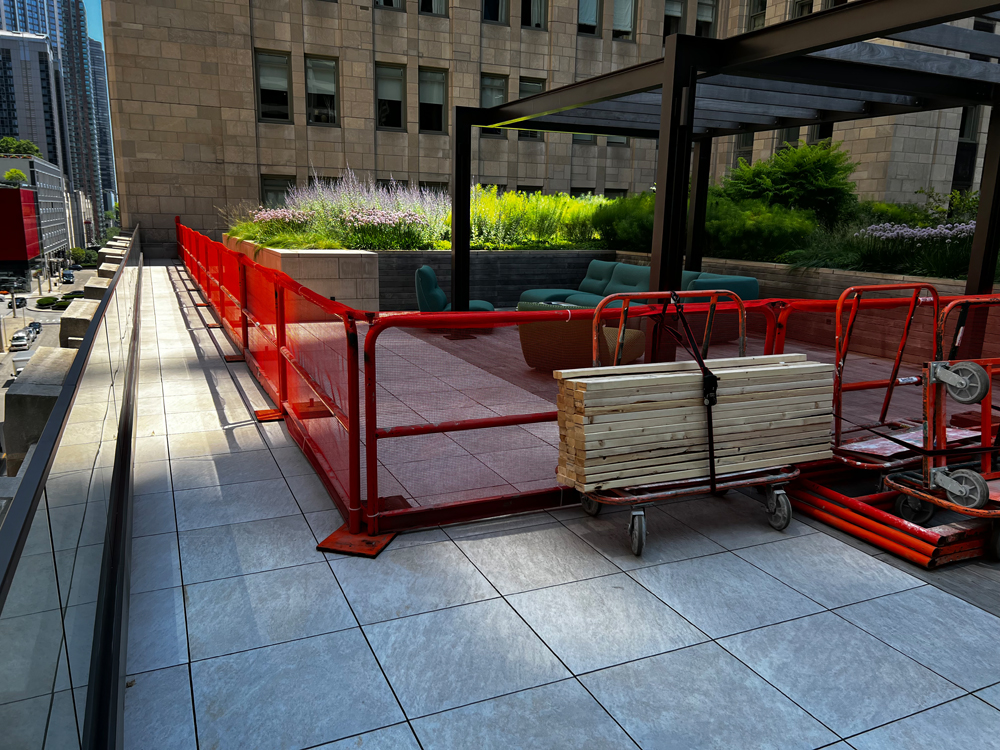
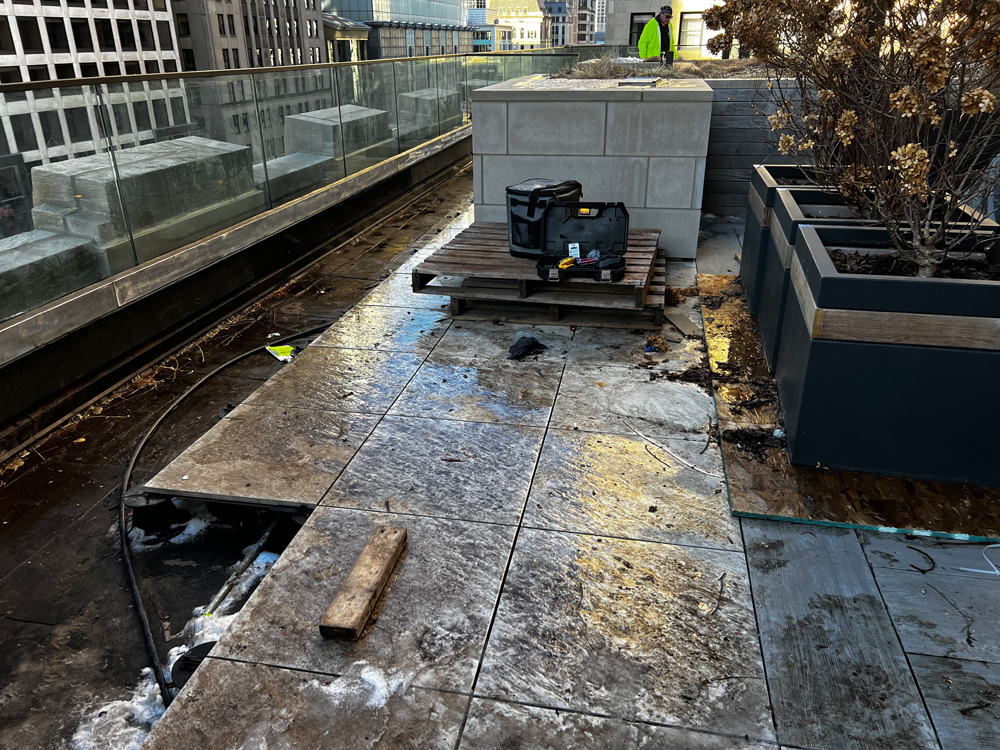
Work Zone Secured
Rooftop terrace section cordoned off with safety barricades to prepare for repairs along the perimeter.
Surface Removal Begins
Paver tiles removed at the terrace edge, exposing the underlying waterproofing system for inspection.
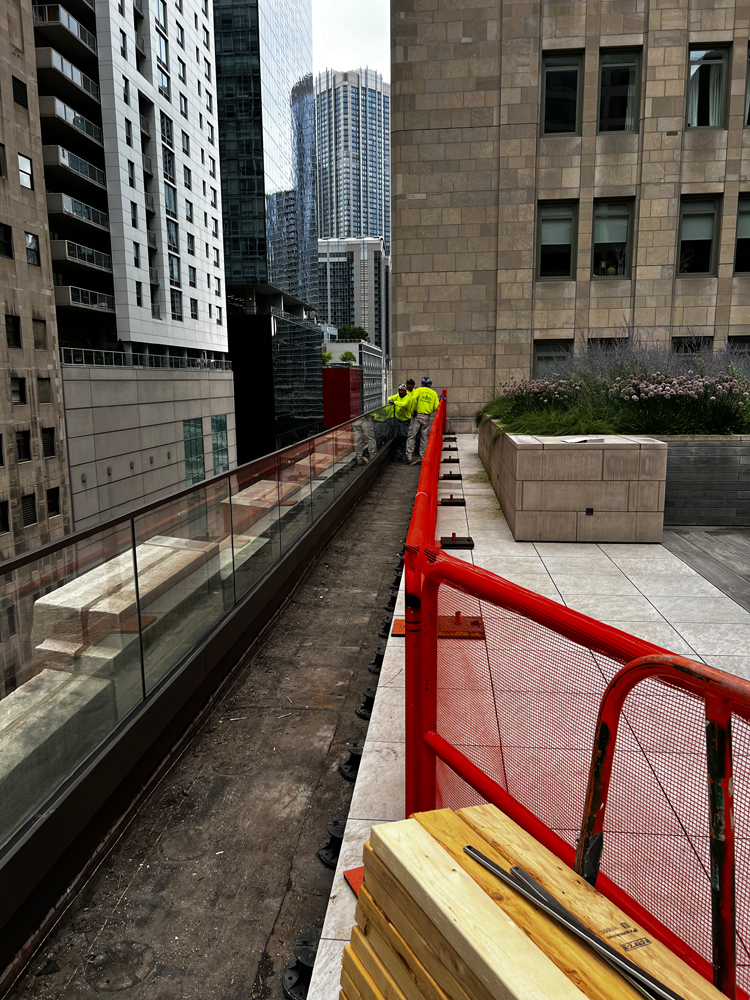
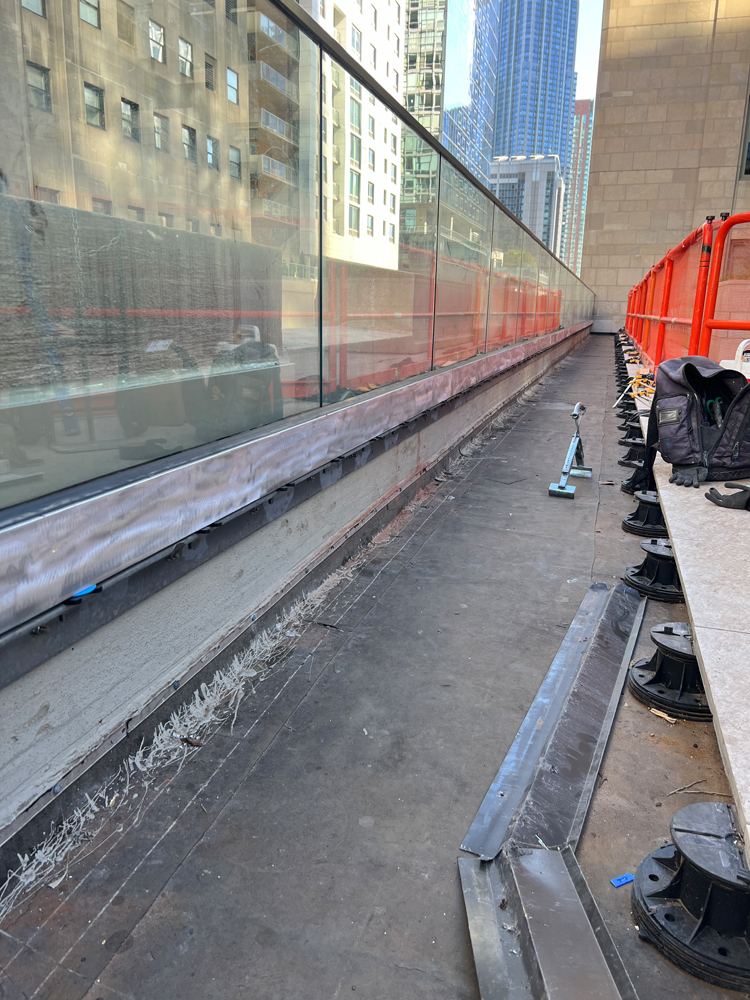
Glass Guardrail Exposed
Base of the glass guardrail system revealed, with old substrate and fasteners visible for replacement.

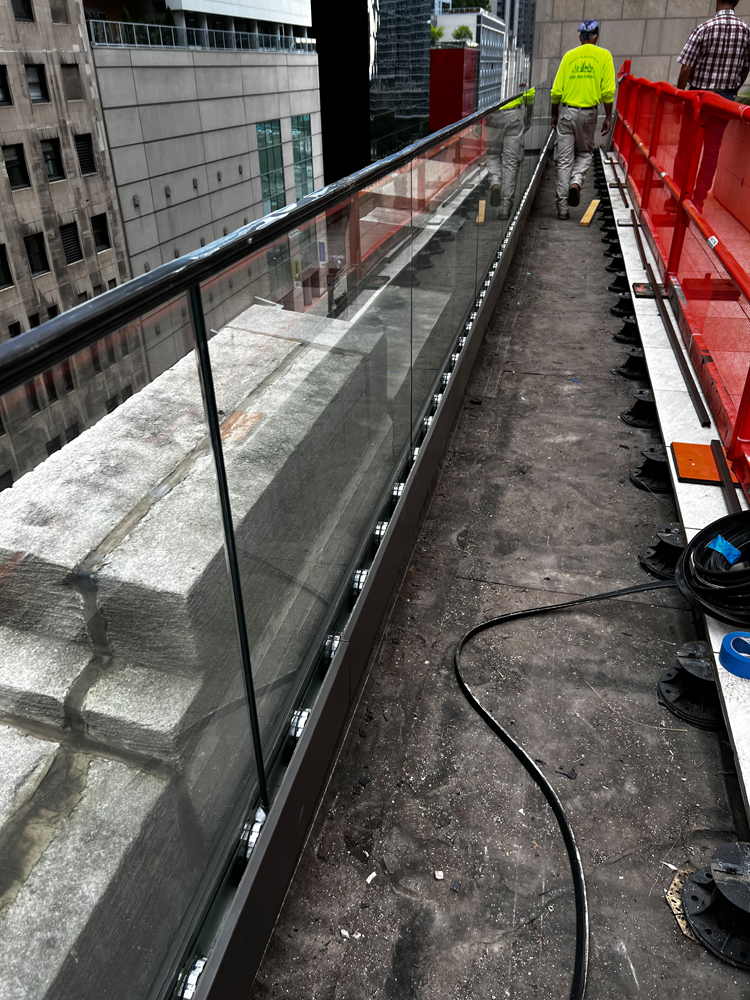
Perimeter Stripped
Existing surface layers cleared away, showing the structural slab and guardrail supports.

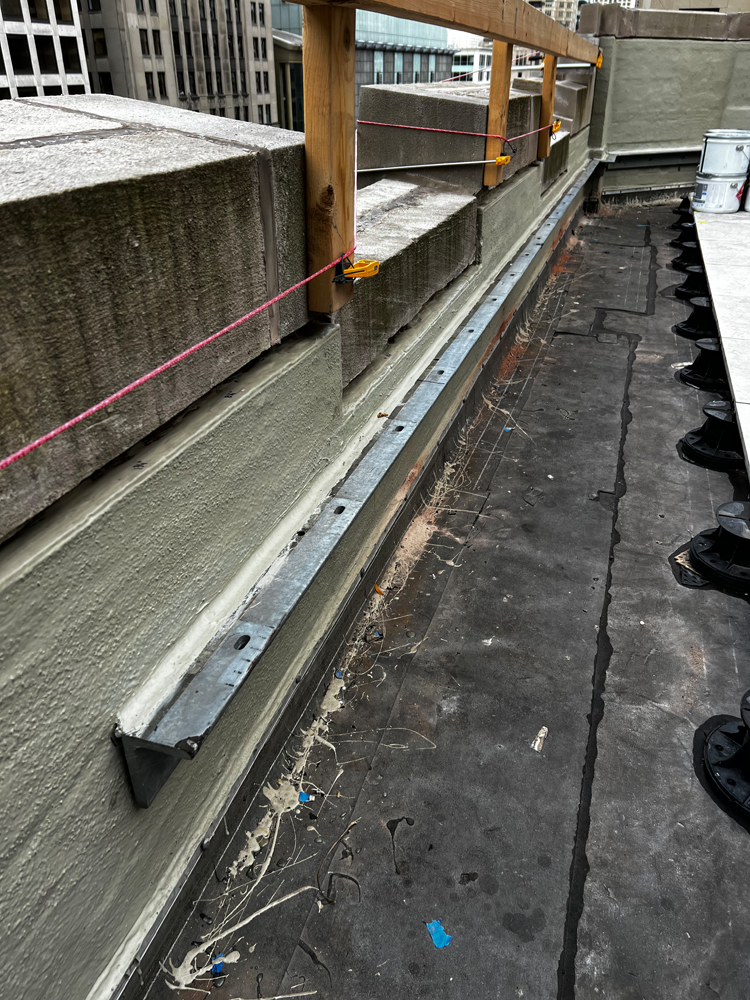
Masonry Edge Exposed
Outer parapet wall and flashing stripped to access deteriorated waterproofing and substrate below.

Wall Preparation
Parapet cleaned and prepped for application of new waterproofing and protective coatings.
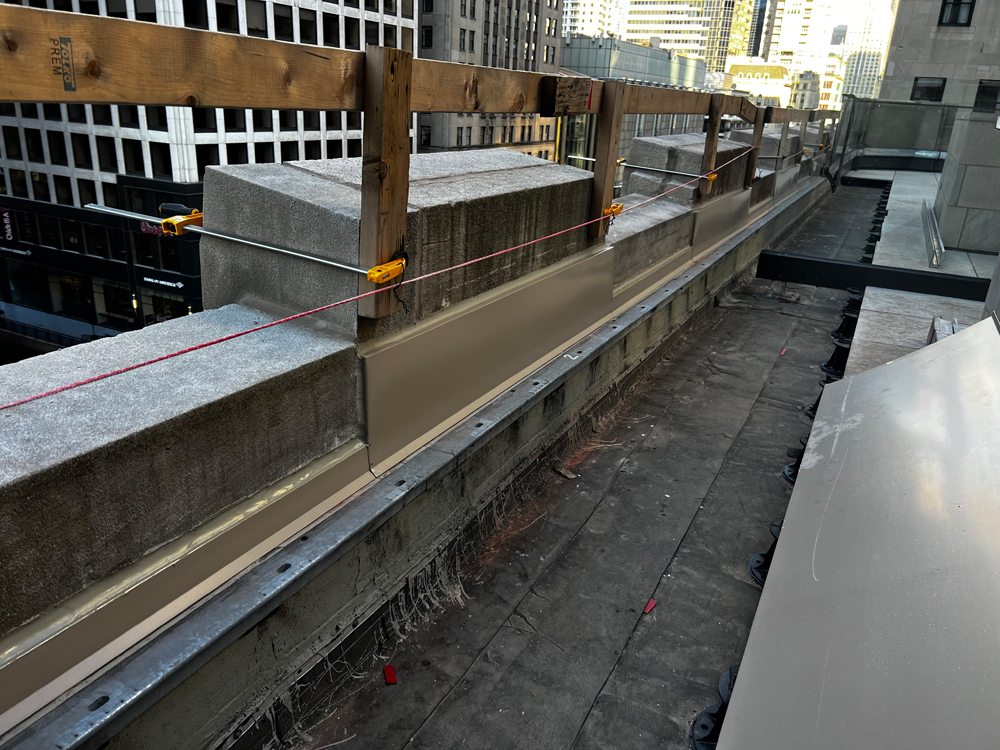
New Waterproofing and Rail Support Reinstalled
Waterproofing applied over newly tuckpointed masonry parapet wall, providing a sealed support anchor for the glass rail system.
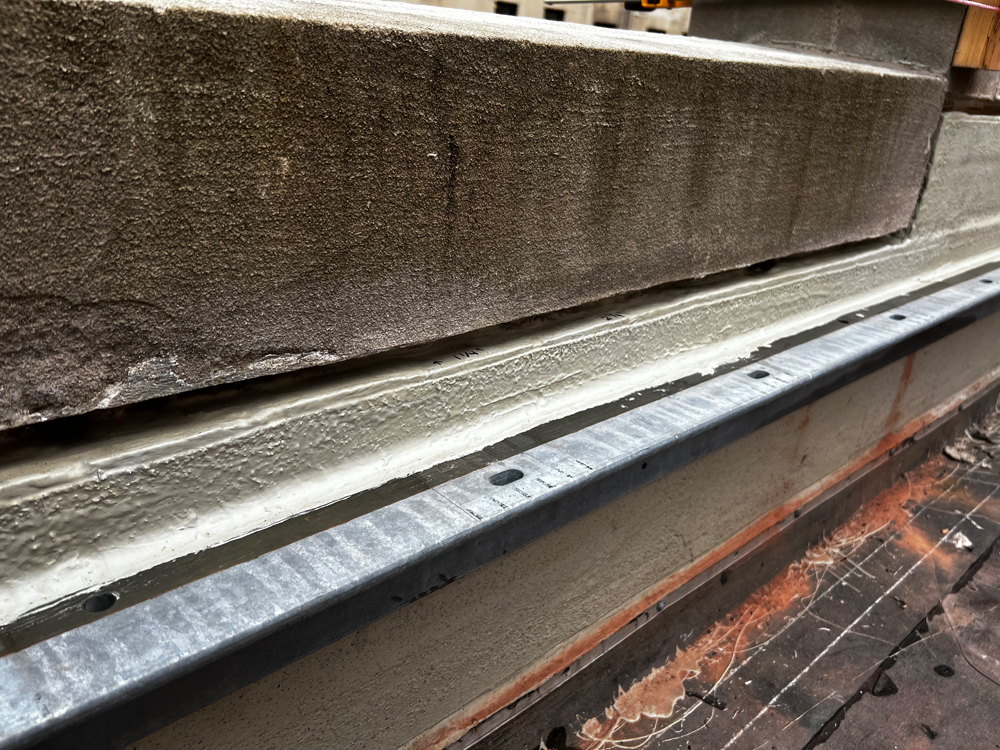
Flashing Detailed
Close-up of new sealant and waterproofing details along the entire perimeter parapet wall, ensuring watertight coverage at all joints and transitions.

Parapet Cladding Installed
Metal cladding panels fastened over waterproofing system providing both protection and architectural finish
Guardrail Base Completed
Glass guardrail anchored and sealed with new flashing beneath, reinforcing safety and waterproofing.
Corner Integration
Detailed work at parapet corners ensures smooth transitions and continuity of the waterproofing system.
New Metal Panels in Place
Continuous metal panel cladding added along parapet, fully enclosing and protecting the wall edge.
Terrace Surface Repair
Pavers lifted and substrate exposed to access damaged waterproofing beneath the planter areas.

Finished Terrace Walkway
Restored paver system creates a uniform, clear walking surface.

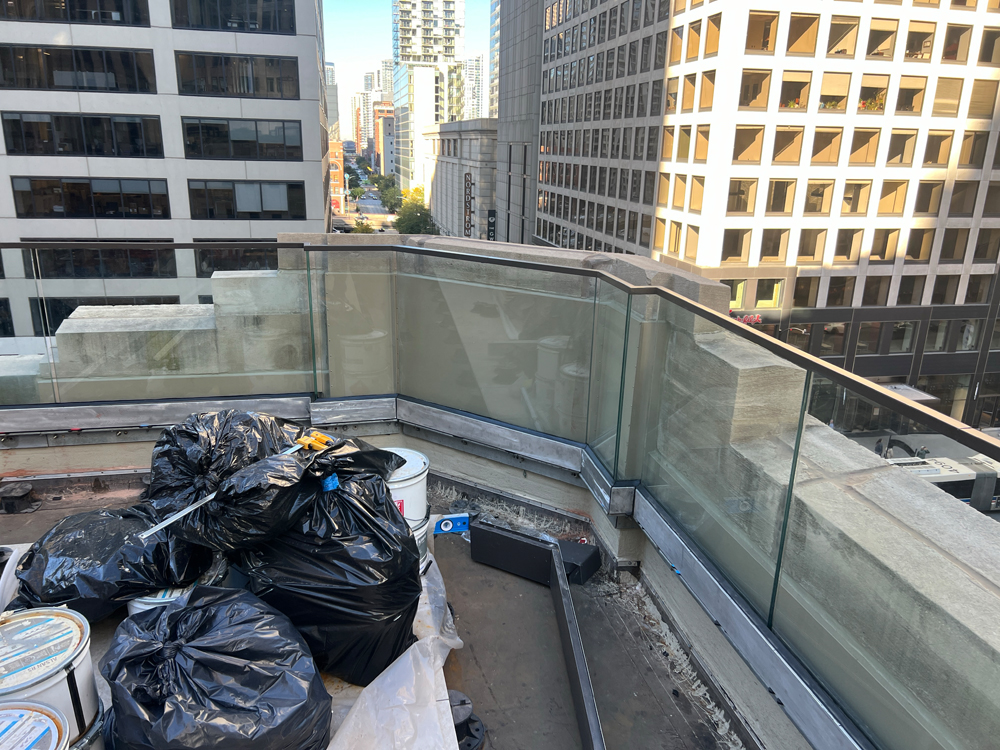
Glass Rail System Complete
Project ready for final cleaning.
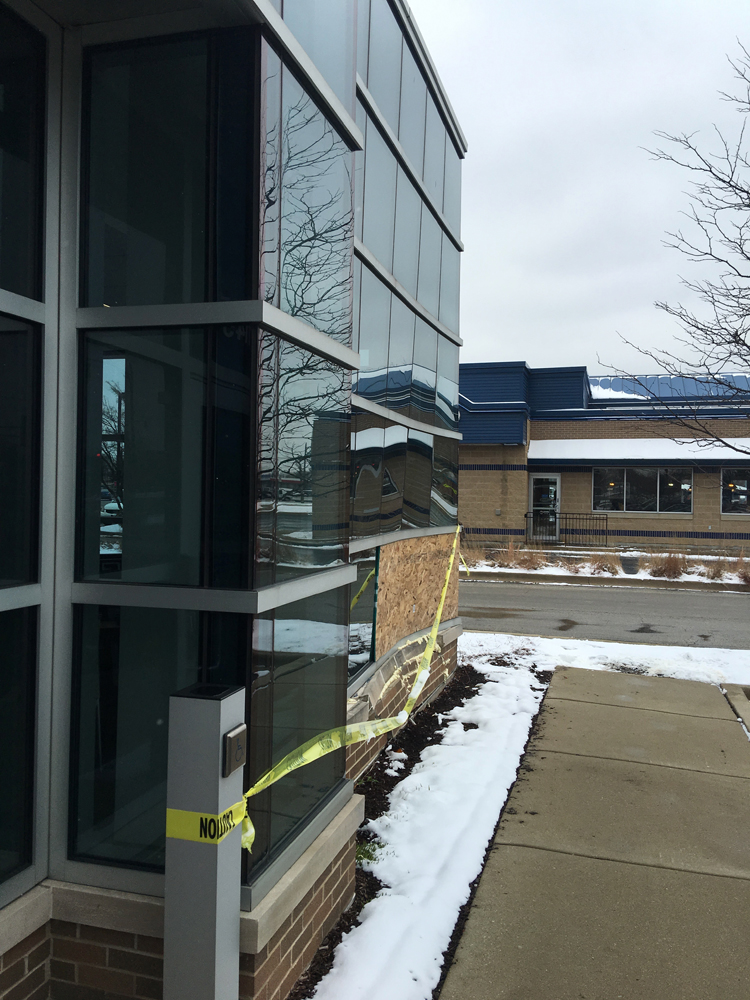
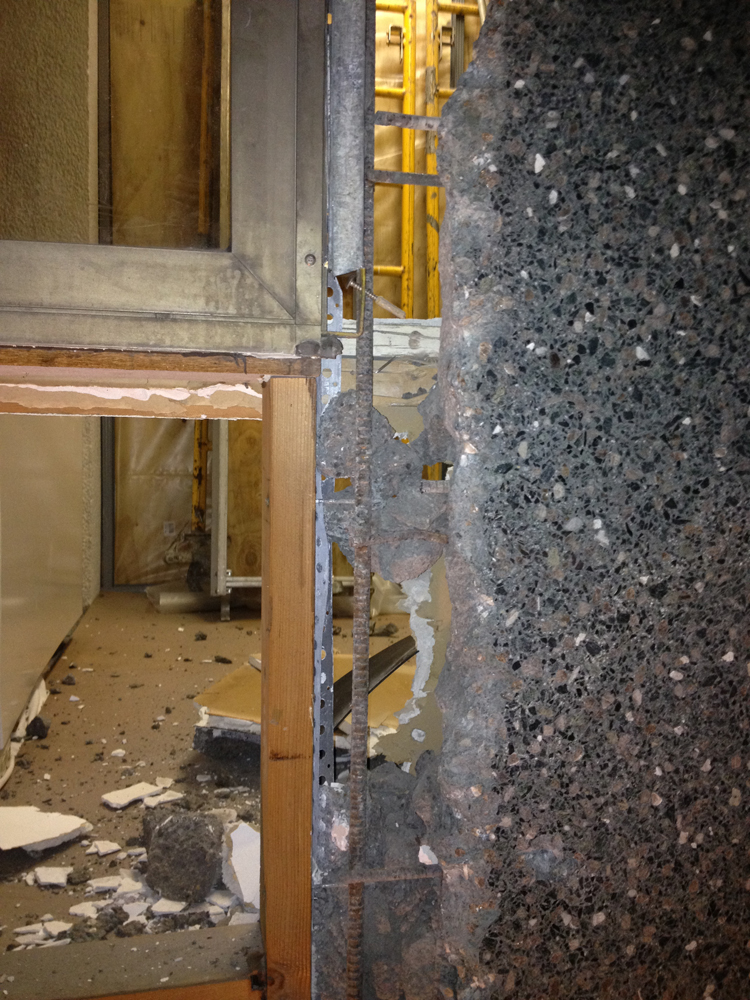
Vehicular Impact Damage
Glass curtain wall cracked and partially displaced, with temporary plywood panel installed and caution tape securing the area.
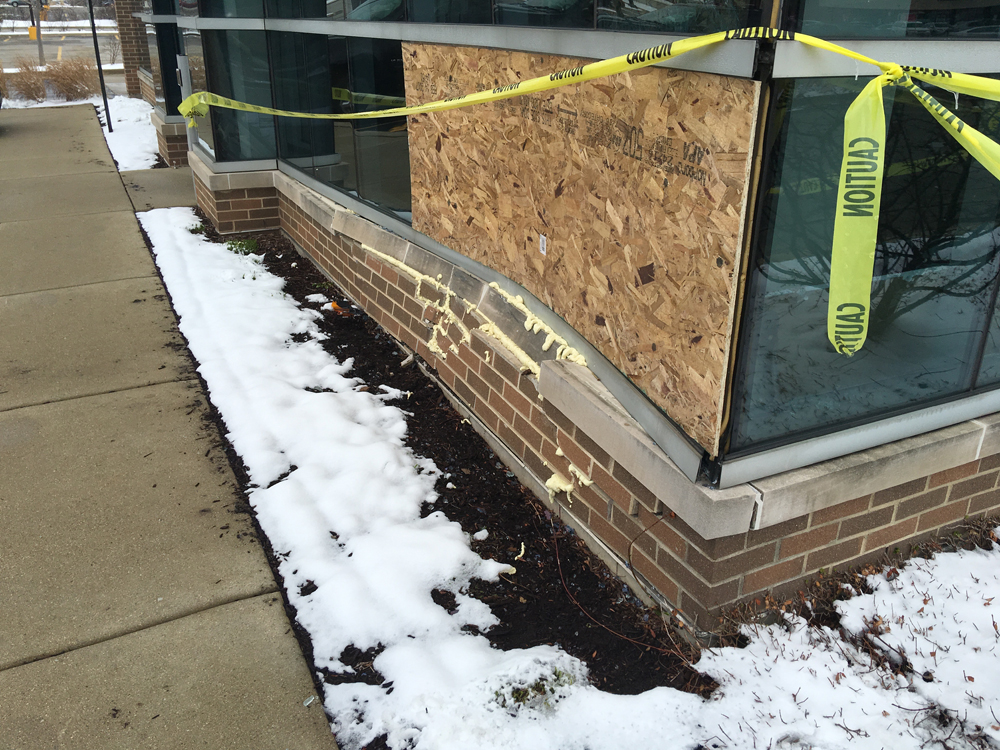
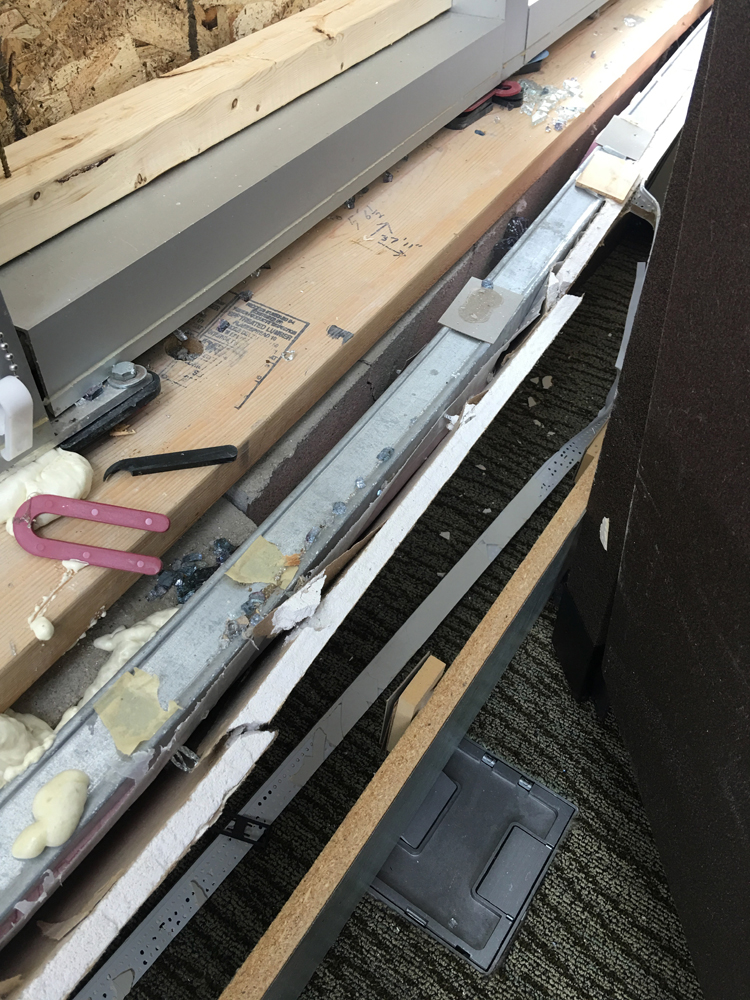
Close-Up of Damage Zone
Broken glazing and bent framing at the lower façade, exposing insulation foam and brick base course.
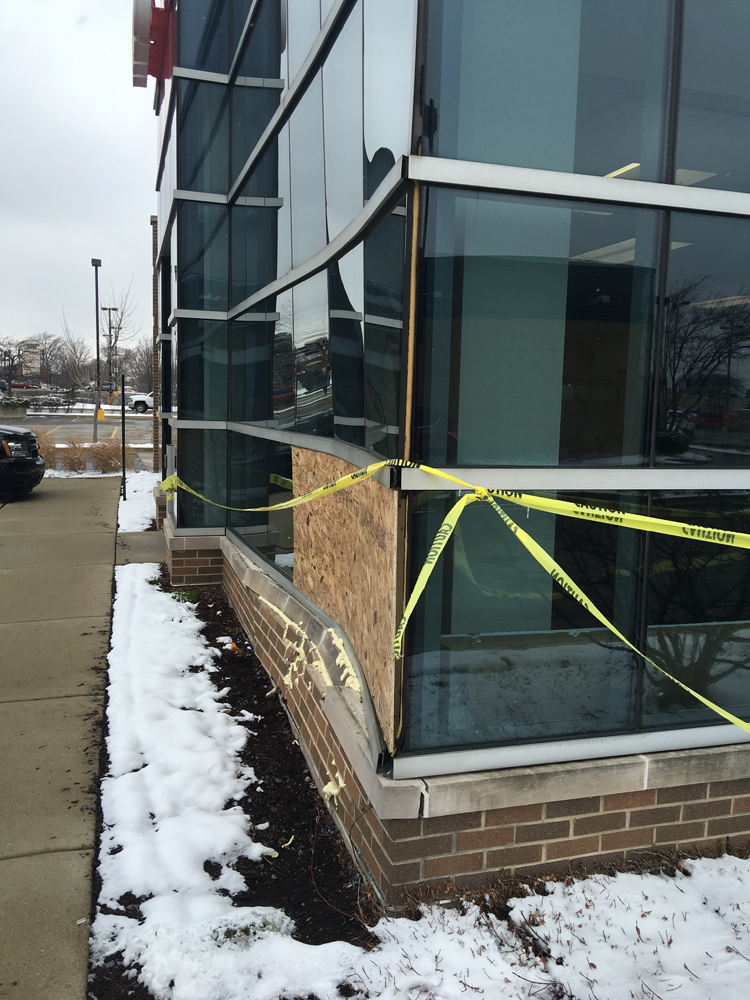
Façade Corner View
Broader view showing extent of damage along the curved glass wall, with plywood enclosure protecting the opening.
Interior Structural Exposure
Inside view of wall assembly during investigation, with damaged mullions and temporary wood framing visible.
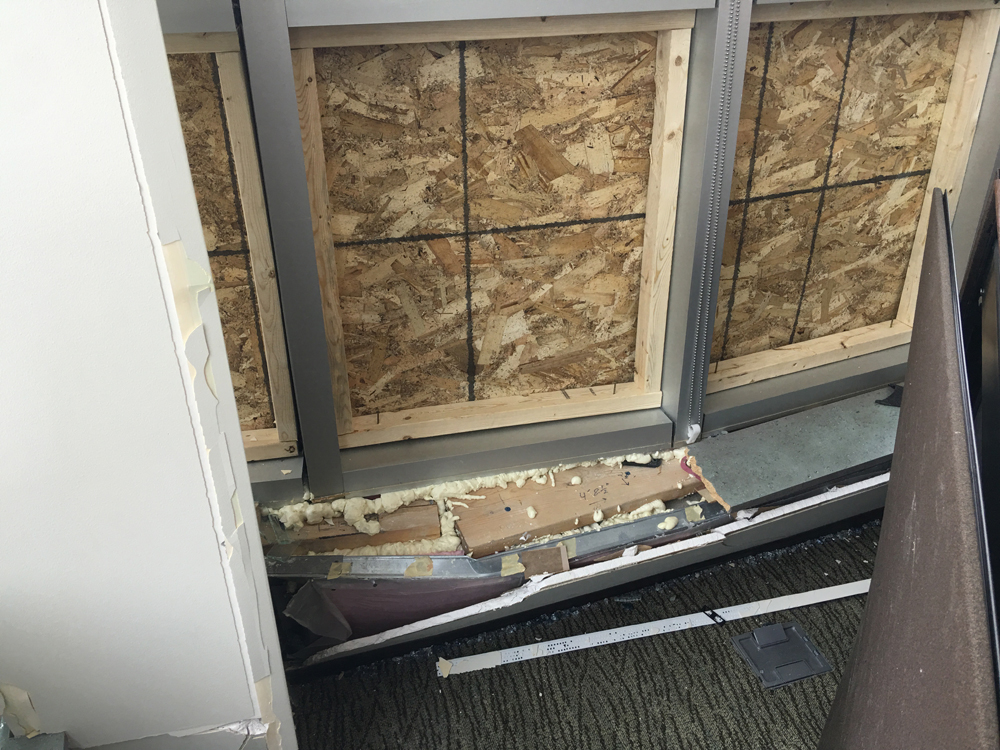
Wall Reconstruction
Interior demolition reveals full extent of sheathing replacement, insulation repairs, and framing tie-ins.
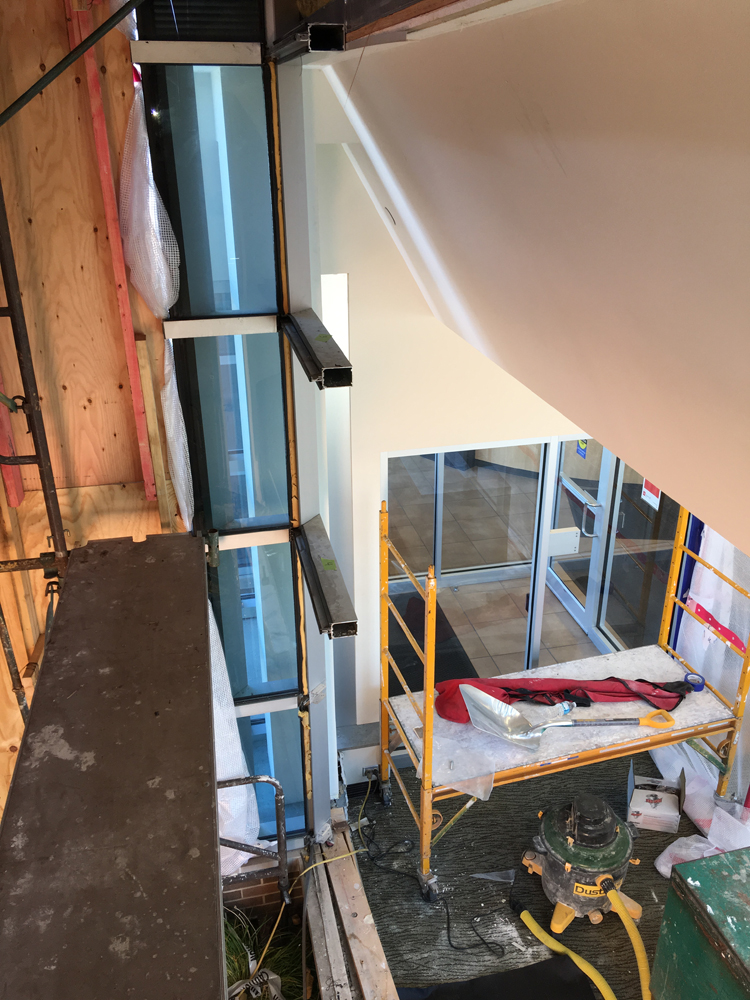
Scaffold Access
Interior scaffolding erected to allow safe replacement of glass curtain wall sections and framing repairs.
Waterproofing Applied
Flashing and sealants installed at the base of the wall to ensure long-term protection against water infiltration.
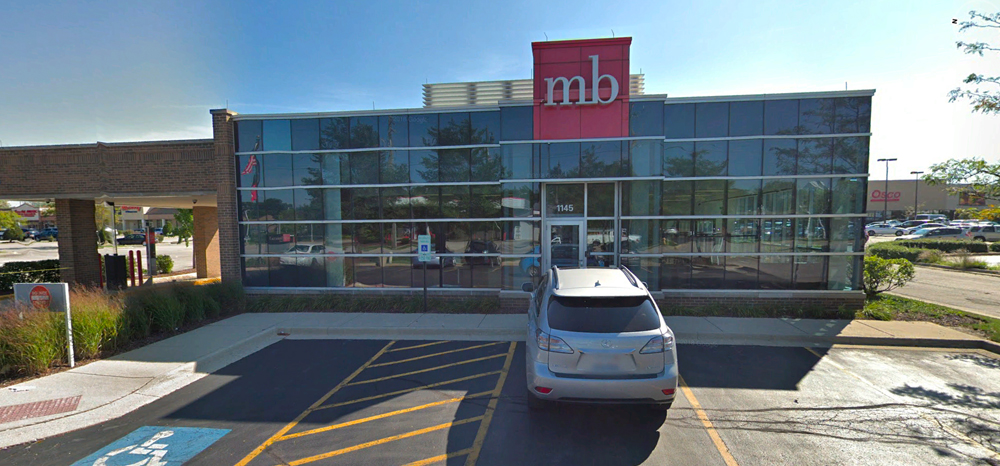
Completed Façade Restoration
Fully restored glass curtain wall at the MB Financial Bank branch, with seamless match to the original architecture.

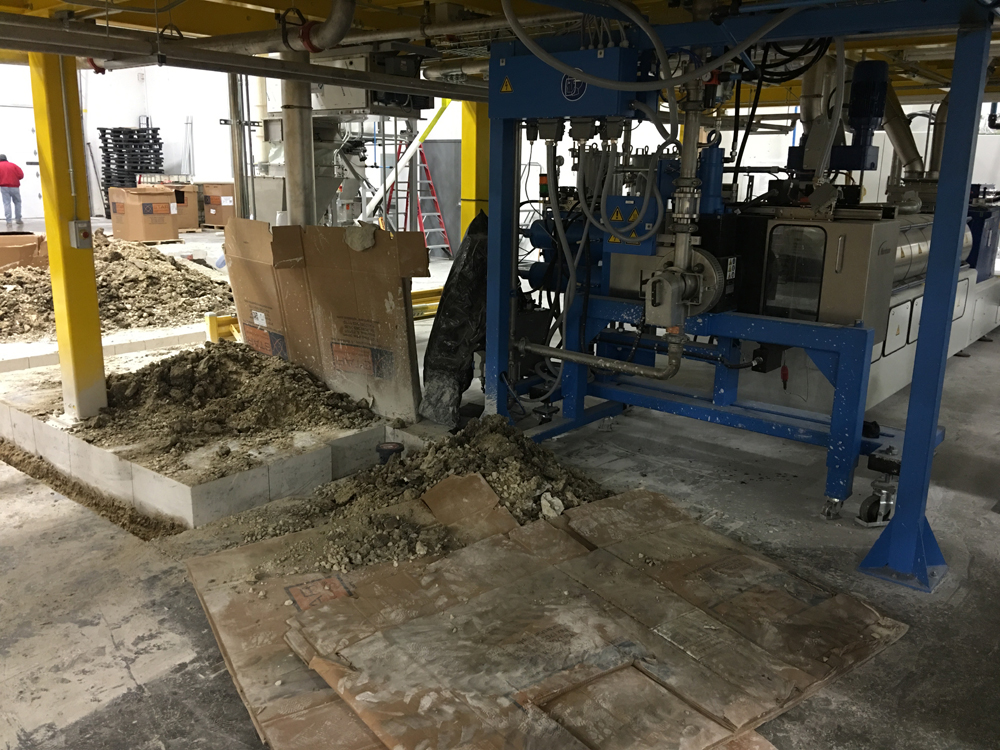
Survey of Existing Injection Molding Plant
Review of area and equipment needing new drainage system.
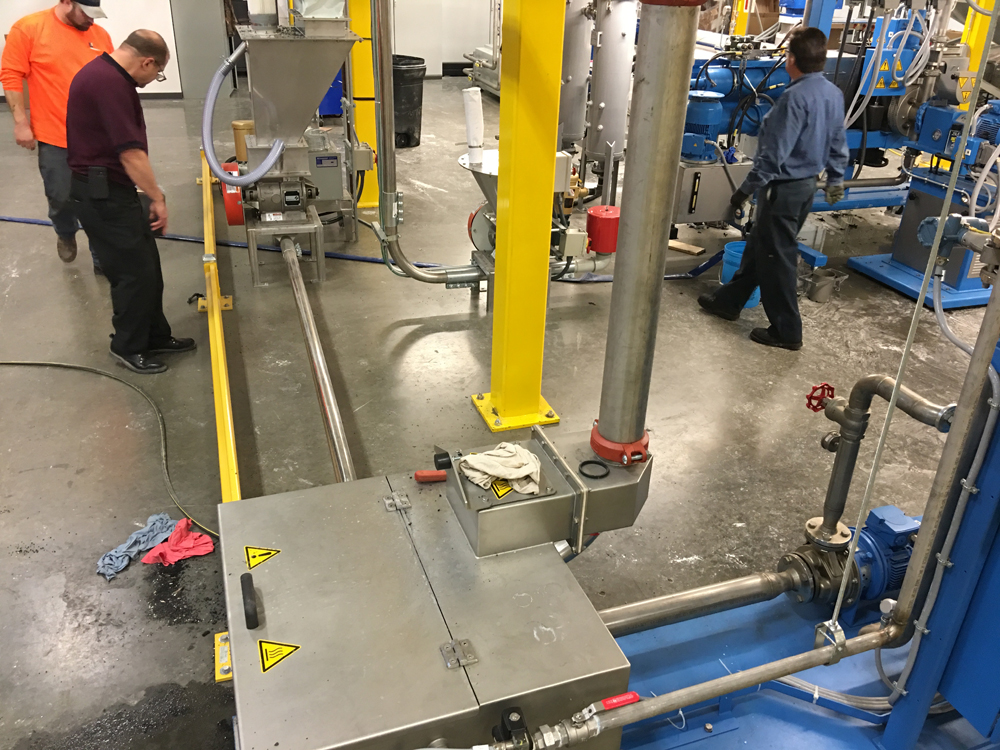
Determination of Proper Piping Location
Based on existing above-grade and below-grade mechanical systems, a mutually agreed upon location for the new drain system has been determined.

Trench Excavation
Concrete trenching underway to prepare for the installation of underground drainage and utility lines within the plant.
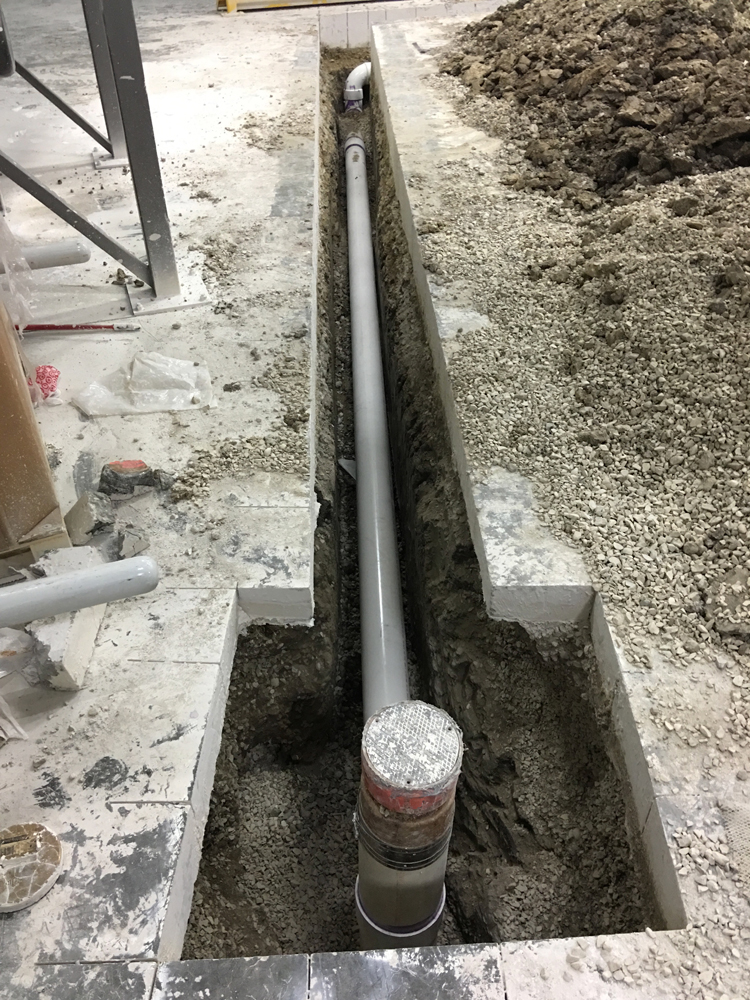
Drain Line Installation
PVC drainage piping placed in the excavated trench, ready for backfill and connection to facility systems.
Equipment and Trenching
Production equipment staged as trenching progresses through the concrete floor to accommodate new piping.
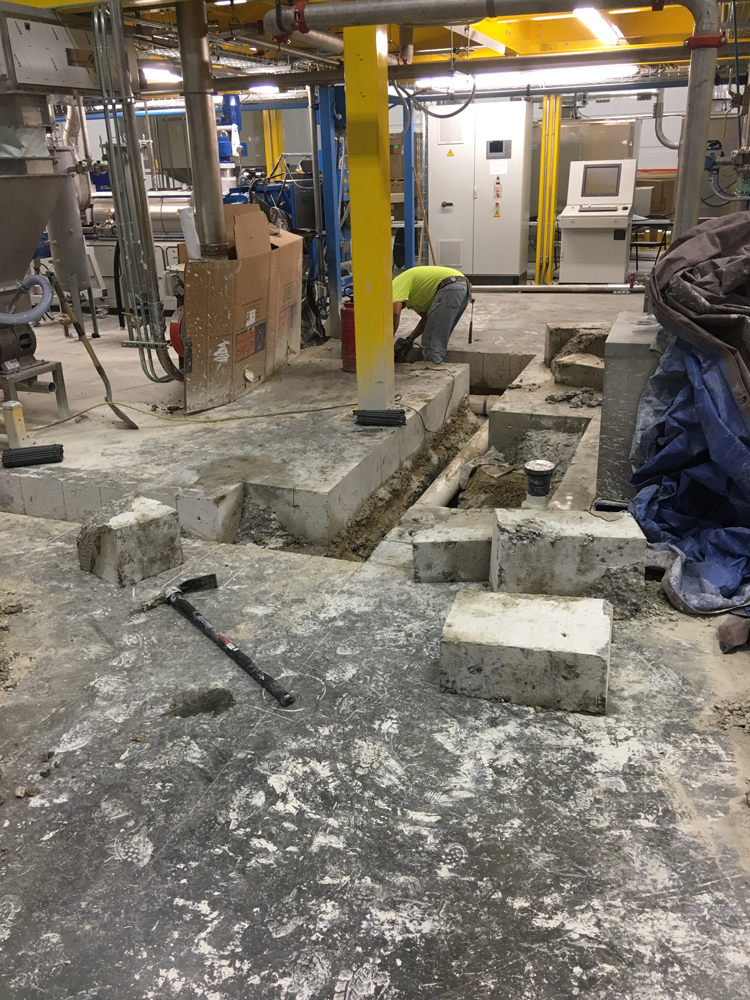
Trench Preparation
Worker preparing drainage trench near structural columns and equipment bases to ensure proper installation.
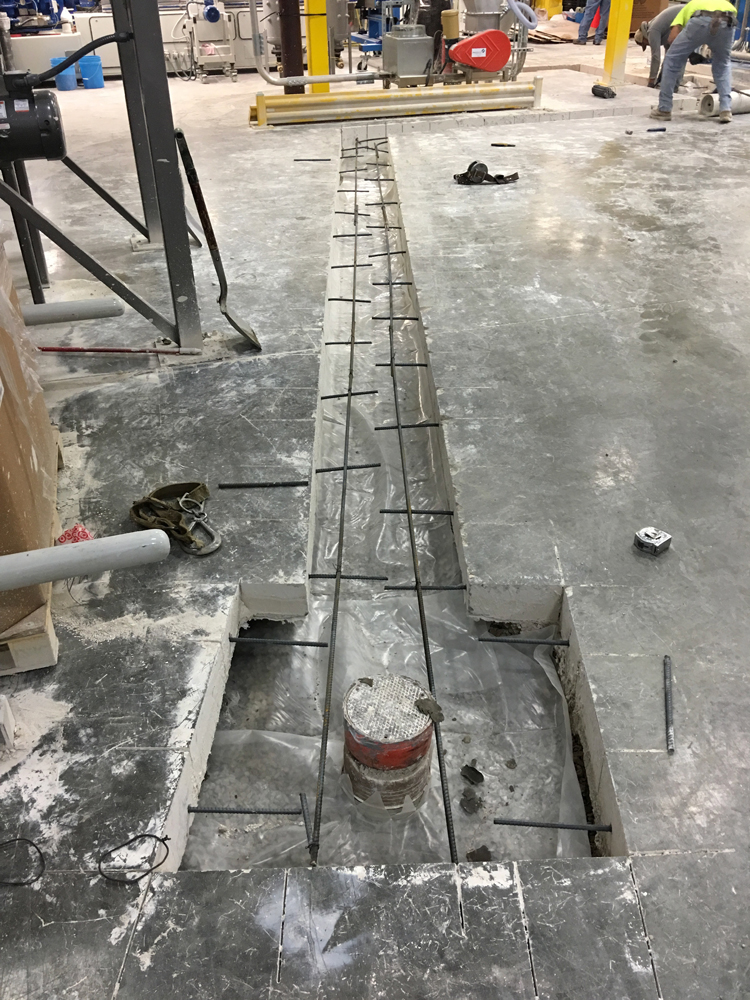
Reinforcement Placement
Rebar reinforcement installed in the trench in preparation for concrete backfill and structural support.
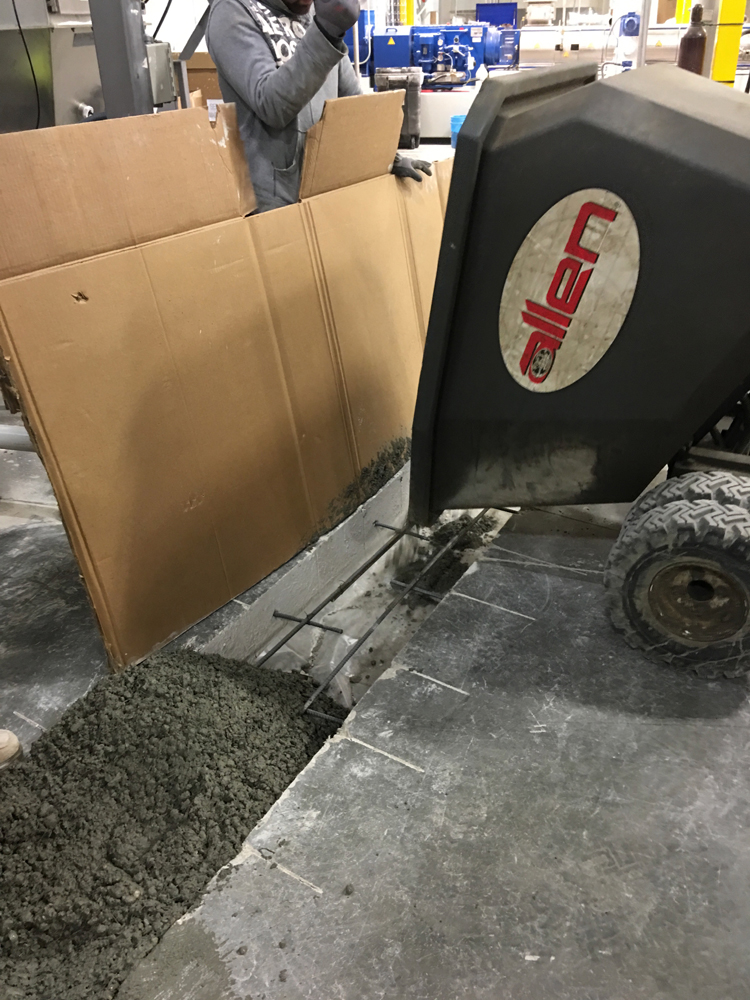
Concrete Pouring
Fresh concrete being poured into the trench to restore the integrity of the factory floor.
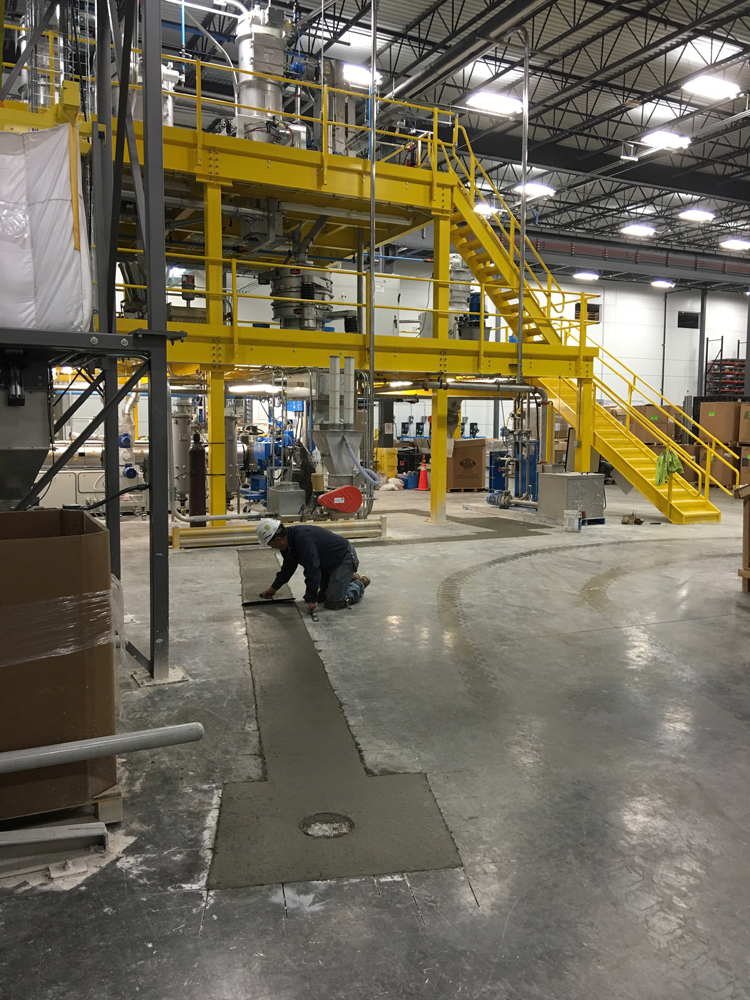
Concrete Finishing
Worker leveling and finishing the concrete surface for a smooth and flush transition with the existing floor.
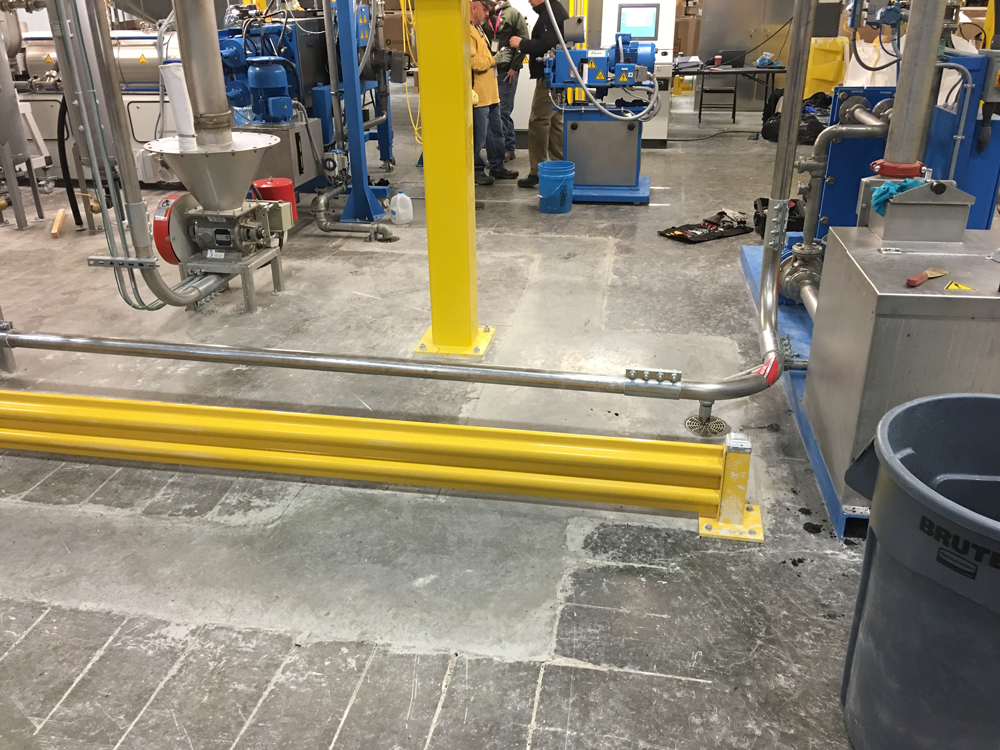
Completed Floor Restoration
Finished floor repair with reinforced piping systems integrated seamlessly into the production environment.
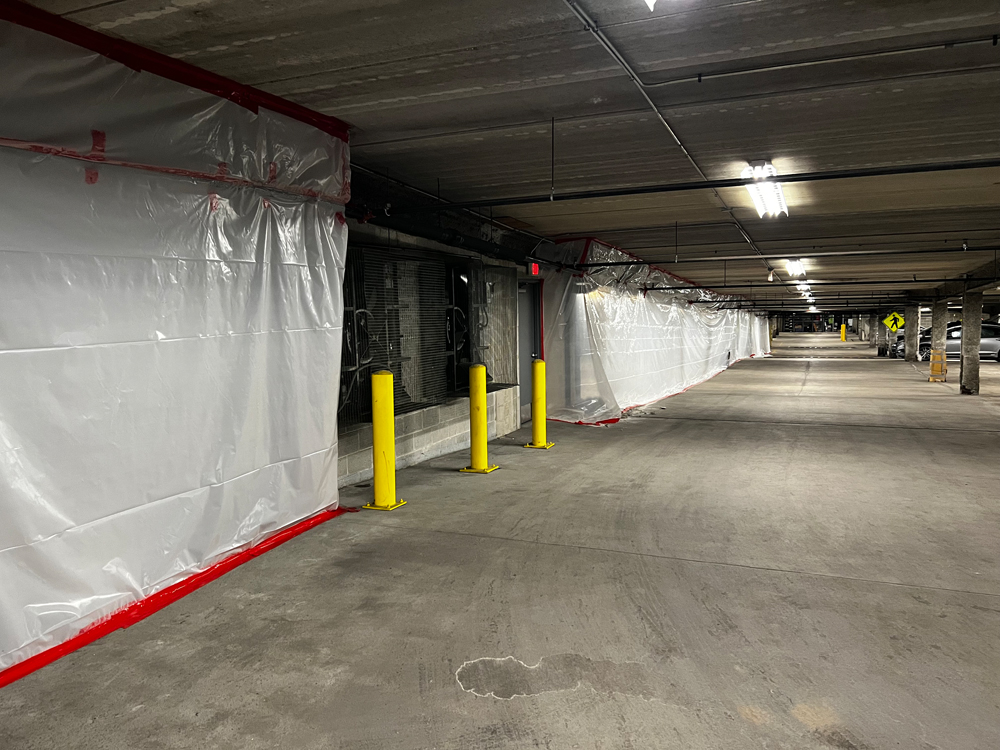
Containment Barriers in Parking Garage
Plastic sheeting with red tape and yellow bollards create a protected work zone along the garage wall.
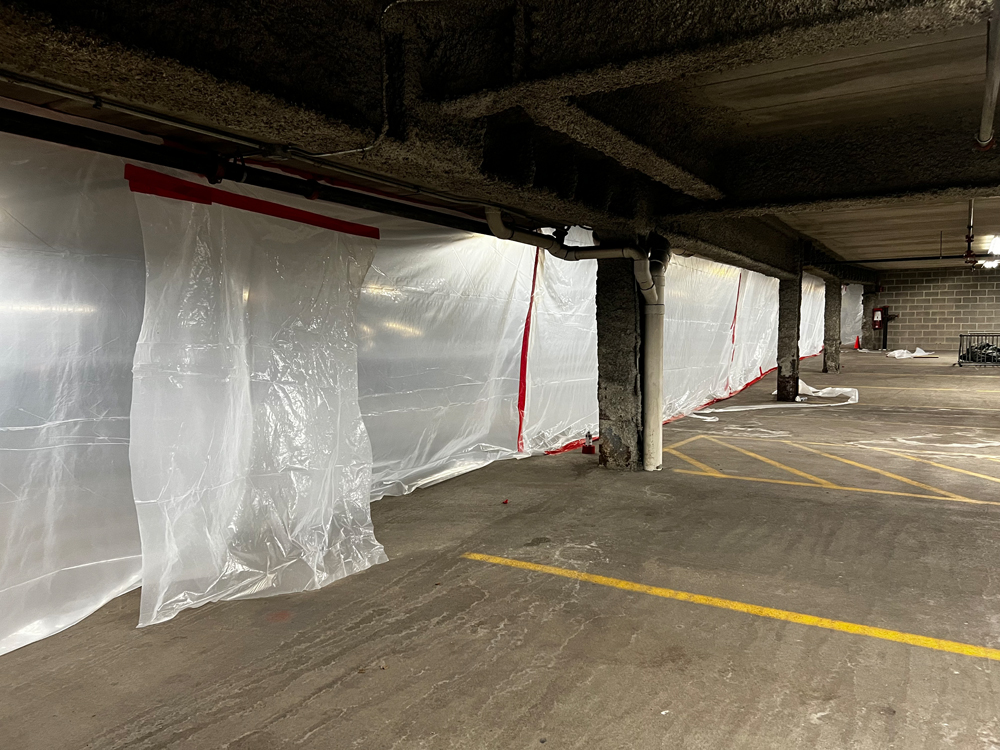
Barrier Protection Along Wall
Clear plastic barriers extend down the garage level, isolating the construction area from parking spaces.
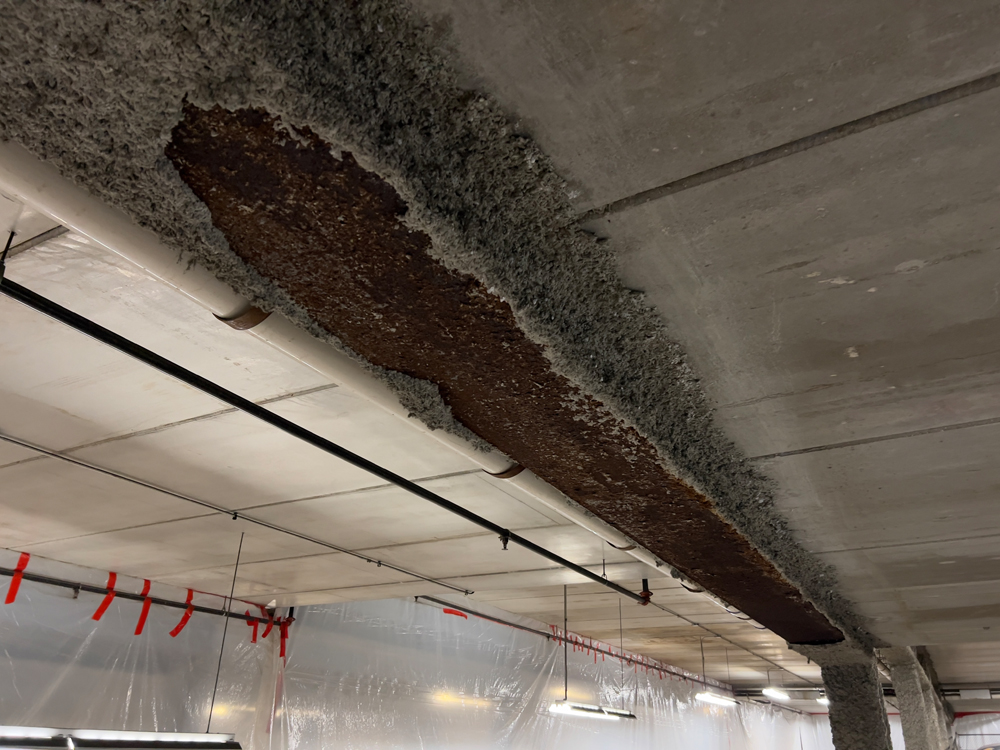
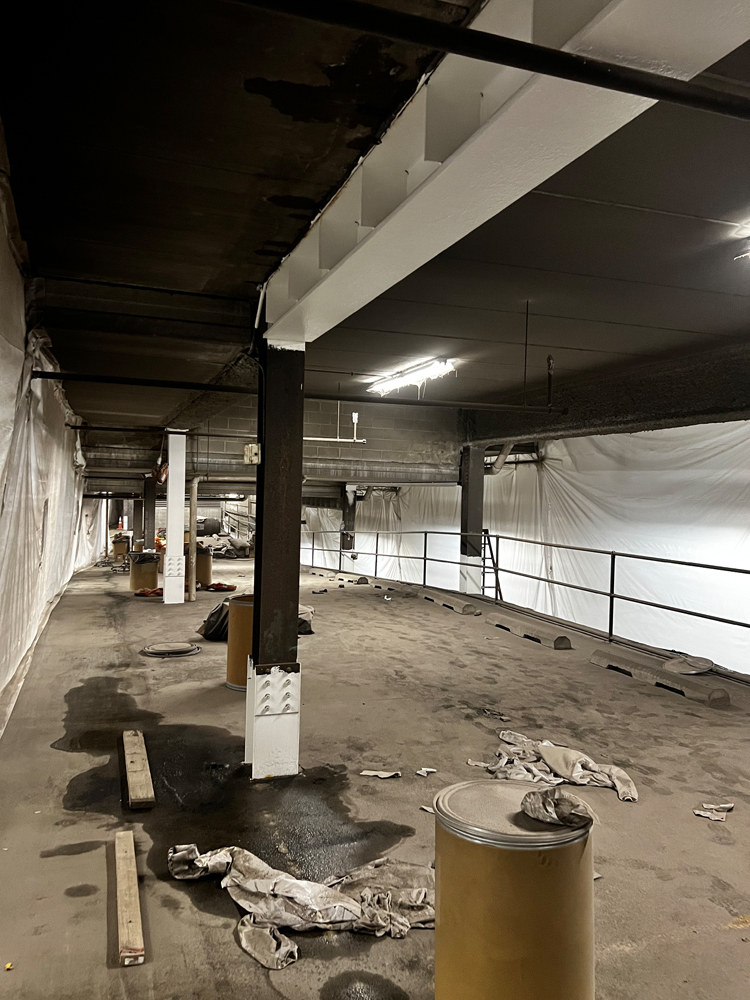
Deterioration Due to Water Infiltration
Plaza leaks creating excessive corrosion of structural members, and adhesion failure of spray fireproofing.
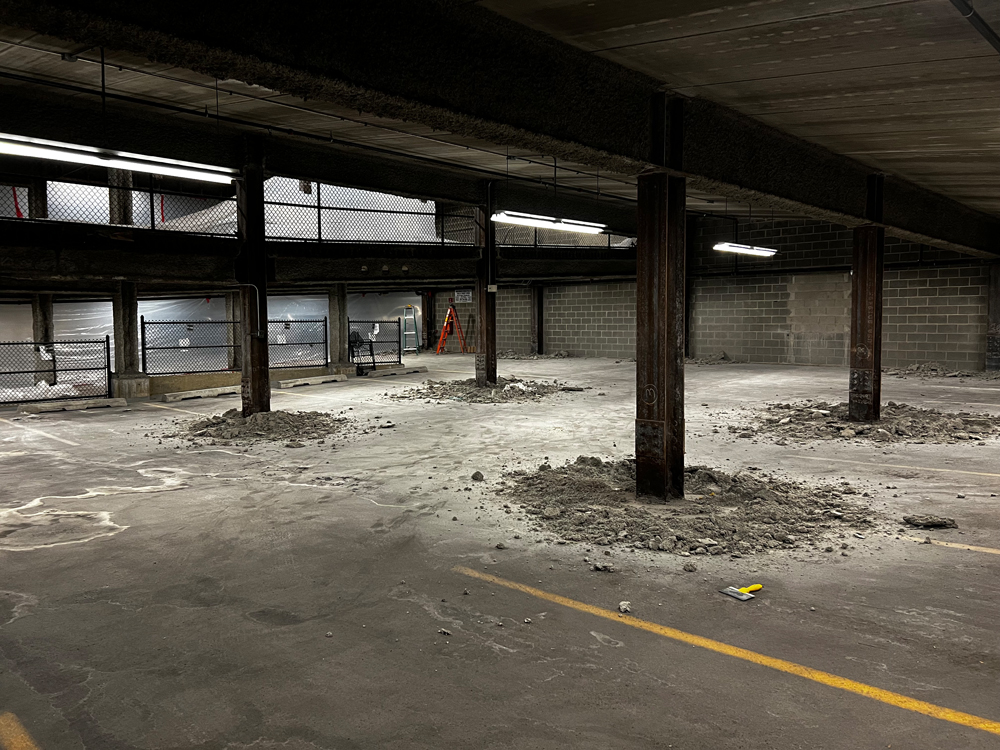
Spray fireproofing Removal
Structural framing being repaired for inspection and heavy blast cleaning.
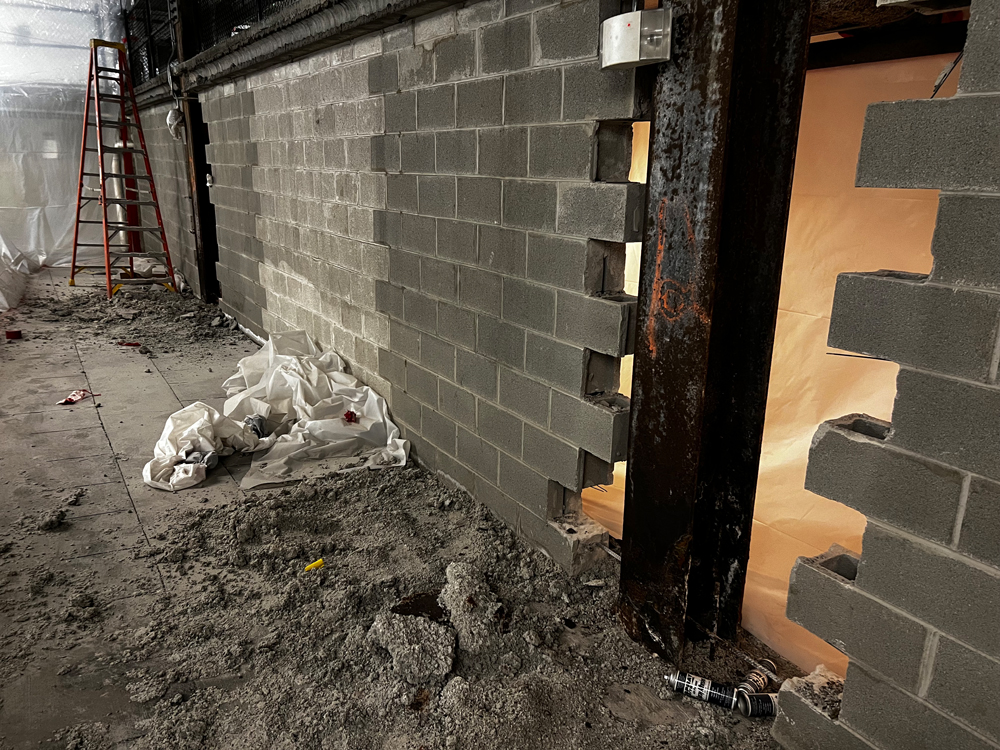
Selective Masonry Demolition
Partial removal of block walls for thorough inspection and heavy blast cleaning.
Heavy Blast Cleaning of Structural Members
In-progress heavy blast cleaning of structural members in order to remove corrosion from surface.
Structural Steel Repairs
All areas with pack rust are heavy blast cleaned and immediately painted with an epoxy coating.

Work Zone with Materials
Scaffolding, tarps, and tools arranged in active work zone with beams and columns under repair.
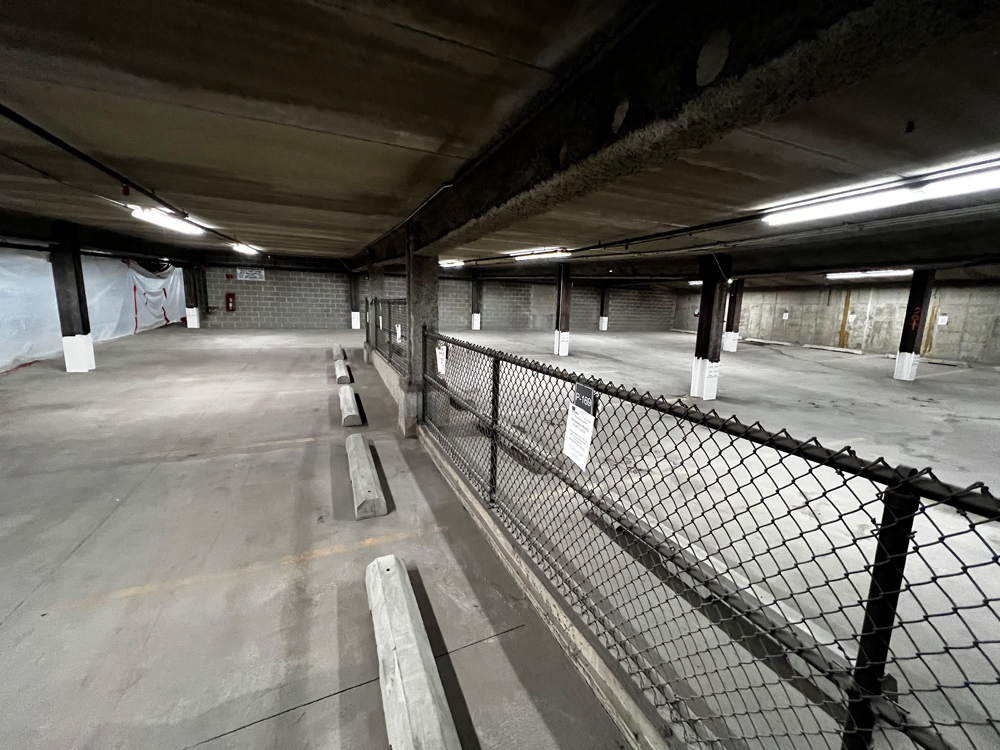
Completed Column Repairs
Parking garage view with epoxy coated column bases, cleared work area, ready for spray fireproofing application.
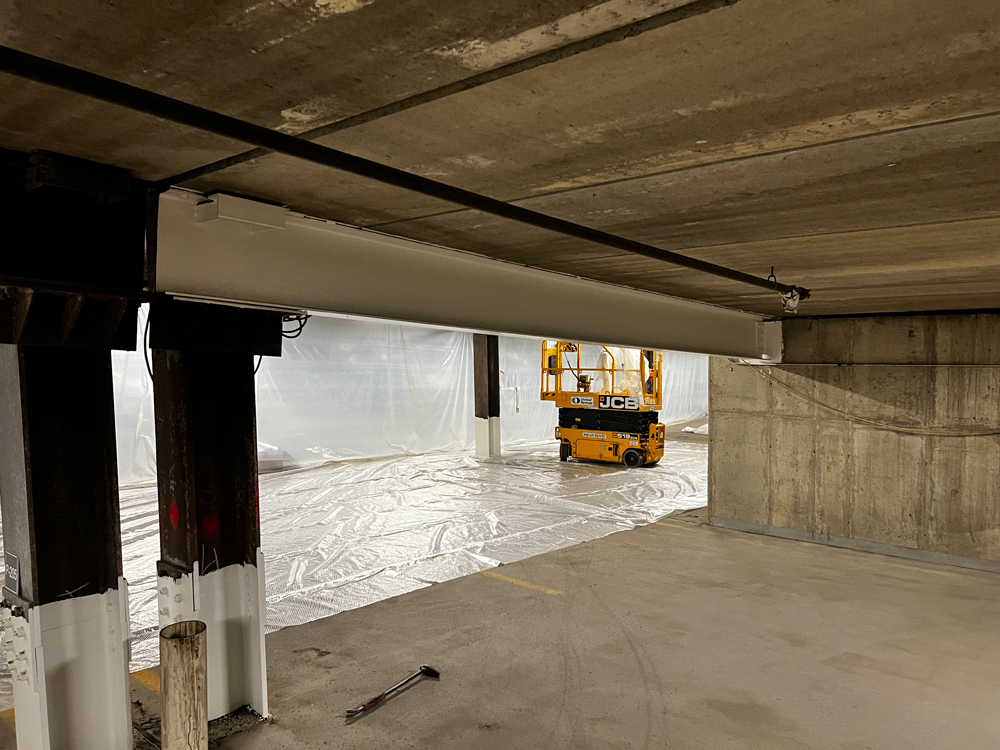
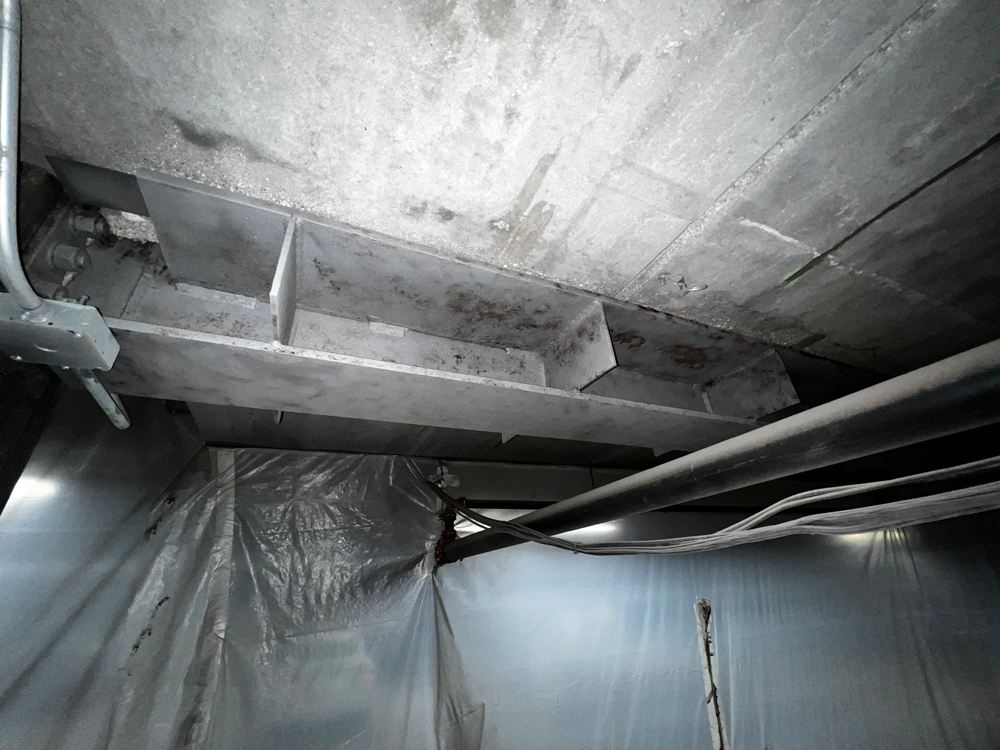
Completed Beam Repairs
Epoxy Coated Steel Beam, and protective barriers being installed in preparation of spray fireproofing activity.

Surface Protection Setup
Plastic sheeting covers the parking deck floor to protect surfaces during fireproofing application.
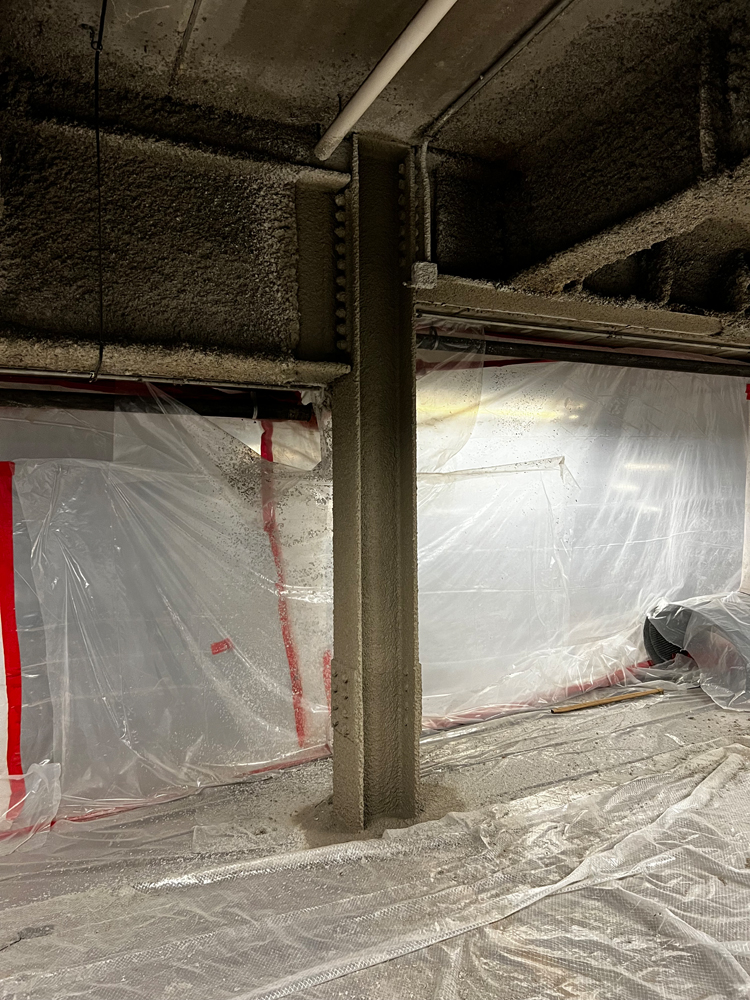
Column Fireproofing Application
A steel column freshly sprayed with the first coat of spray fireproofing material.
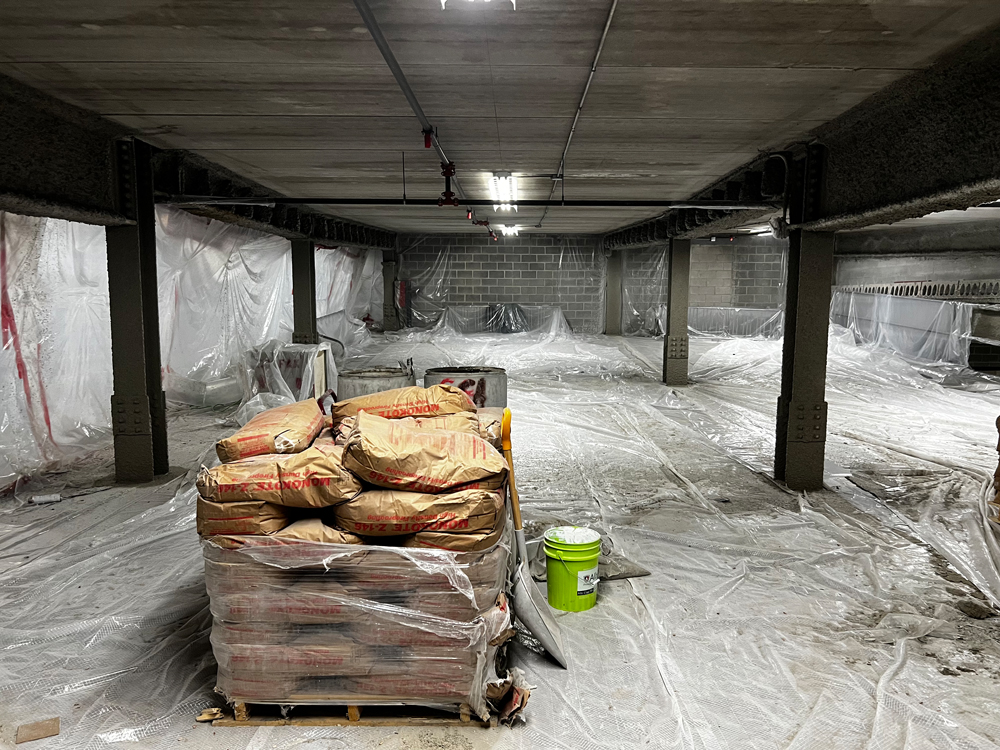
Material Staging Area
A pallet of bagged construction material and supplies staged inside the parking structure, ready for application.
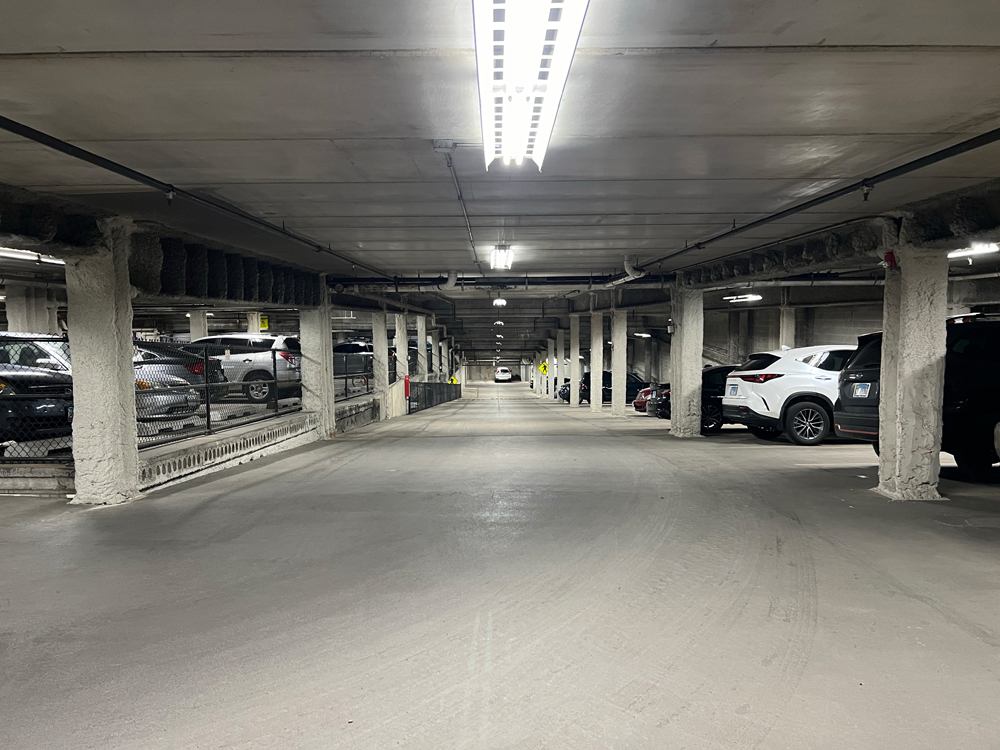
Restored Parking Aisle
View down the main parking lane after significant restoration, with cars parked and repaired columns visible.

Structural Steel Repairs/Modifications
Multiple sets of red steel shoring frames installed beneath the precast plank to provide temporary structural support.
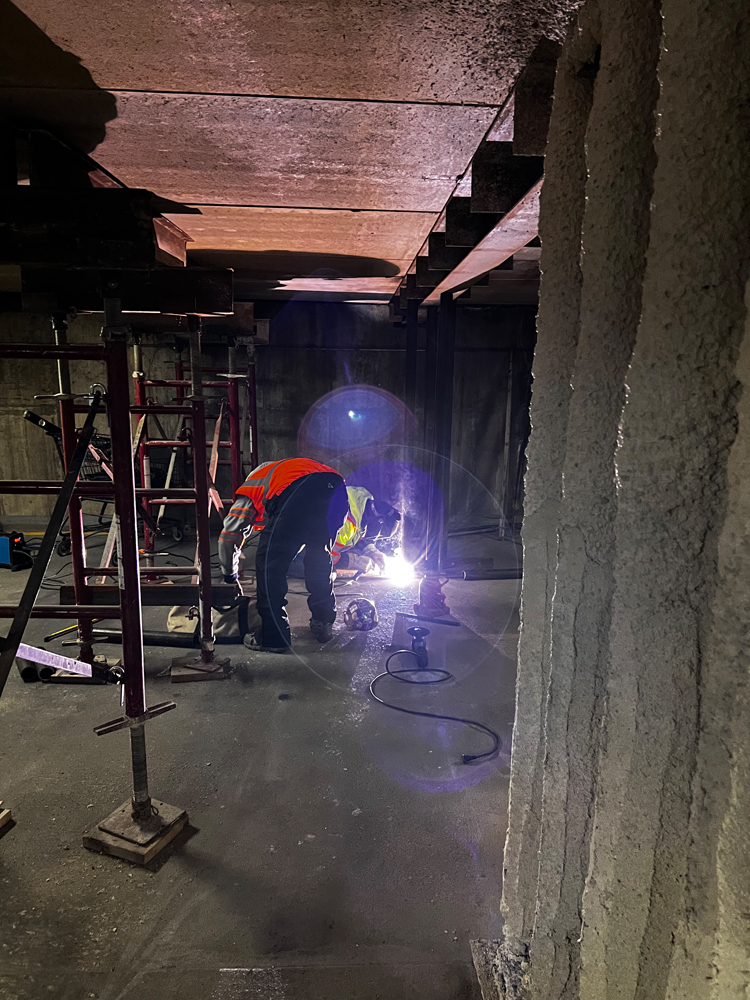
Welding Work in Progress
Workers performing welding operations on structural steel with shoring equipment in place around them.
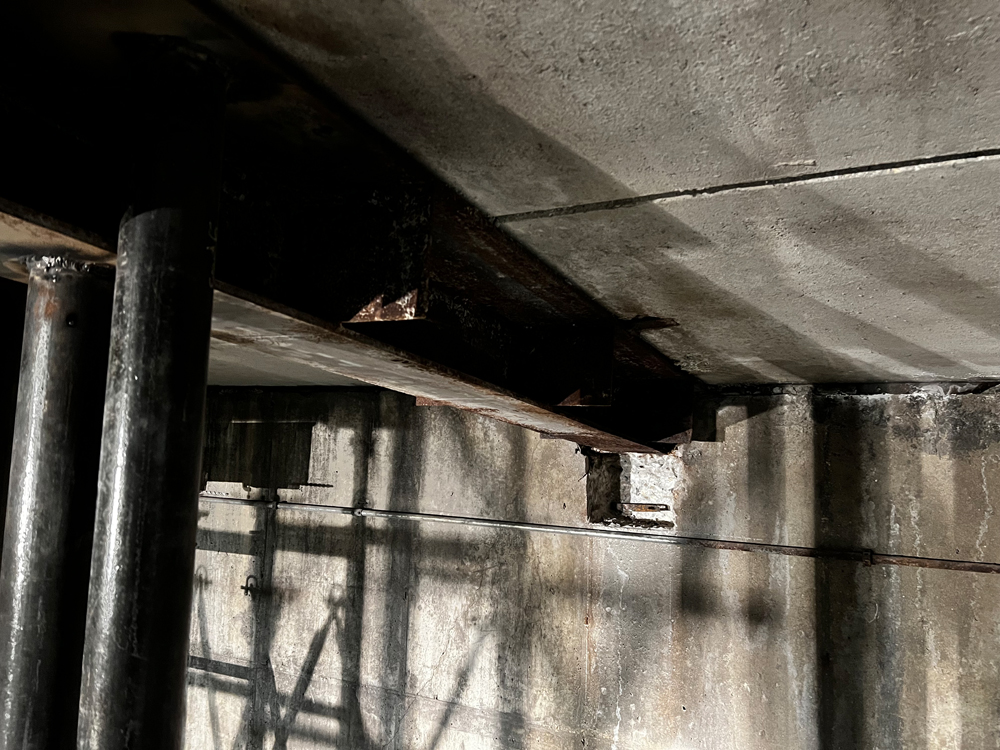
Exposed Beam Connection
Close-up of a deteriorated steel beam junction at the ceiling before reinforcement work begins.

Beam Reinforcement in Progress
Steel plates being welded into place at a beam connection to strengthen the structural framework.

Completed Beam Repair
Reinforced steel beam connection showing newly installed plates securely fastened to existing members.
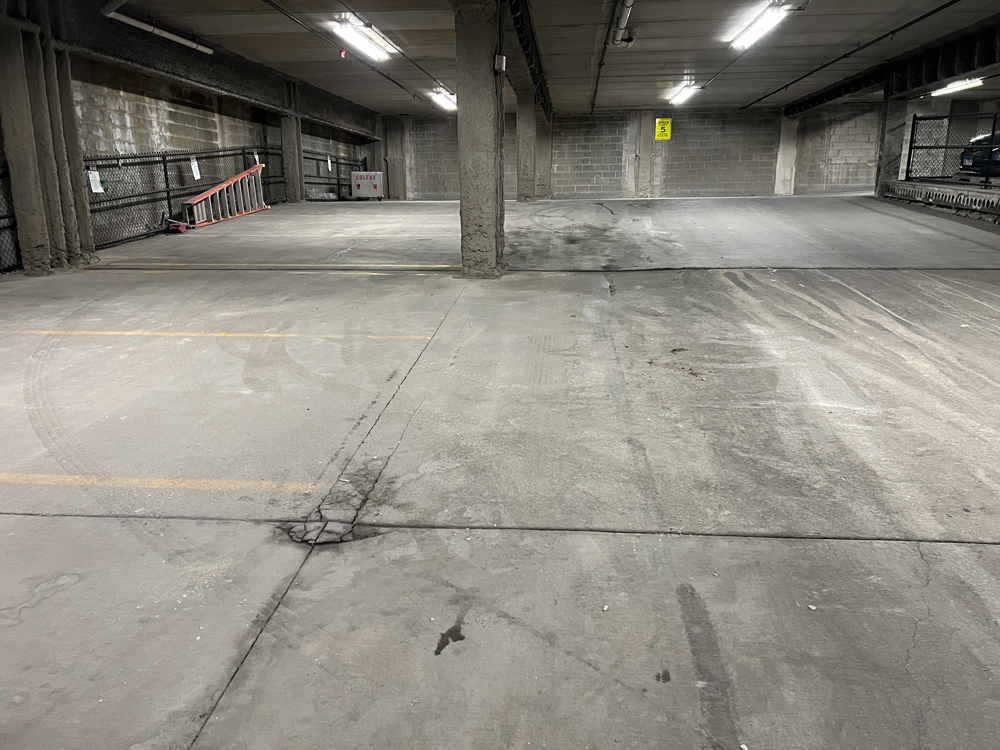
Floor Crack Inspection
View of existing floor cracks in the parking deck slab prior to repair, highlighting areas needing restoration.

Concrete Cutting
Worker using a concrete saw to cut and open a trench in the slab as part of structural floor repair.
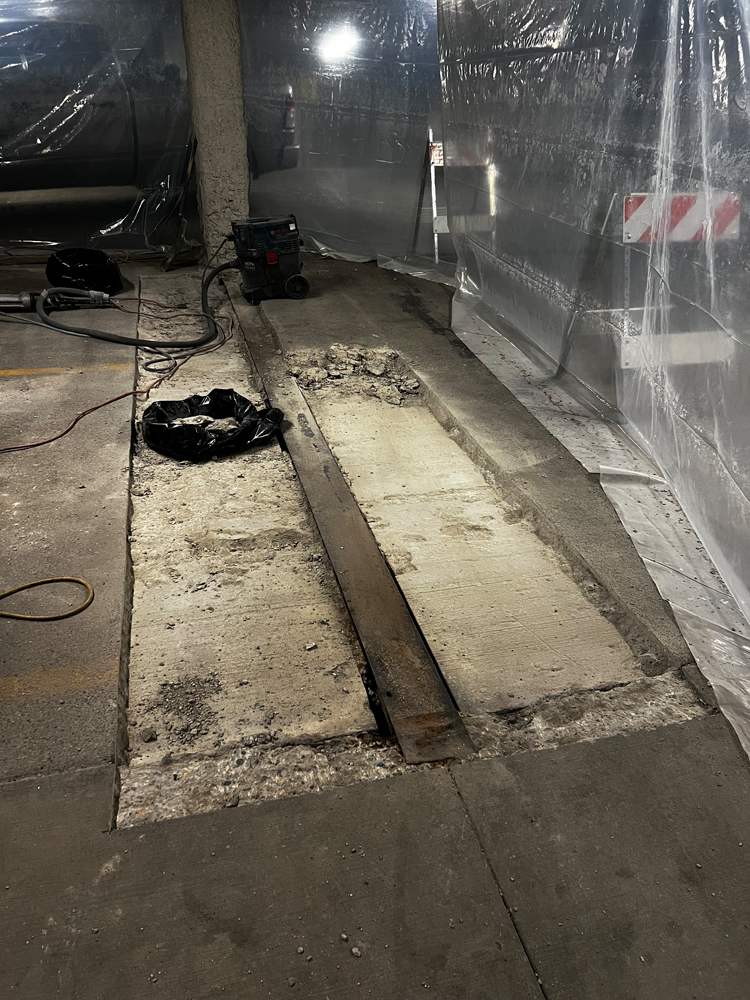
Slab Removal
Section of deteriorated concrete removed to expose underlying material and prepare for new placement.
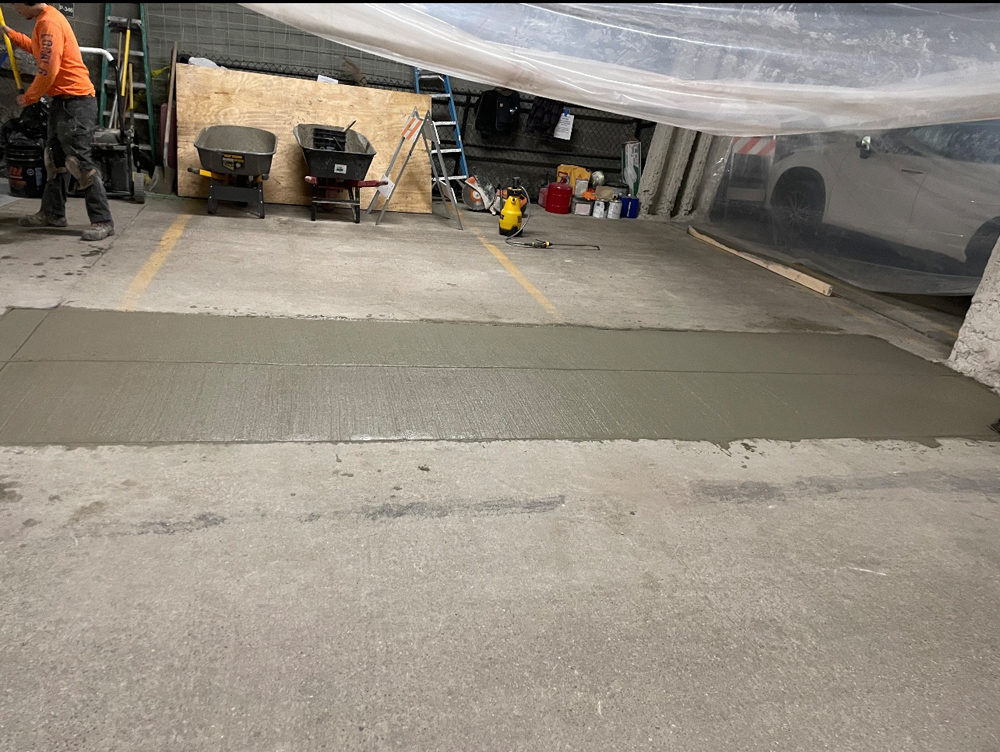
Concrete Pour
Fresh concrete placed into the repaired section of the slab, restoring the surface integrity.

Crack Filling
Visible floor cracks and joints sealed with repair compound to prevent water infiltration and further damage.
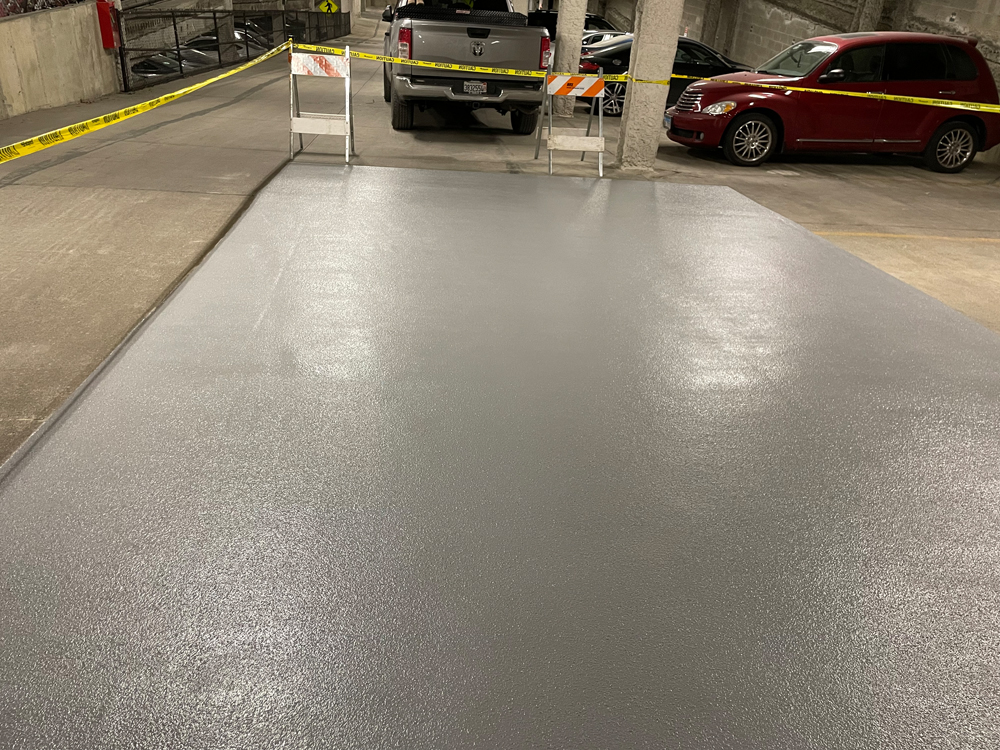
Completed Slab Finish
Newly resurfaced concrete slab with smooth, finished texture, marking the completion of floor restoration.

Initial Trench Excavation
The repair begins with breaking out a section of concrete floor and digging a trench to expose the underlying soil and utilities. Standing water is visible, indicating drainage issues that need to be addressed.
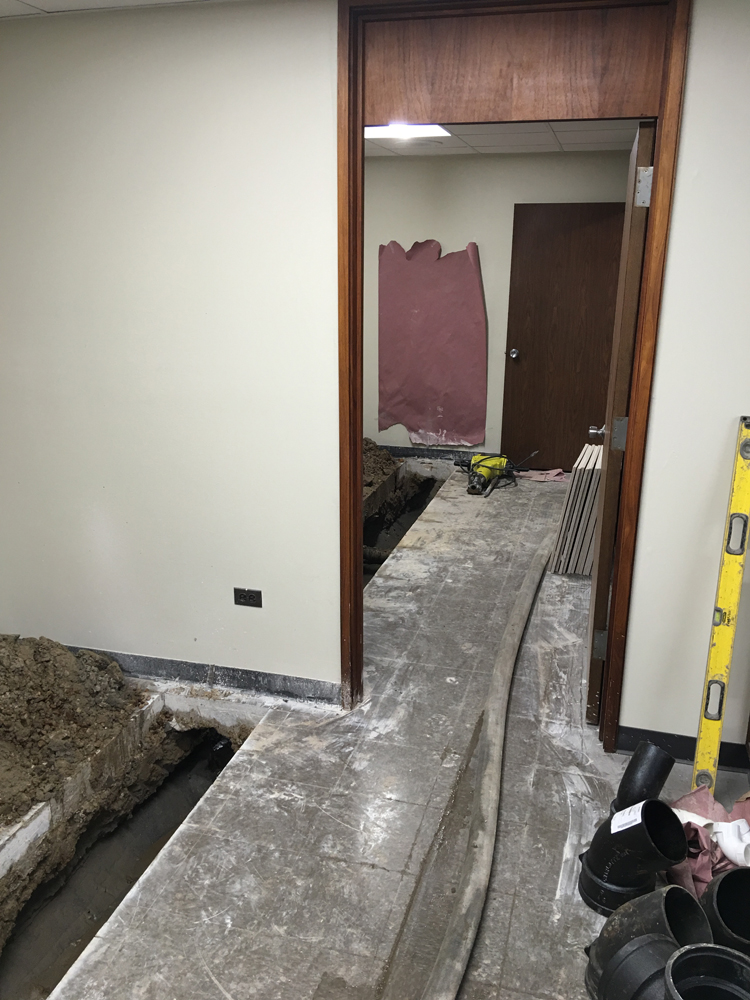
Extending the Trench Through Corridor
The trenching continues through the interior hallway, creating access for new piping. Tools and materials are staged nearby, ready for installation.

Temp shoring for Pit Excavation
Plywood shoring placed in preparation for new below-grade basin. Water management equipment is already in place to keep the excavation dry until the fiberglass basin is installed.
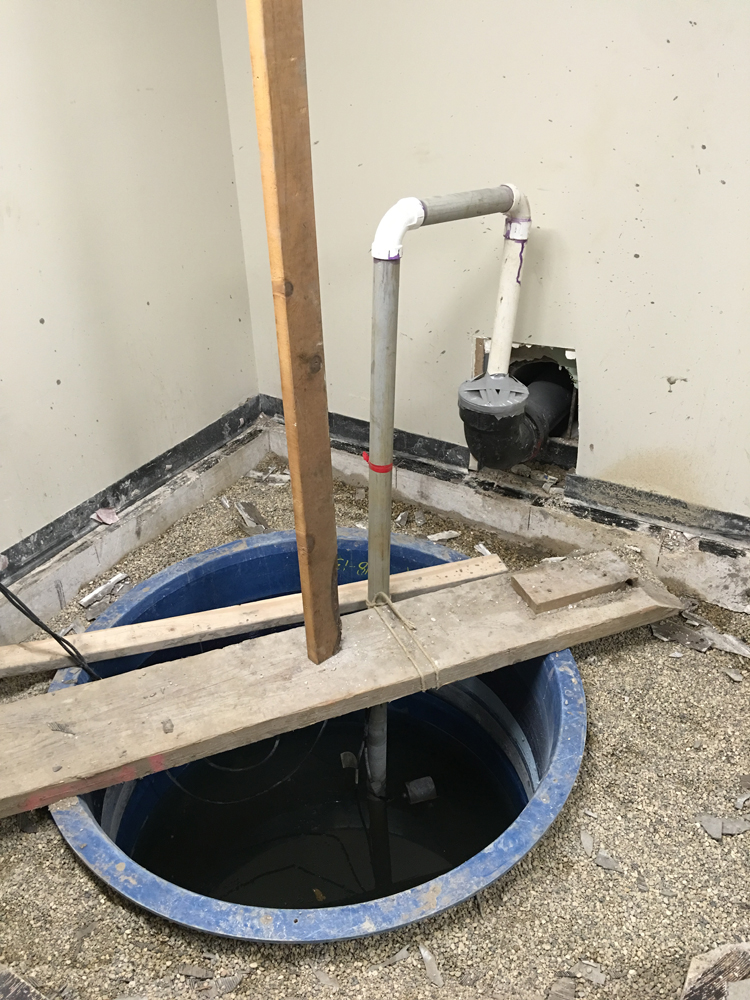
Installing the Sump Basin
A large sump basin is set in place and connected with vertical piping. This will serve as the collection point for groundwater or excess drainage.
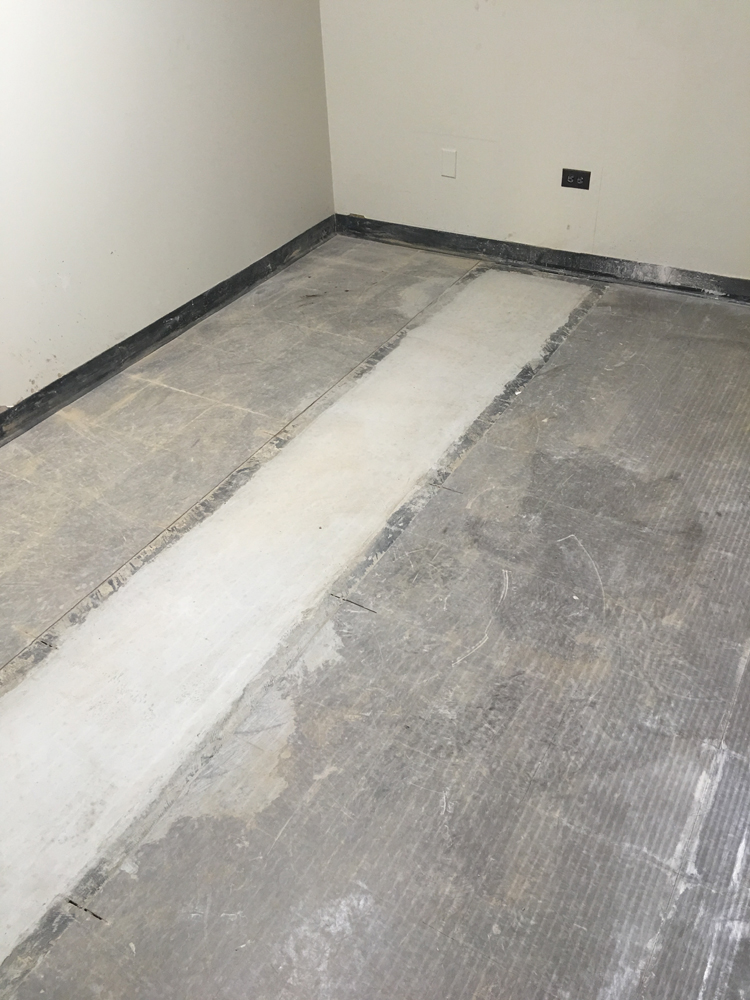
Restoring the Trench
After the underground work is complete, the trench is backfilled and capped with fresh concrete, restoring the surface of the floor.
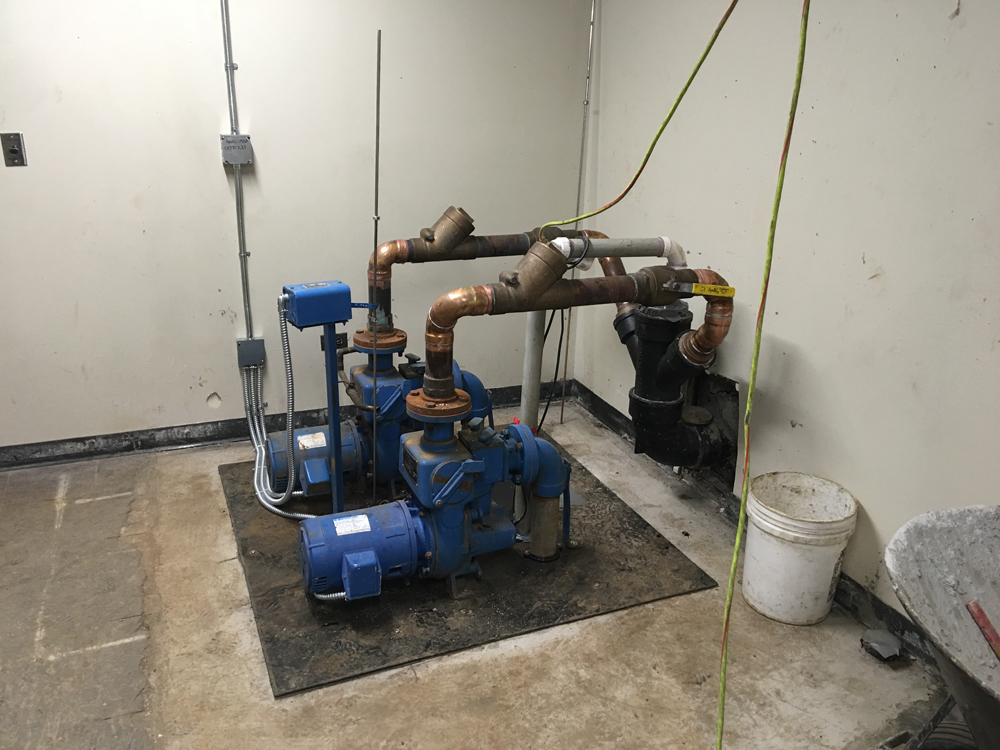
Mechanical Pump Installation
New mechanical pumps and piping are installed on a cover plate, tying into the sump system to provide reliable water removal.
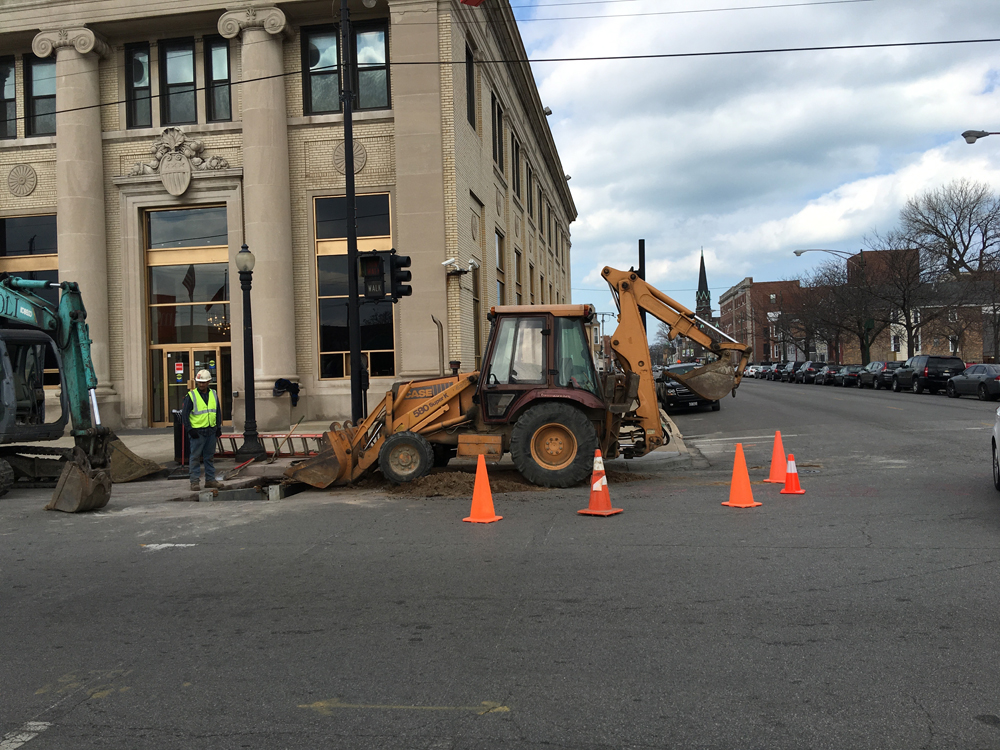
Exterior Excavation Begins
Work extends outside the building, where backhoes and crews open the pavement to access the utility connection point in front of the structure.
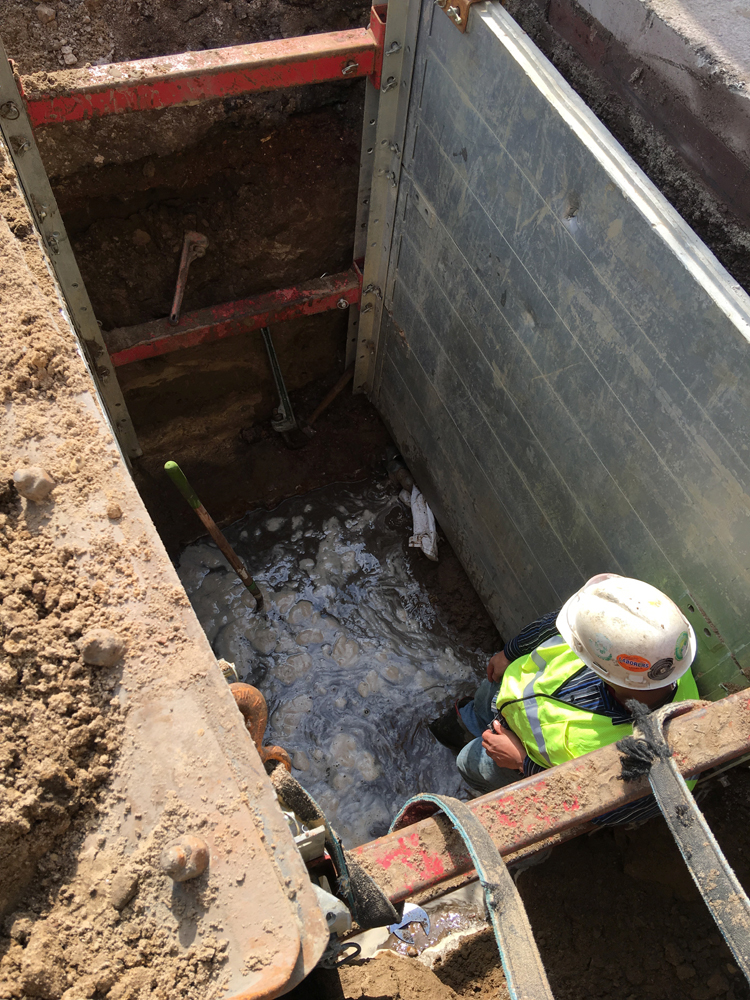
Addressing Groundwater in the Excavation
The street excavation is supported with shoring panels. Groundwater is managed while workers prepare the area for a new domestic water service installation.
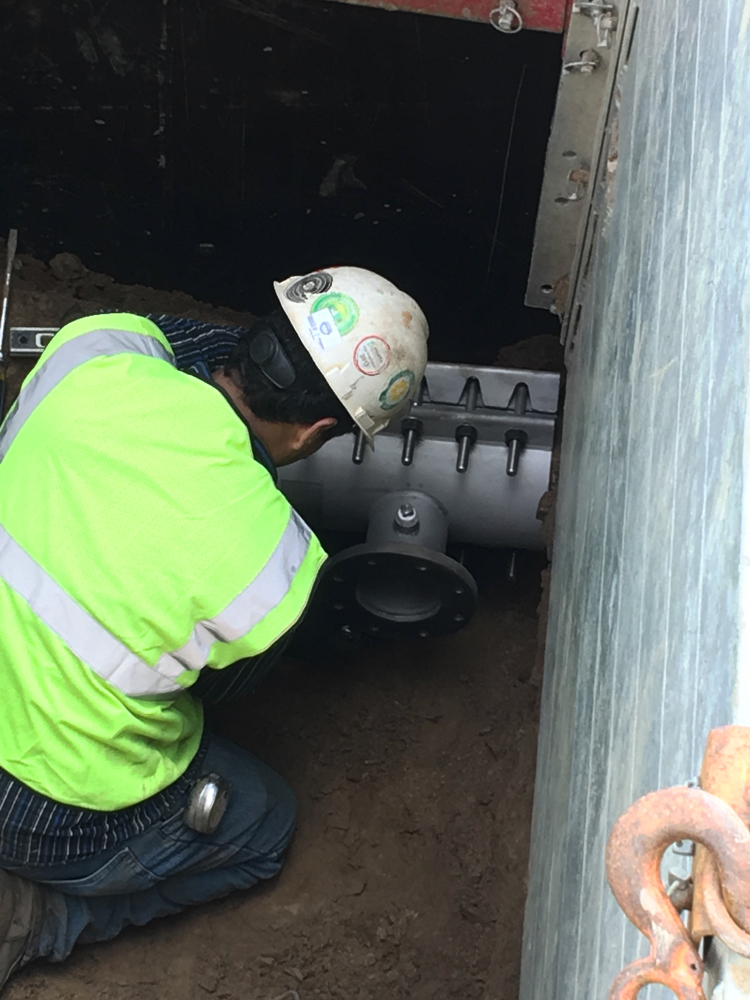
Securing the Utility Connection
Workers connect new underground piping with heavy flanged joints, ensuring a durable tie-in to the existing system.

Backfilling and Compaction
With the new utility line secured, the trench is backfilled and compacted, completing the underground repair and restoring stability to the work zone.
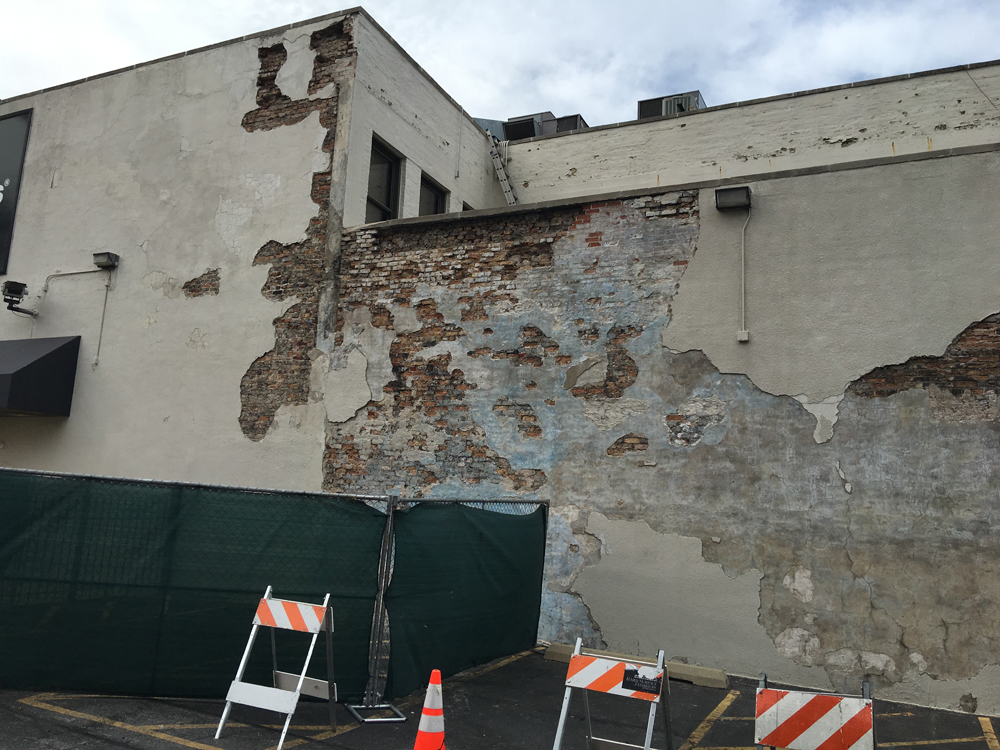
Damaged Exterior Wall
The building’s exterior shows large areas of failing plaster and exposed brick, with significant sections of masonry deteriorating and in need of repair.
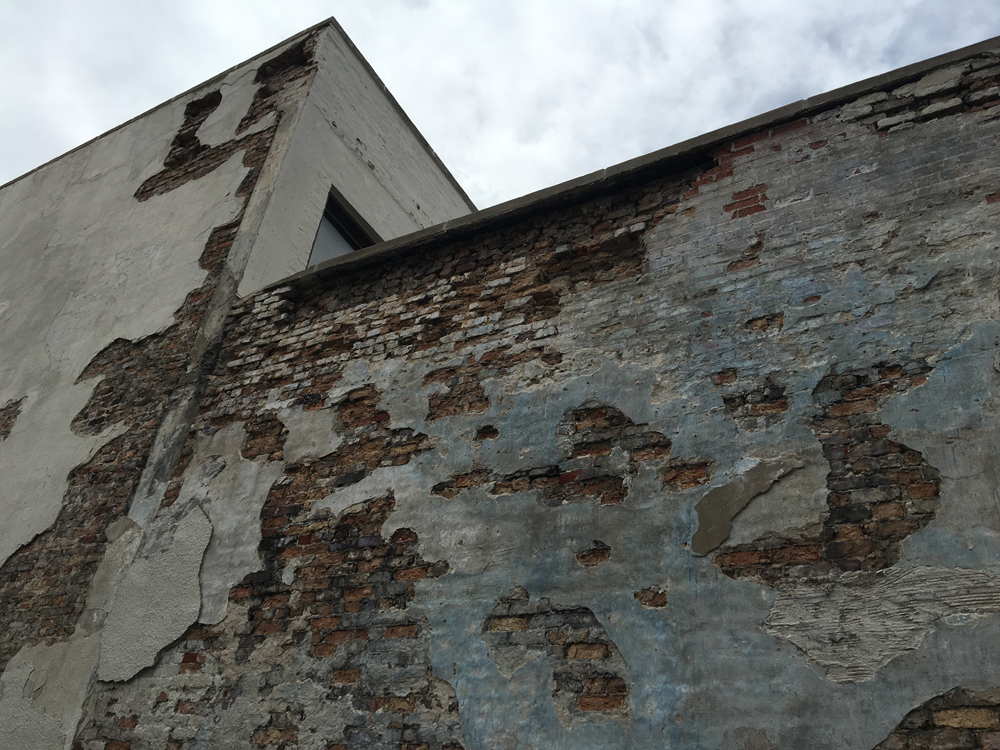
Close-Up of Deterioration
A detailed view highlights the extent of brick exposure and surface erosion, showing just how much of the façade has lost its protective finish.
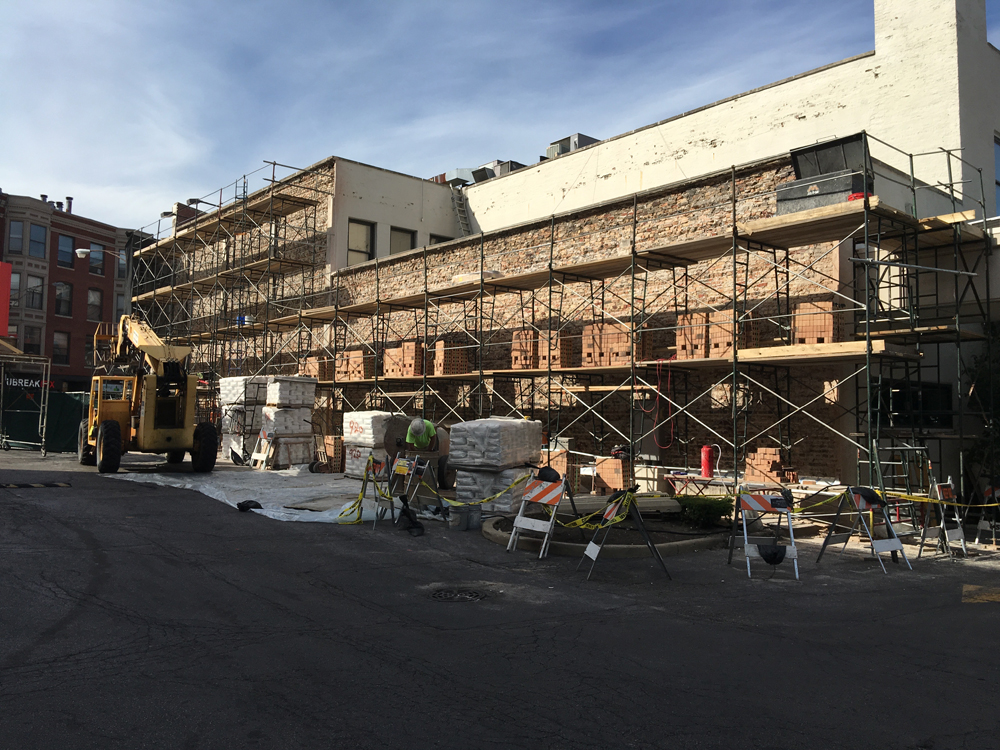
Scaffolding and Restoration Work
Scaffolding is erected along the building as crews prepare for brick replacement and façade restoration, with materials staged and workers on site.
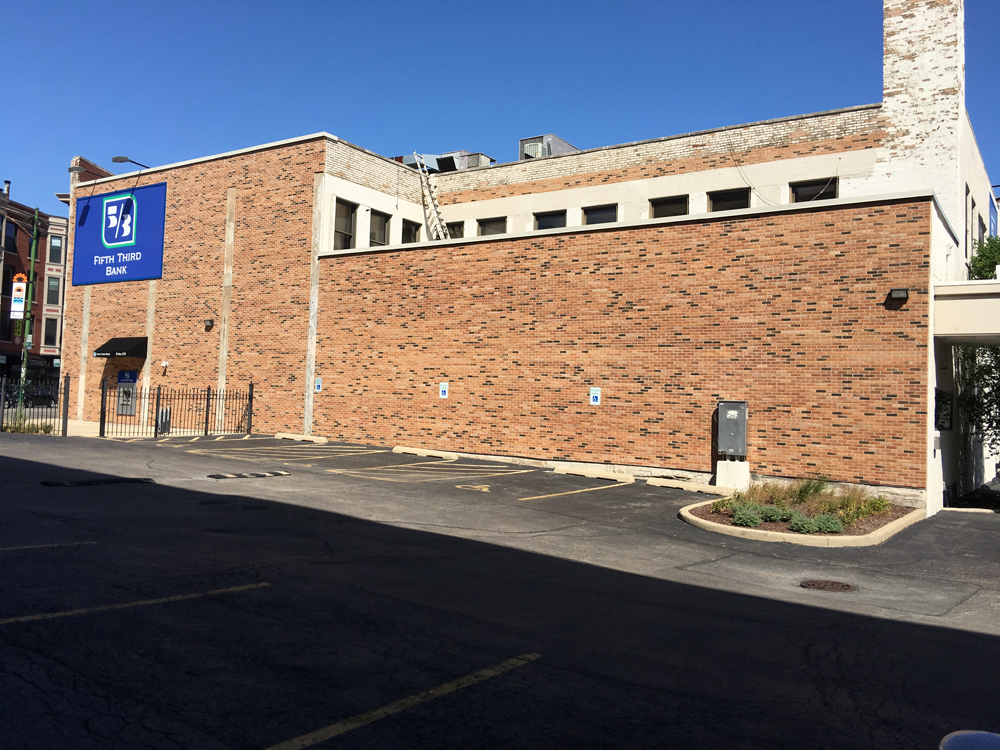
Completed Brick Façade
The exterior wall is fully restored with new brickwork, giving the building a clean, uniform appearance and ensuring long-term structural protection.
The specified gallery is trashed.
Damaged Facade with Temporary Security Board-up
The exterior of the bank has been securely boarded-up at high-speed vehicular impact location.
Close-Up of Wall Damage
A detailed view of the facade reveals the exposed interior structure and rebar after outer material broke away.

Exterior Wall Panel Failure
A large section of the exterior cladding has broken off from the upper facade, leaving underlying materials exposed and requiring urgent repair.
Completed Wall Restoration
The building facade is fully restored with new panels in place, blending seamlessly with the original structure.
The specified gallery is trashed.
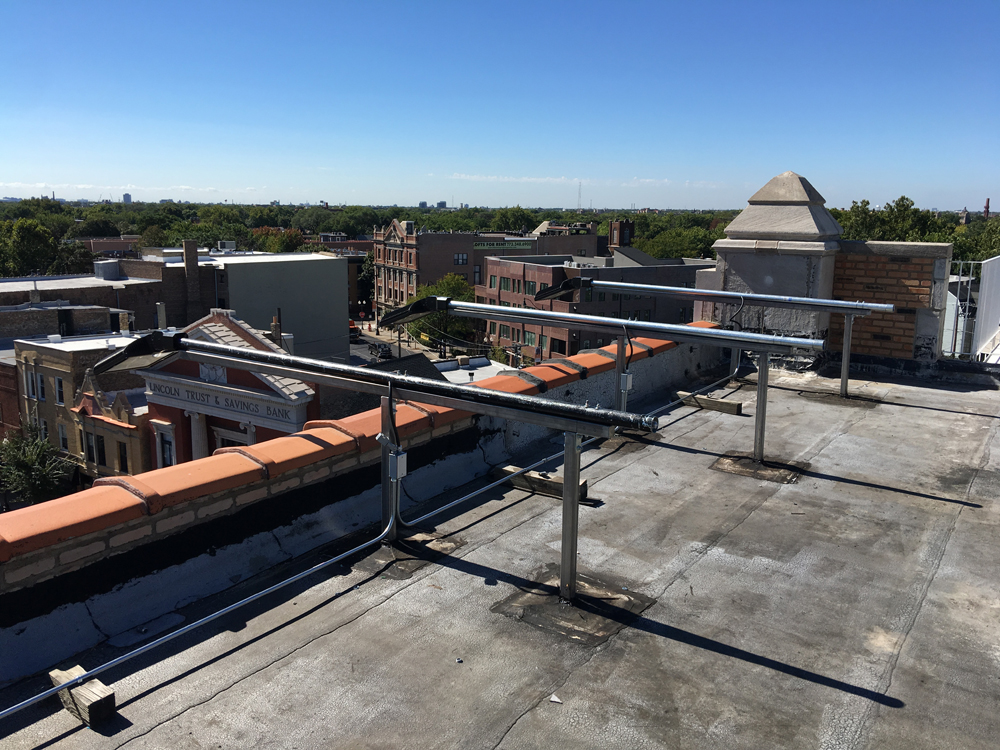
A New Redesigned Gutter System Required
Flashing system removed, and ready for the installation of a new gutter system with snowmelt capabilities.
Gutter System Supports
Structural support bracing being fabricated onsite and installed.
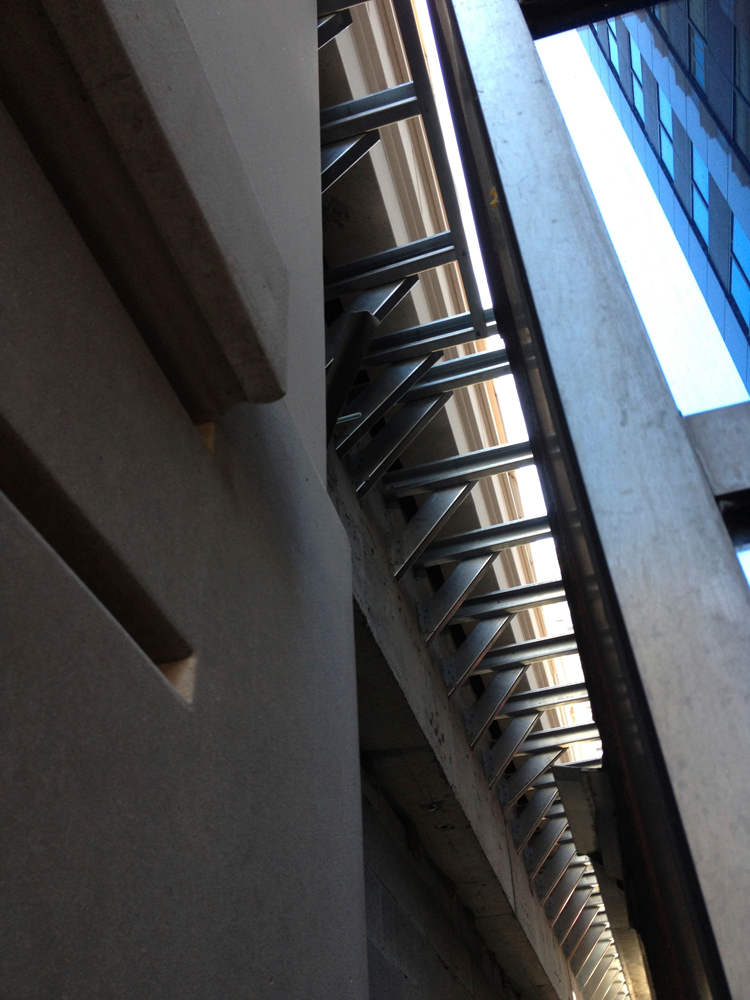
Structural Reinforcement
A closer look at the new steel framing support system within the precast wall panels.

Completed Gutter System
A new completed rain gutter system with snow melting capabilities. System added to mitigate water shed onto neighboring property.
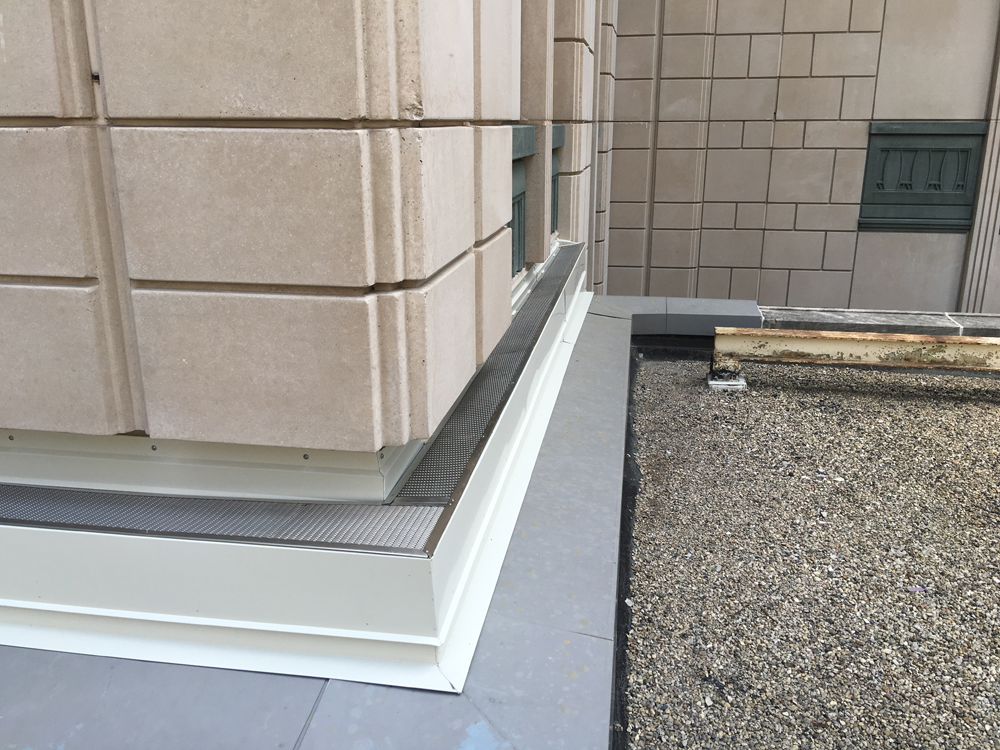
Completed Gutter and Wall Cavity Closure
Wall system is fully restored, with new finishes blindinghseamlessly into the buildings design and ensuring protection from the environmental elements.
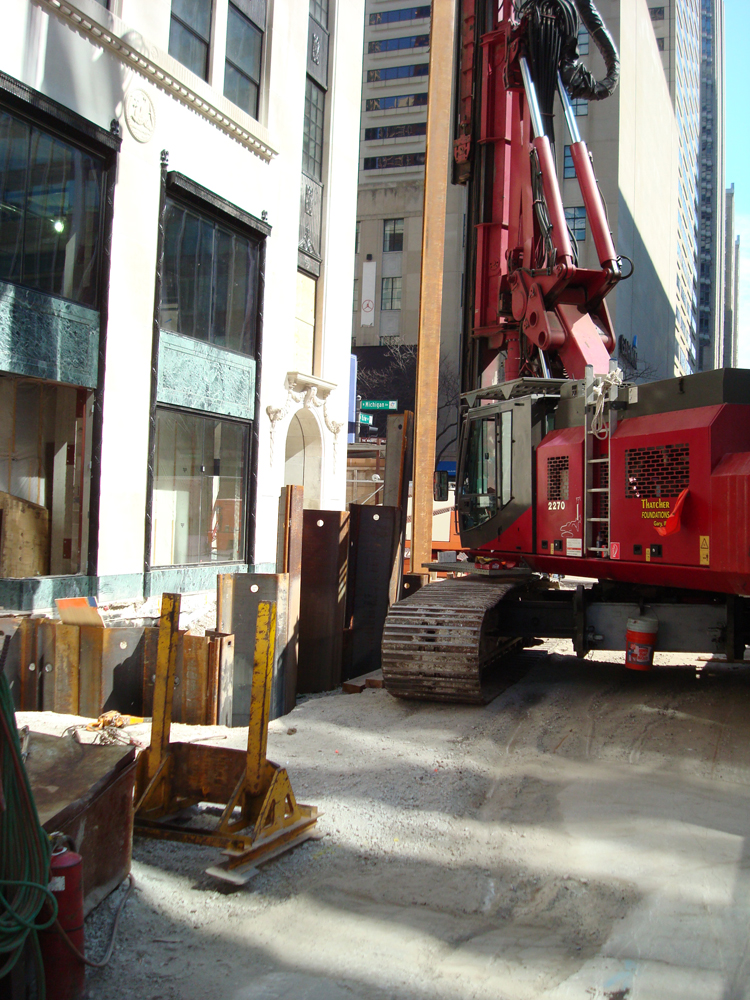
Installing Sheet Piles for Excavation Support
Heavy equipment drives sheet piles into the ground to create shoring walls, ensuring safe excavation and protecting surrounding structures.
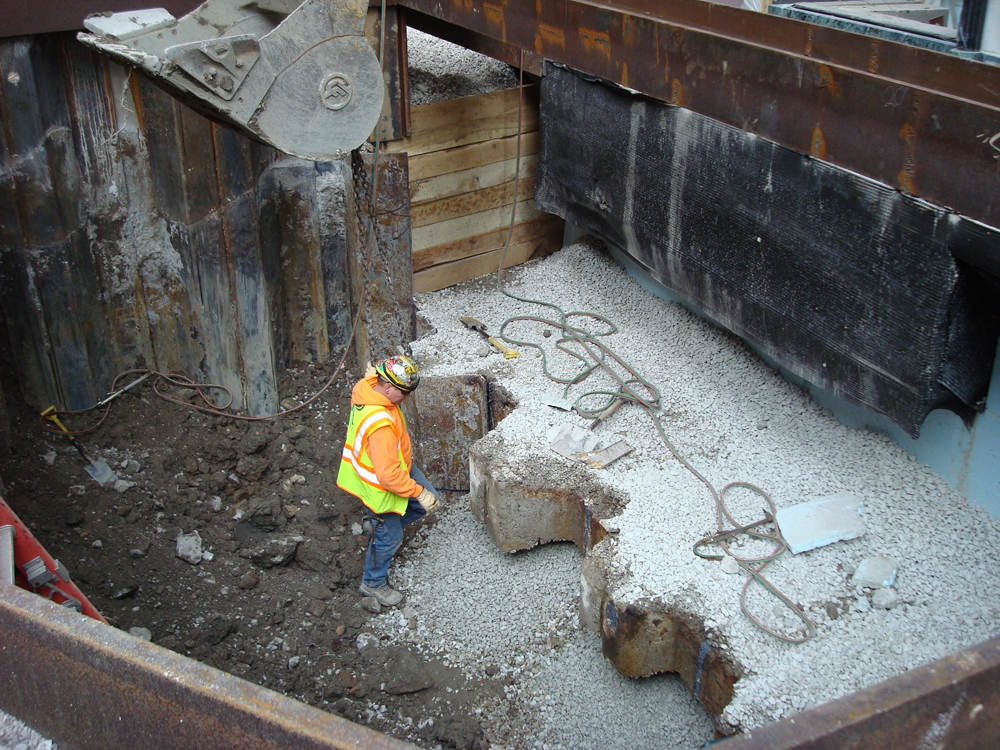
Excavation and Foundation Preparation
A worker oversees the removal of unearthed existing ground retention sheeting and loose material as the foundation pit is cleared and prepared for new construction.
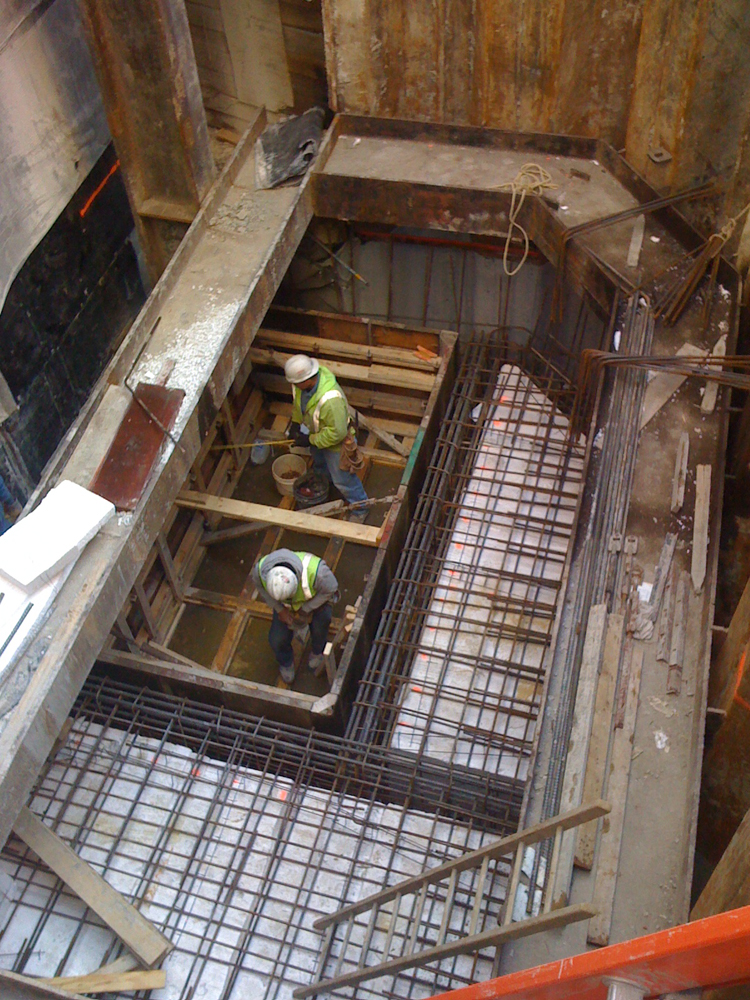
Rebar Framework for New Foundation Walls
Reinforcement steel is carefully tied and set in place, creating a strong framework for the new structural foundation walls.
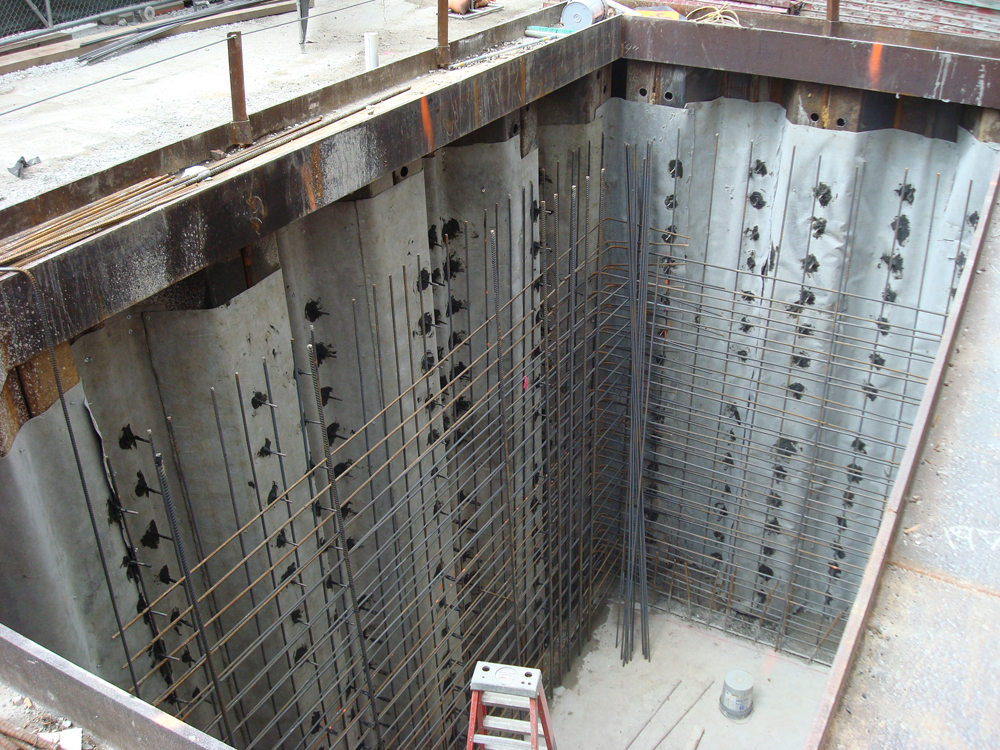
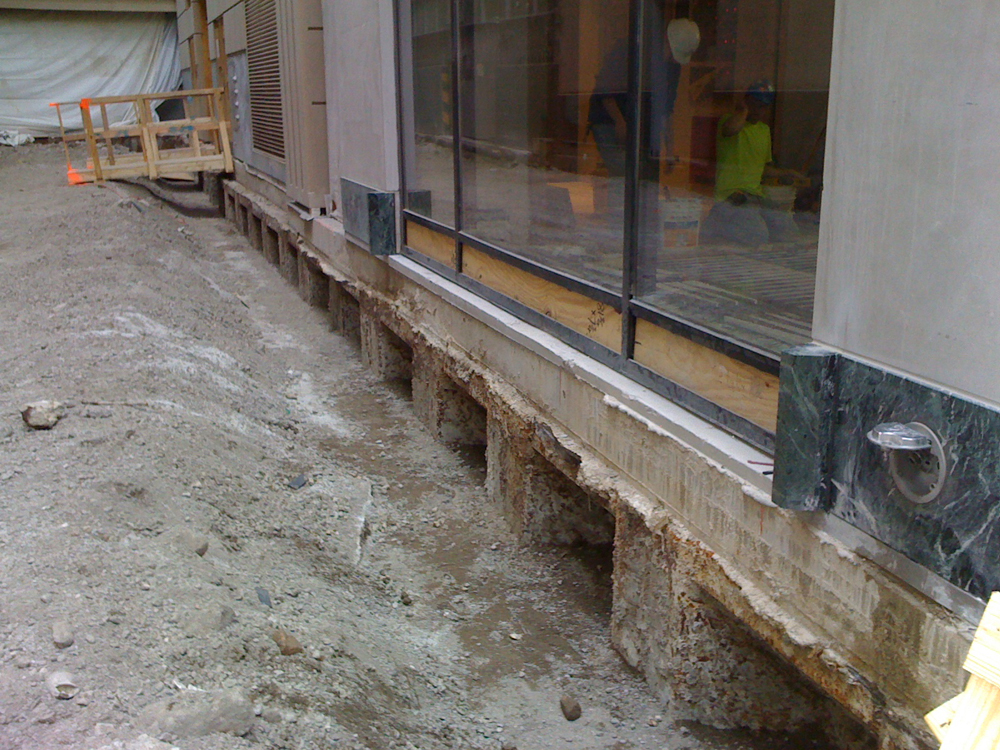
Foundation Wall Reinforcement and Waterproofing System
Foundation wall reinforcement bars installed along the ground retention sheeting ensuring long-term structural stability of the new elevator shaft and elevator machine room walls.

Foundation Slab and Formwork
Concrete slabs and formwork are shaped within the excavation, forming the structural base that will support the building’s new systems.
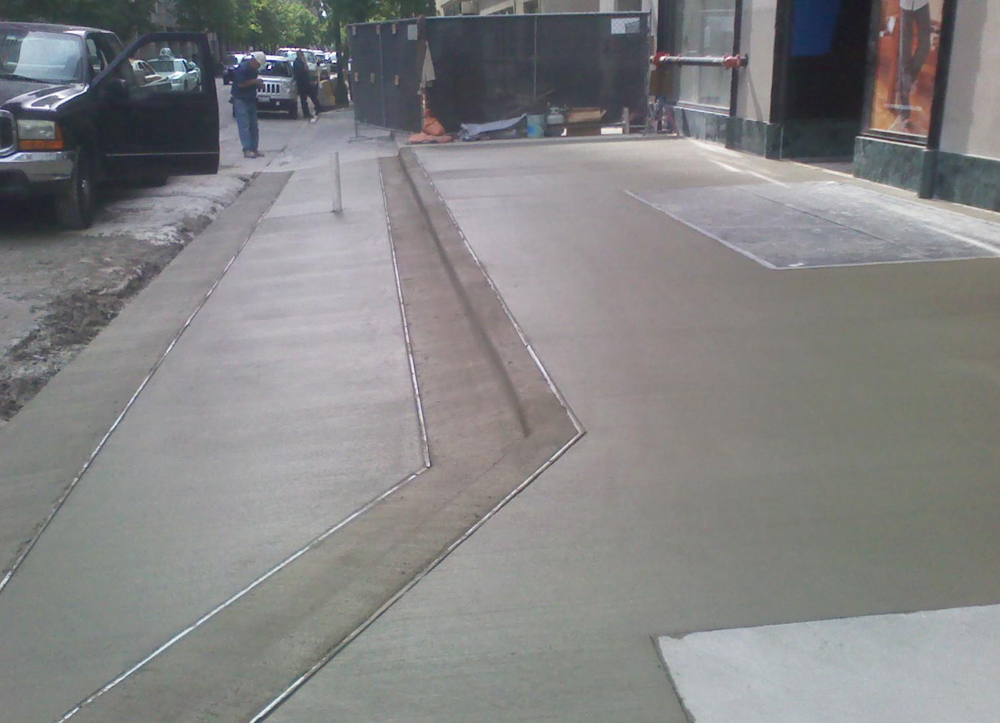
New Concrete Sidewalk Installation
Fresh concrete is poured and finished to create a smooth new sidewalk surface above the completed foundation work.
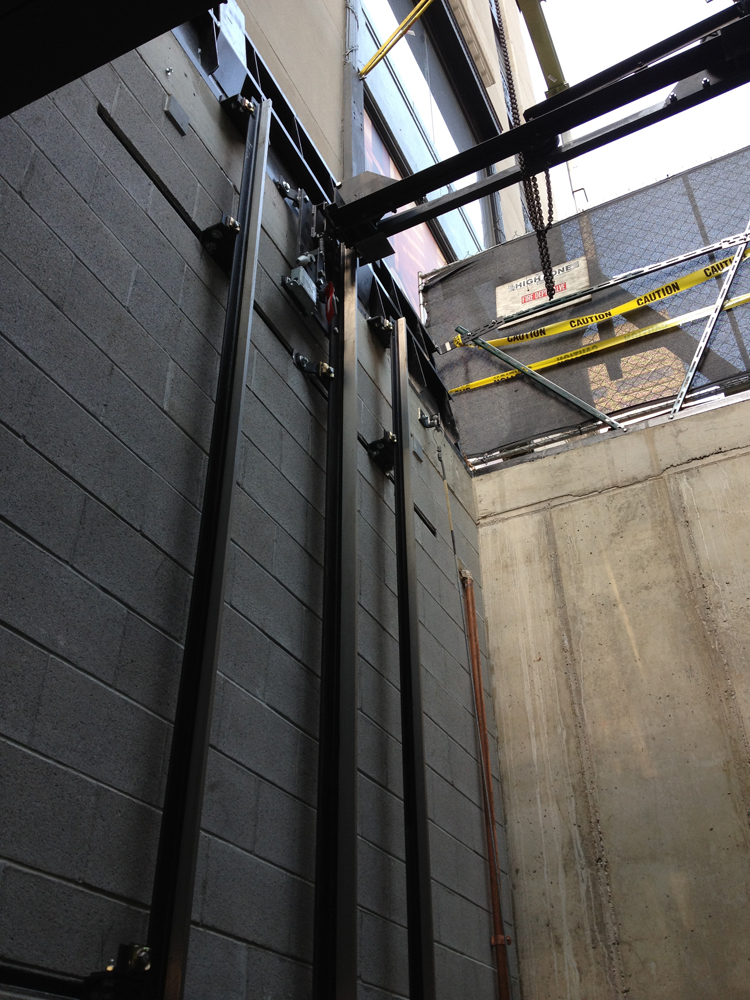
Elevator Shaft Construction
Steel guide rails are installed within the concrete elevator shaft, providing alignment and support for the future lift system.
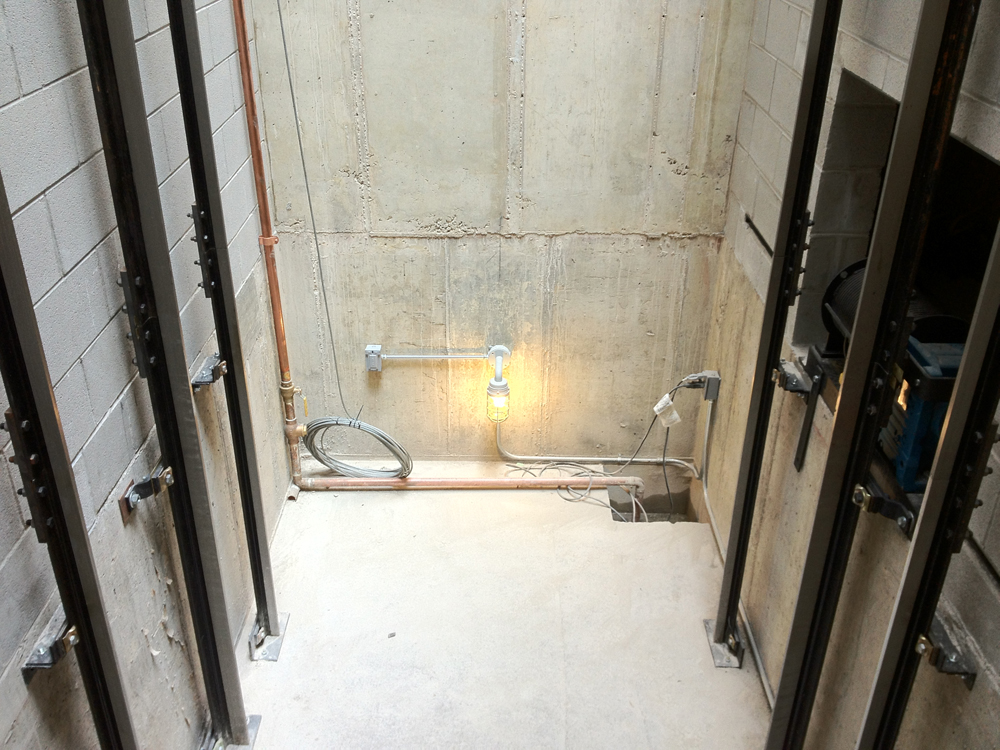
Interior of Completed Elevator Shaft
The finished elevator pit and shaft interior show final detailing, including conduit, piping, and lighting ready for equipment installation.
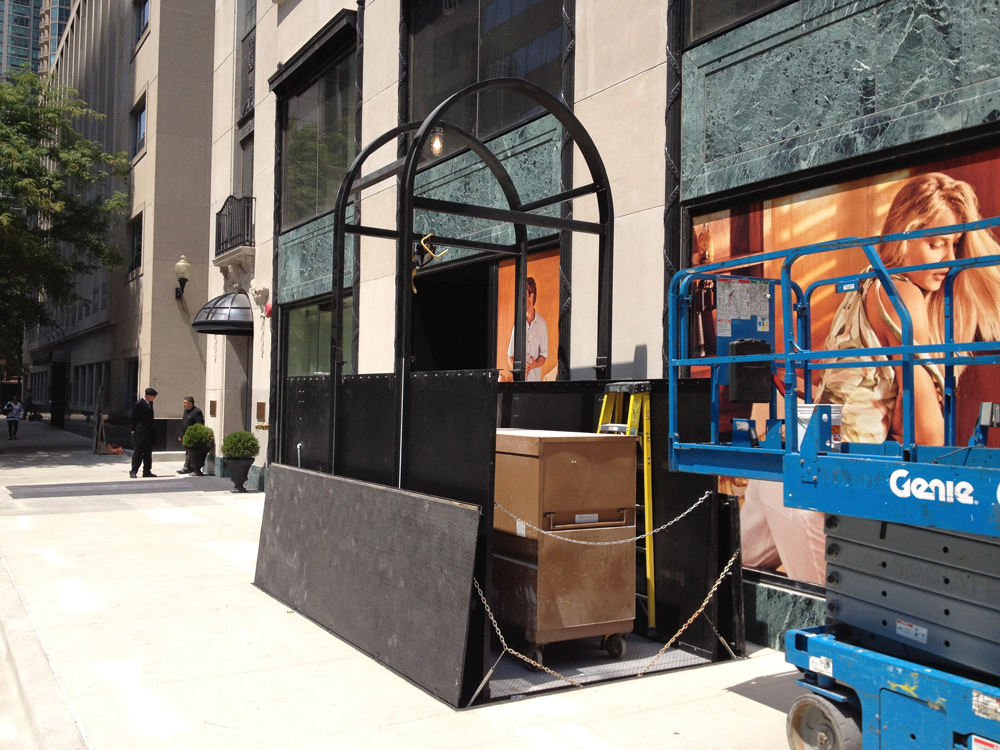
Finished Sidewalk Elevator
The permanent sidewalk elevator shown bringing construction equipment to street level from building basement.
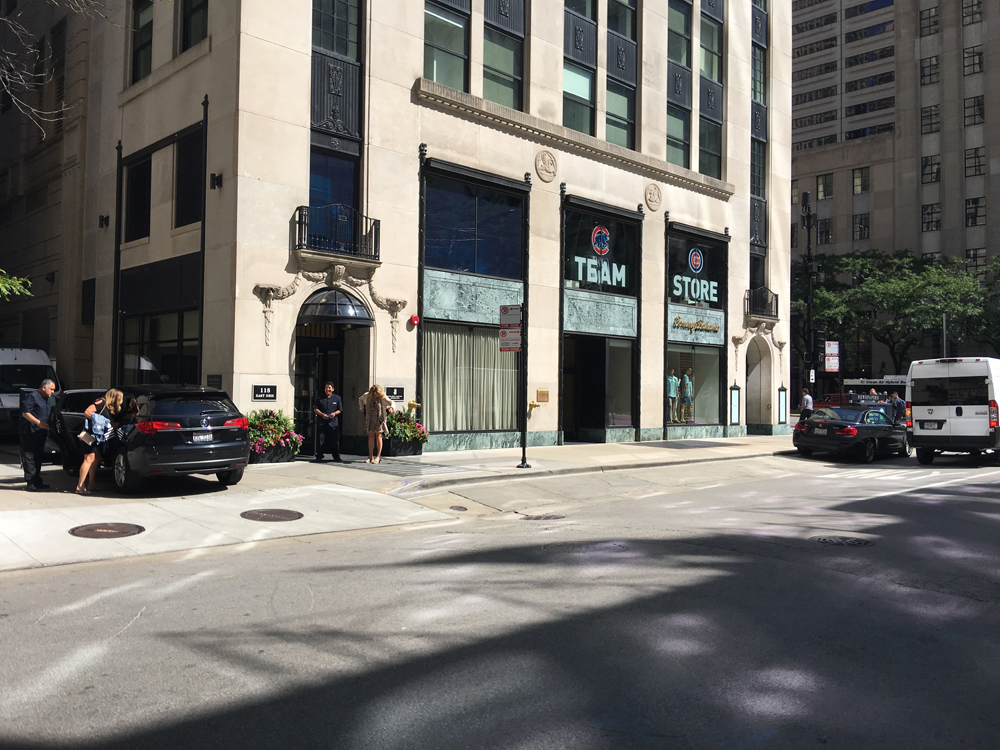
Restored Storefront and Completed Sidewalk Elevator Project
The finished project showcases a fully restored exterior and new storefront, blending seamlessly with the surrounding historic architecture.
Excavation Exposing Existing Ground Retention System
Building foundation and ground retention system wall is exposed, revealing the areas requiring modifications prior to placement of new concrete.
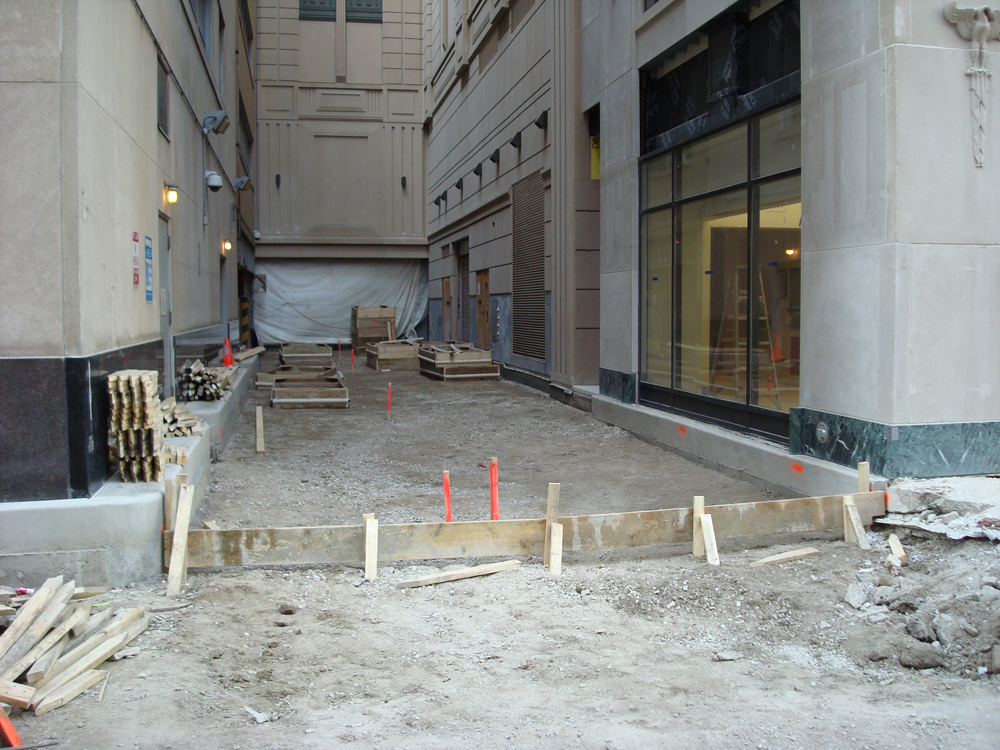
Excavation Along Alleyway
The construction area is cleared, with wooden forms placed in preparation for fresh concrete to reshape the alleyway and service drive.

Concrete Placement in Forms
Concrete is poured into multiple framed sections across the alley, reinforcing the ground and preparing the surface for heavy use.
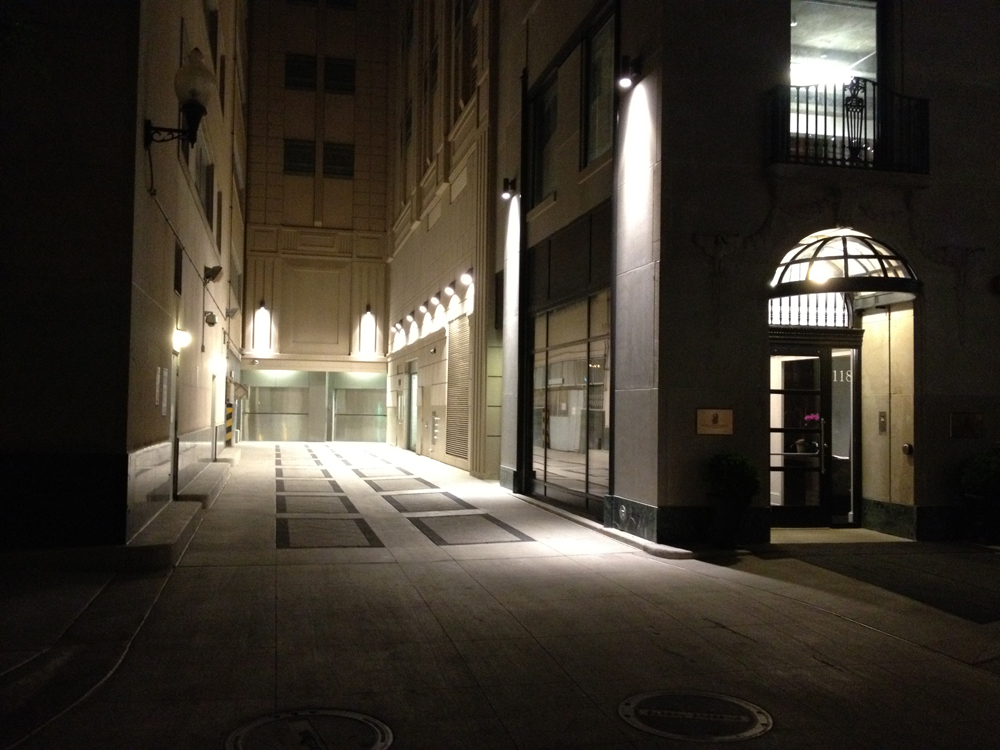
Finished Alleyway at Night
The new alleyway is complete, featuring new concrete paving, concrete paver system, integrated lighting, and a clean finish for safe nighttime use.
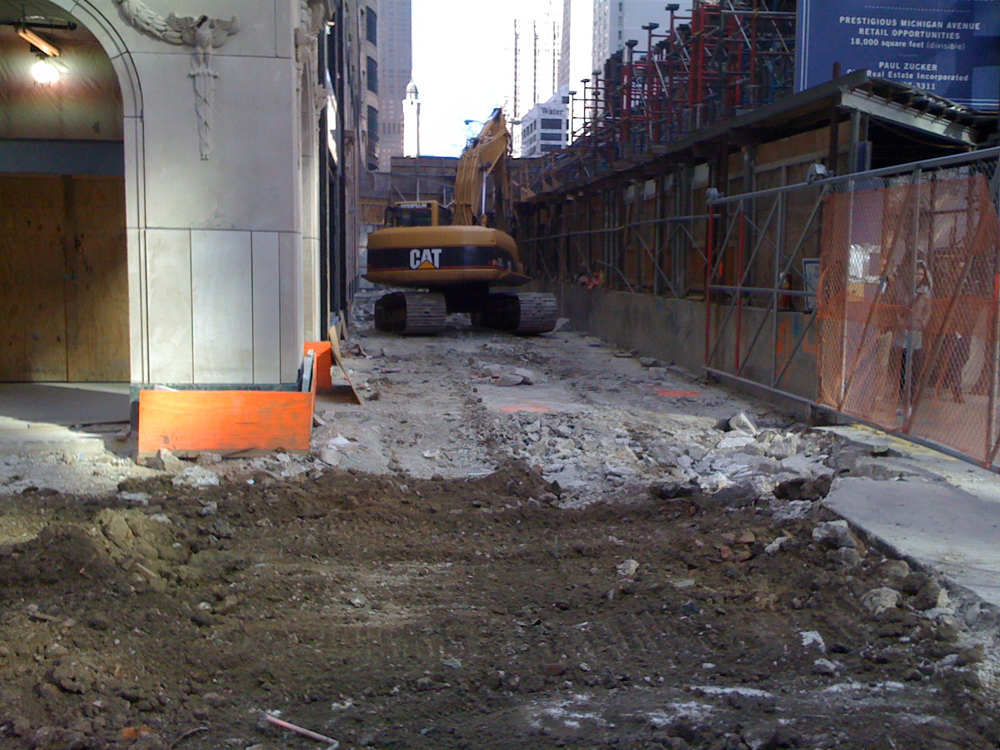
Sidewalk Demolition
Old sidewalk concrete is demolished with heavy machinery, breaking down worn and damaged sections for complete replacement.
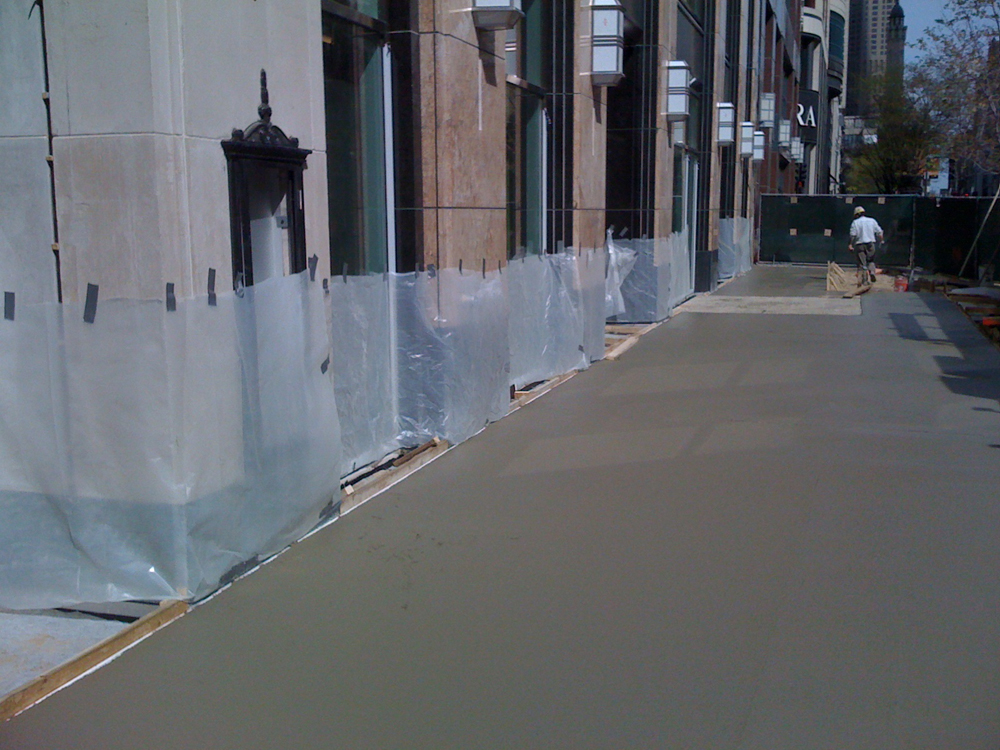
Fresh Sidewalk Pour Along Façade
Plastic coverings protect the building exterior as new concrete sidewalks are poured and smoothed along Michigan Avenue.
Sidewalk Framing and Crew Work
Construction crews set wooden frames and prepare the ground for additional sidewalk pours, ensuring precise alignment and finish.
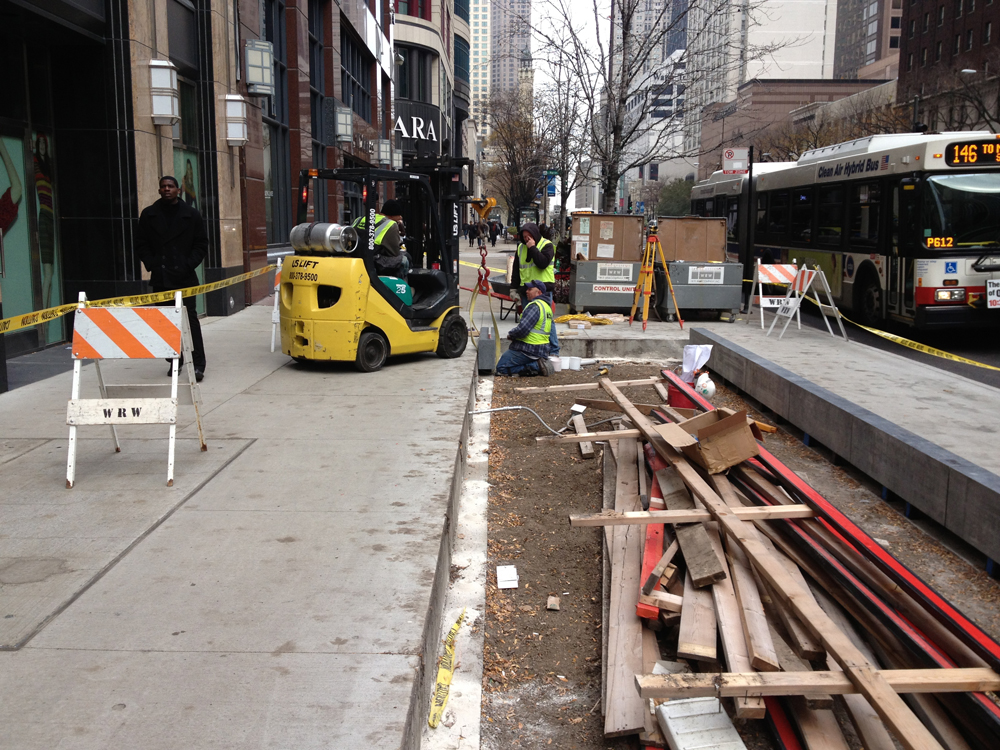
Site Work with Forklift Support
A forklift and crew prepare materials and utilities along the sidewalk, coordinating installation and ensuring site safety.
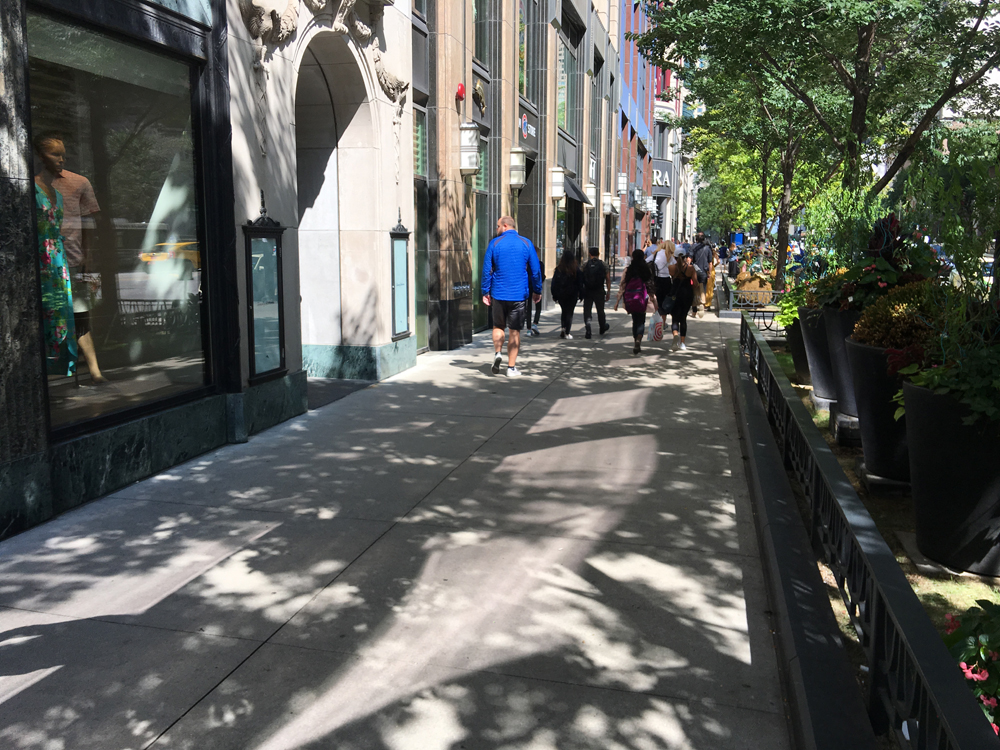
Completed Sidewalk View
The newly completed sidewalks are open to the public, providing a clean, smooth surface with improved pedestrian access.
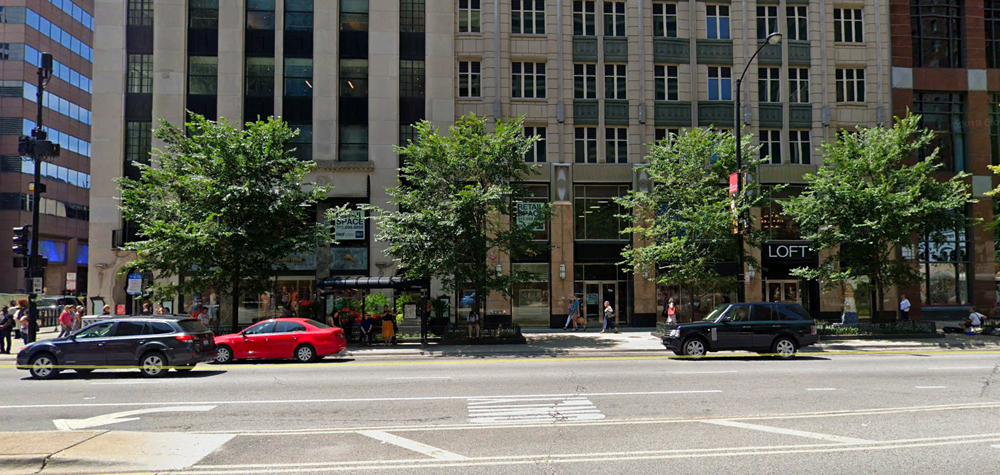
Restored Streetscape
The final view showcases the completed building and streetscape, with fresh sidewalks, landscaping, and restored storefront presence along Michigan Avenue.
The specified gallery is trashed.

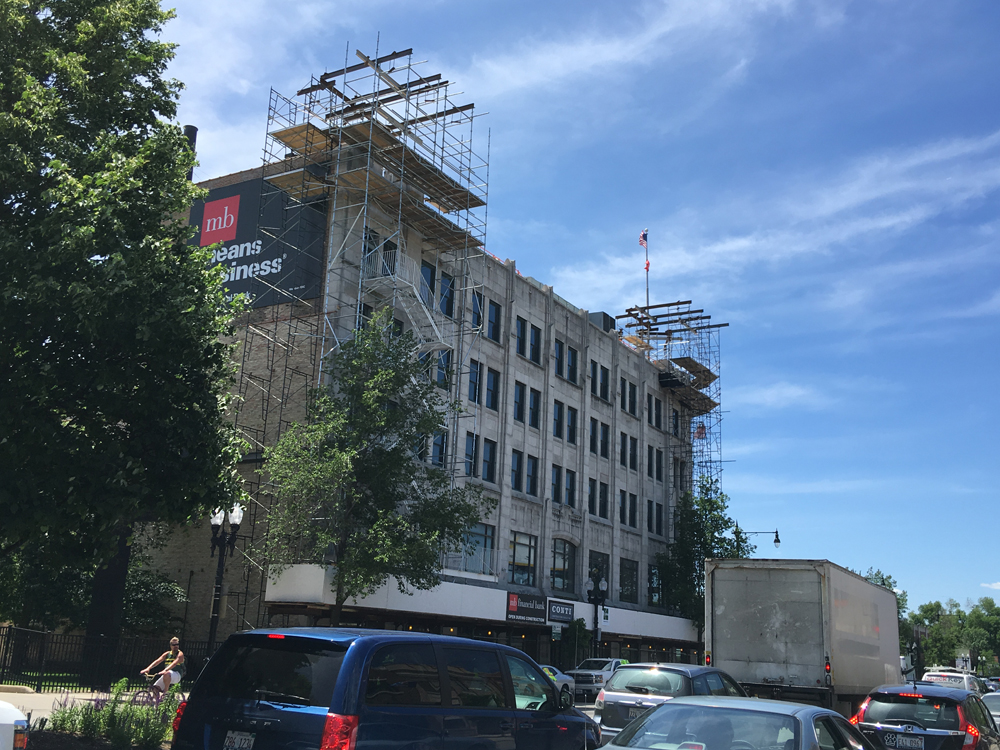
Scaffolding Setup
Scaffolding and equipment are staged along the side of the building, preparing the work area for masonry repairs.
Roof Access Preparation
Workers and equipment are assembled on the roof, with safety barriers in place to allow for the start of demolition and repair.
Exposed Parapet Wall
New parapet wall being reconstructed.
Full Building Scaffold
The building’s corner is fully enclosed in scaffolding to provide access for comprehensive façade and parapet repairs.
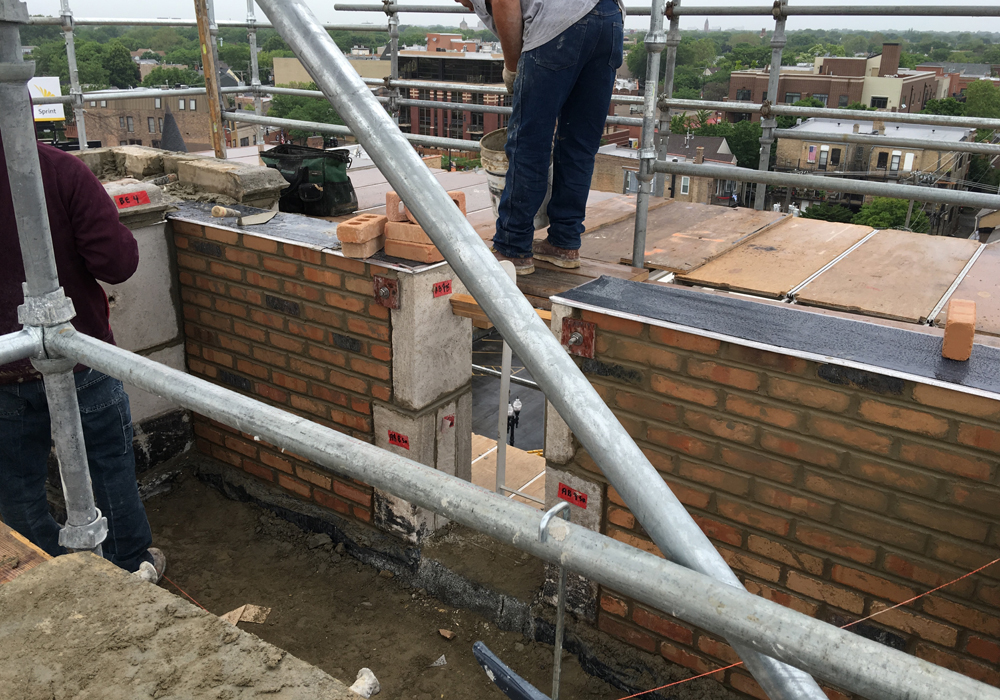
Parapet Reconstruction
Workers rebuild the parapet wall with new brick, restoring the structure and reinforcing its integrity.
Brickwork Reinforcement
Metal wall ties secure original limestone panels to the new brick backing, ensuring stability and long-term durability of the parapet repair.
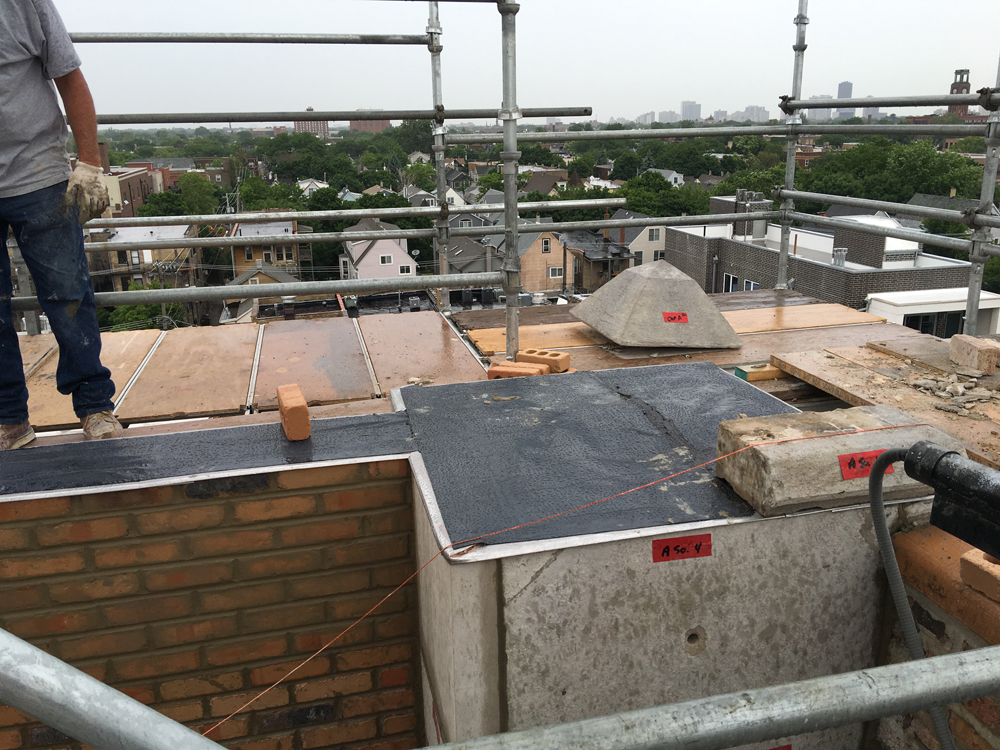
Capstone Reset and Waterproofing
Crews install waterproofing underlayment and begin resetting the heavy stone caps, which protect the parapet from future weather damage.
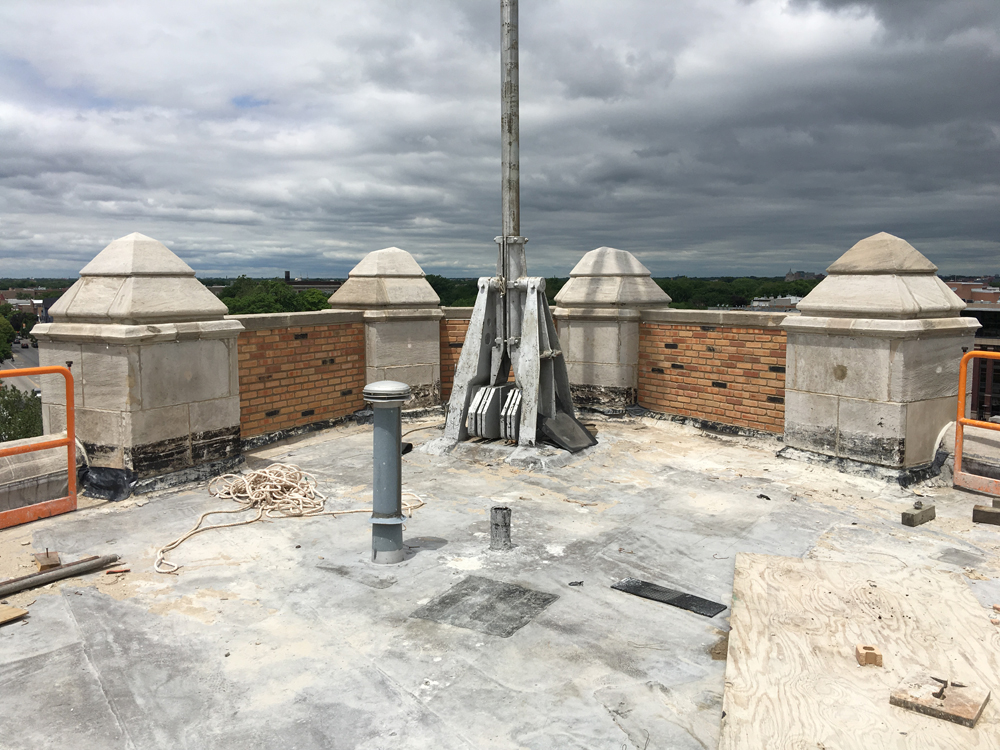
Completed Parapet Reconstruction
The parapet is fully rebuilt with new brick and reset stone caps, restoring both structural safety and architectural character. Ready for roofing system tie-ins and final cleaning.
Electrical and Support Work
New rooftop conduit and supports are installed alongside the masonry repairs, modernizing the infrastructure while preserving the building.
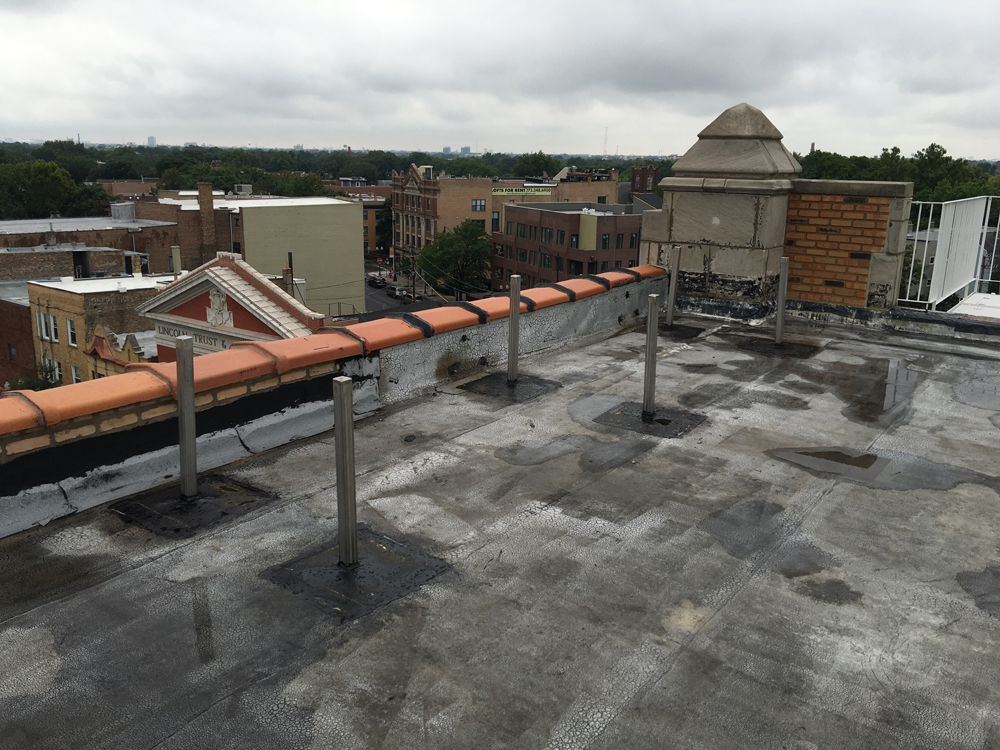
Final View of Restored Roofline
The completed roofline shows rebuilt parapets, reinstalled stone caps, and updated rooftop systems, completing the restoration project.
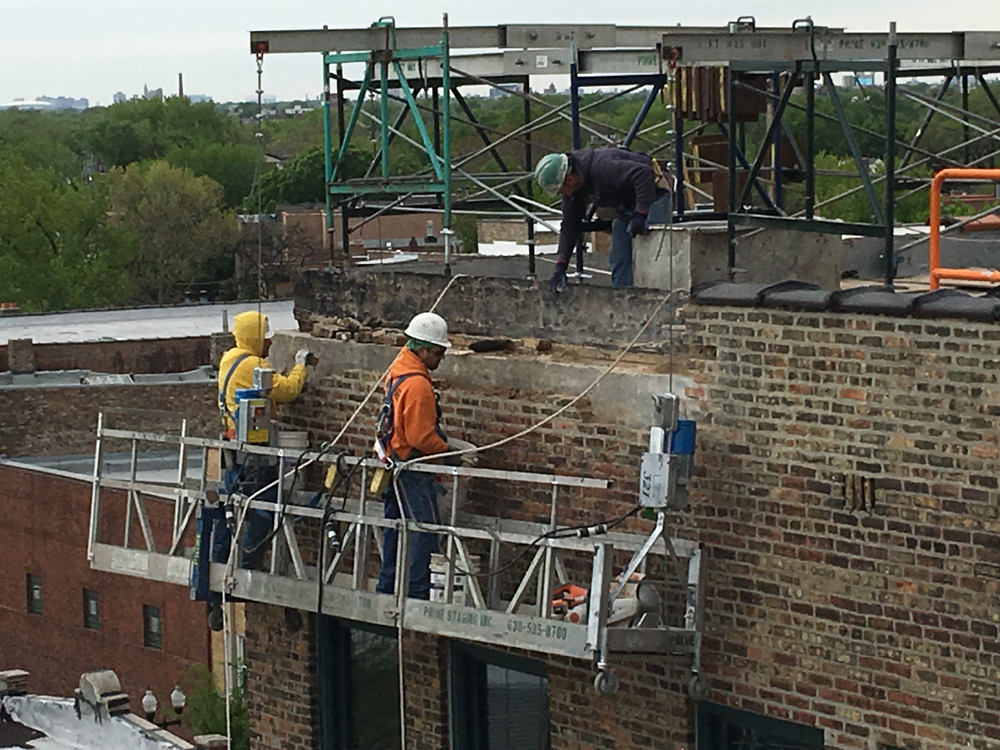
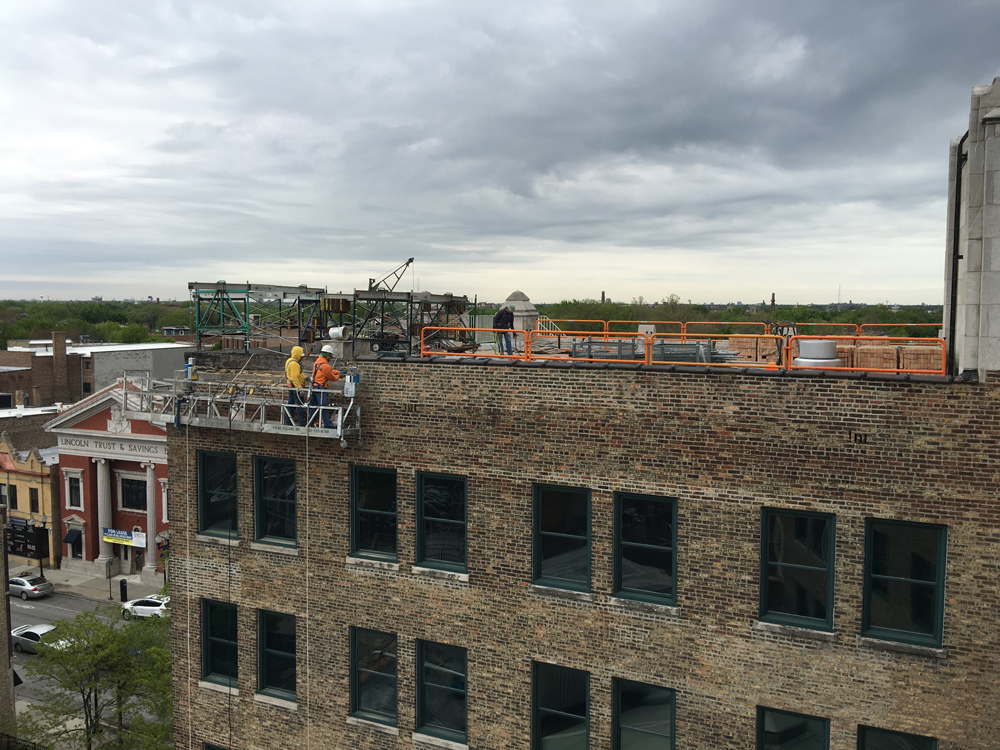
Masonry Repairs in Progress
Workers on suspended scaffolding begin dismantling deteriorated brickwork at the top of the building, preparing the structure for rebuilding.
Exposed Wall Section for Repair
Damaged and weathered masonry is revealed along a vertical wall, ready for tuckpointing and replacement of compromised units.
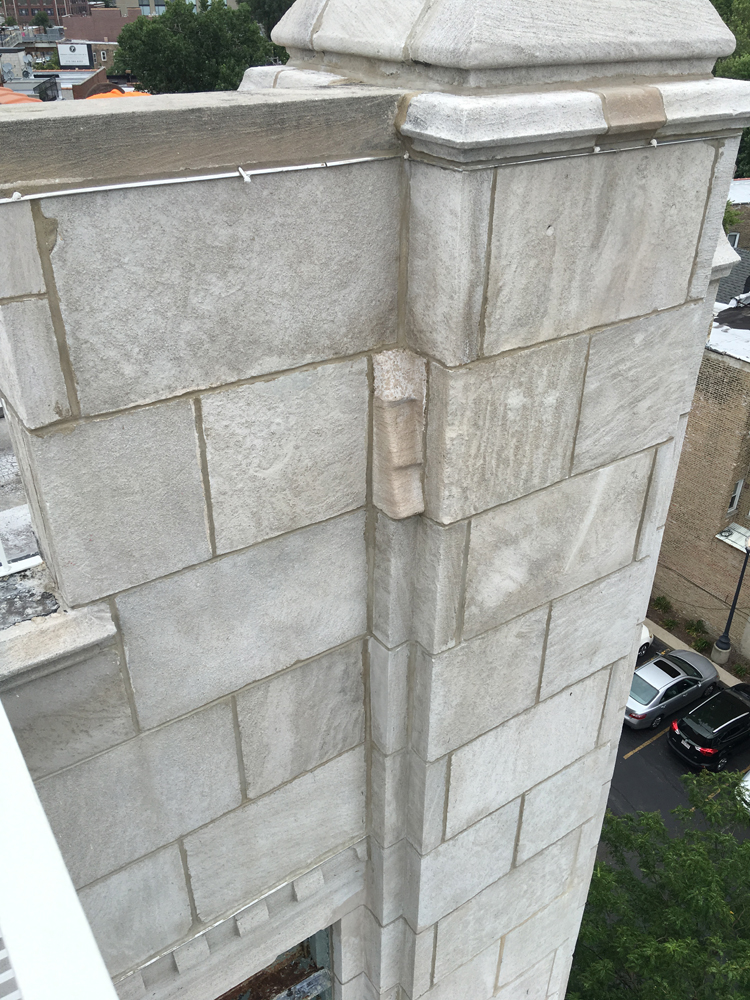
Finished Stonework Detail
A close view of completed stone repairs shows the cleaned and repointed masonry, blending seamlessly with the original structure.
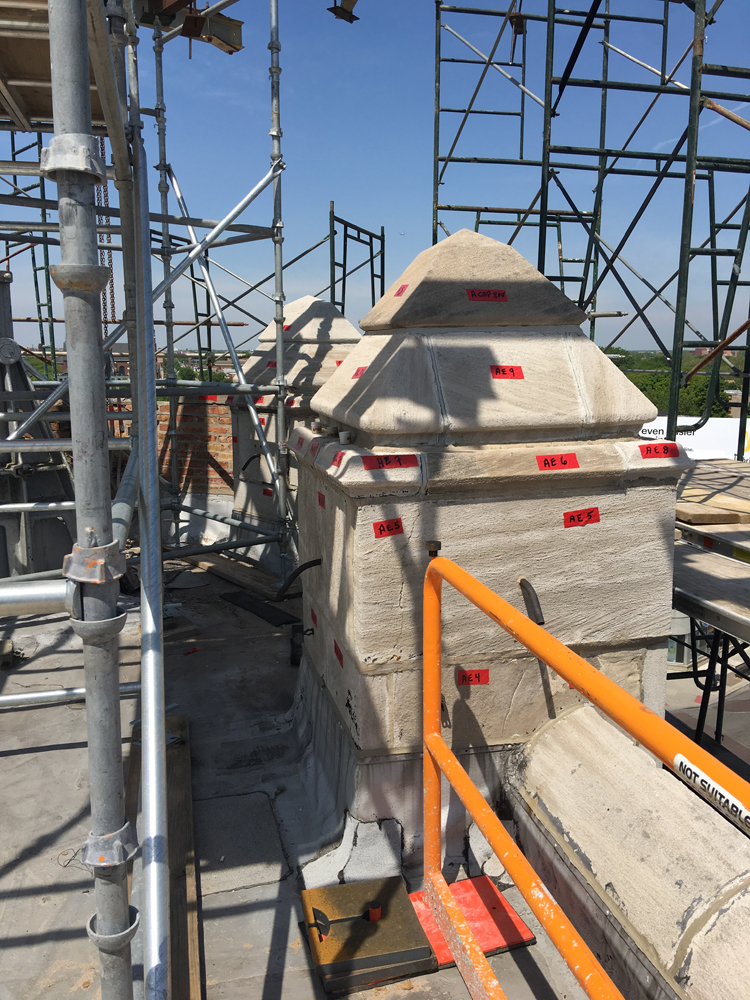
Stone Elements Tagged for Repair
Ornamental stone features at the roofline are labeled and documented, ensuring each piece is addressed during the restoration.
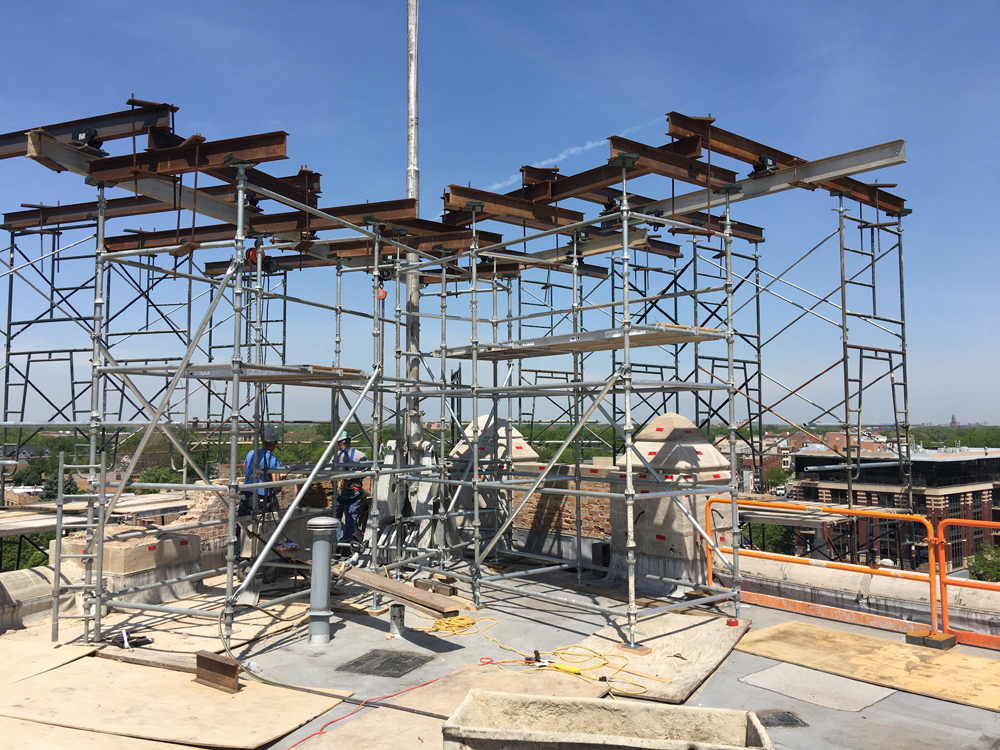
Scaffolding Structure Installed
A large scaffolding system is erected to provide safe access and support for extensive masonry and stone repair work at roof level.
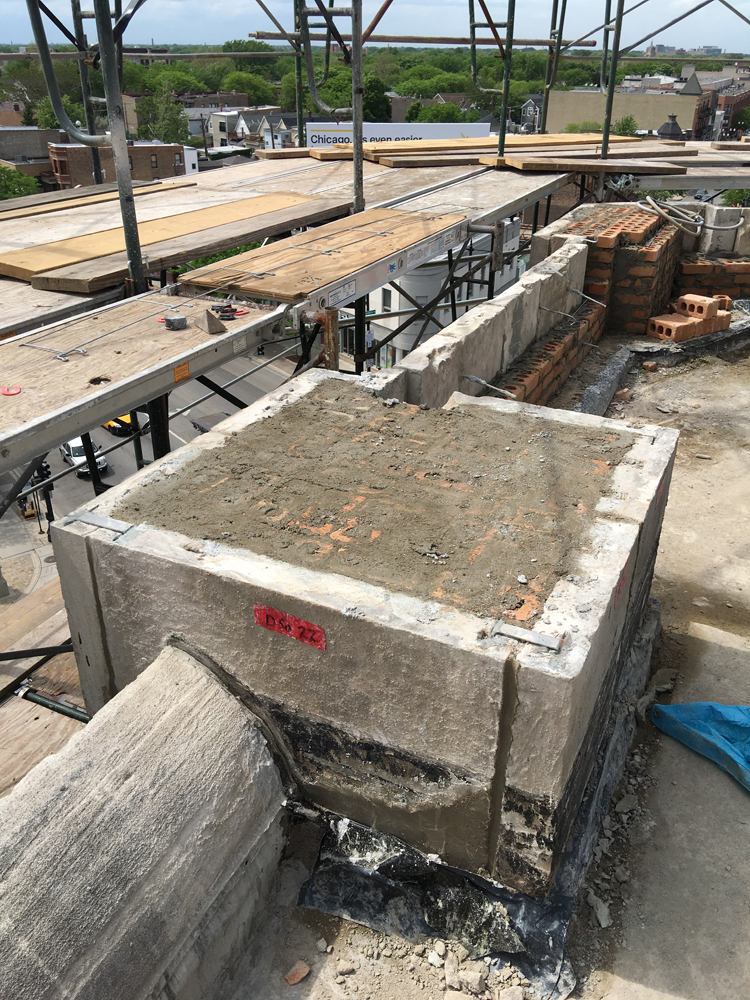
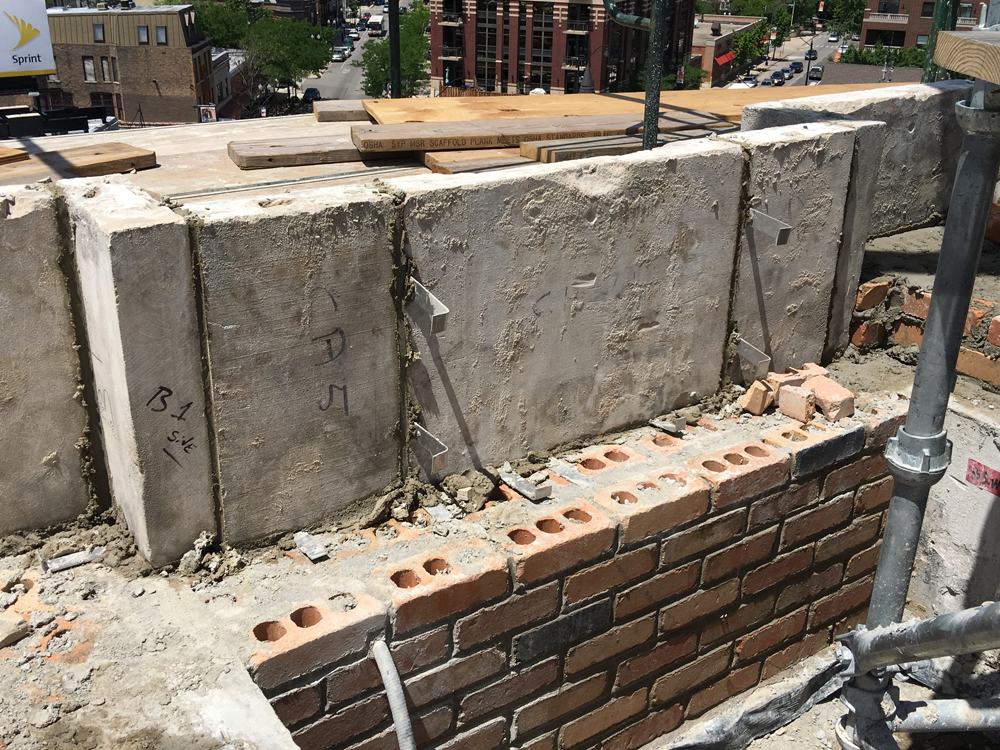
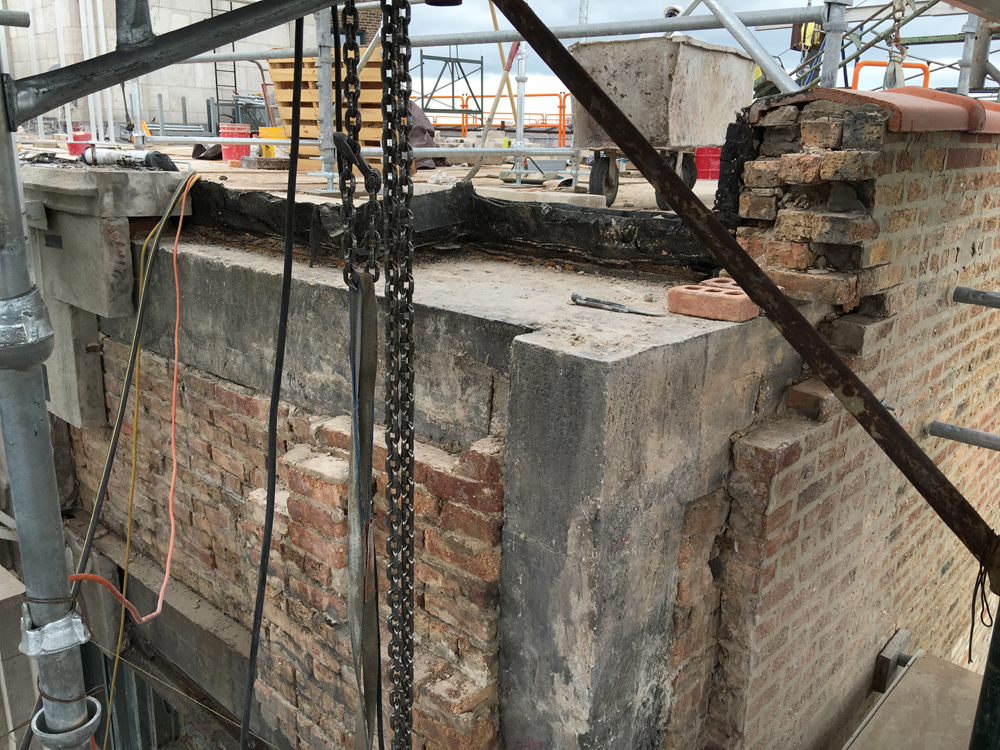
Concrete and Brick Base Prepared
The top of a parapet pier is cleared and capped with fresh concrete, stabilizing the structure before new materials are added.
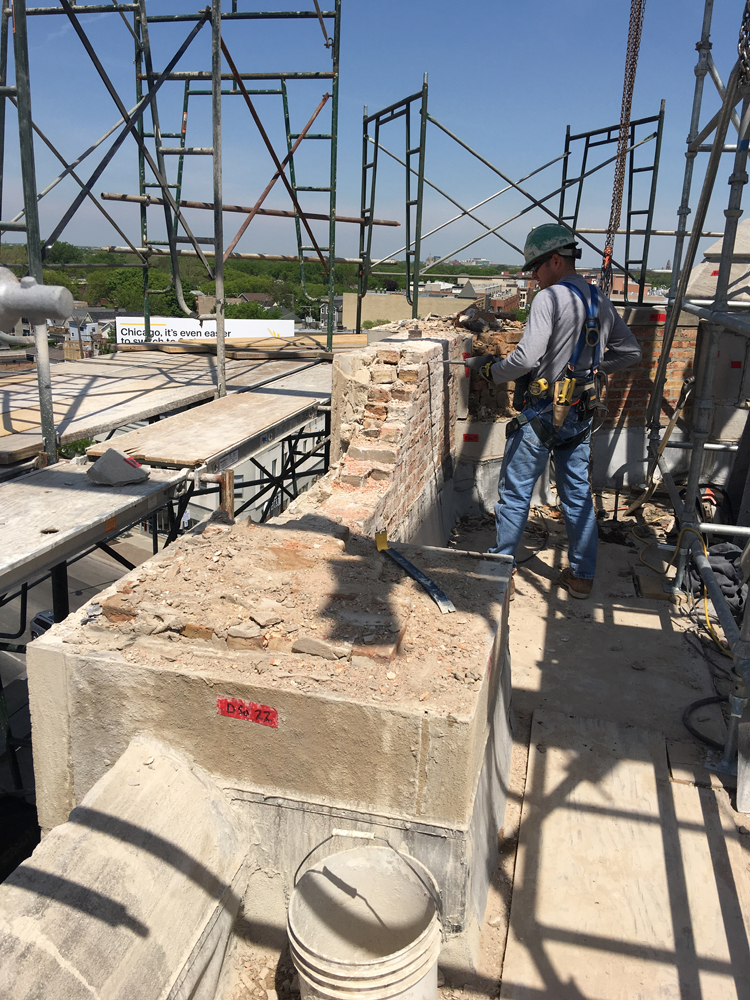
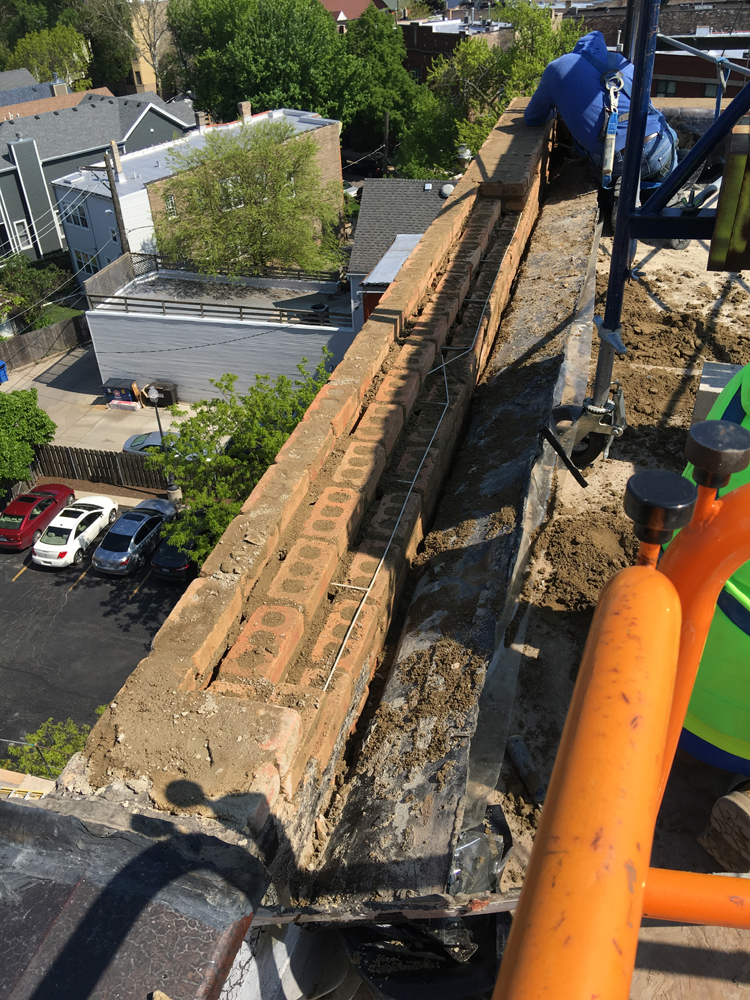
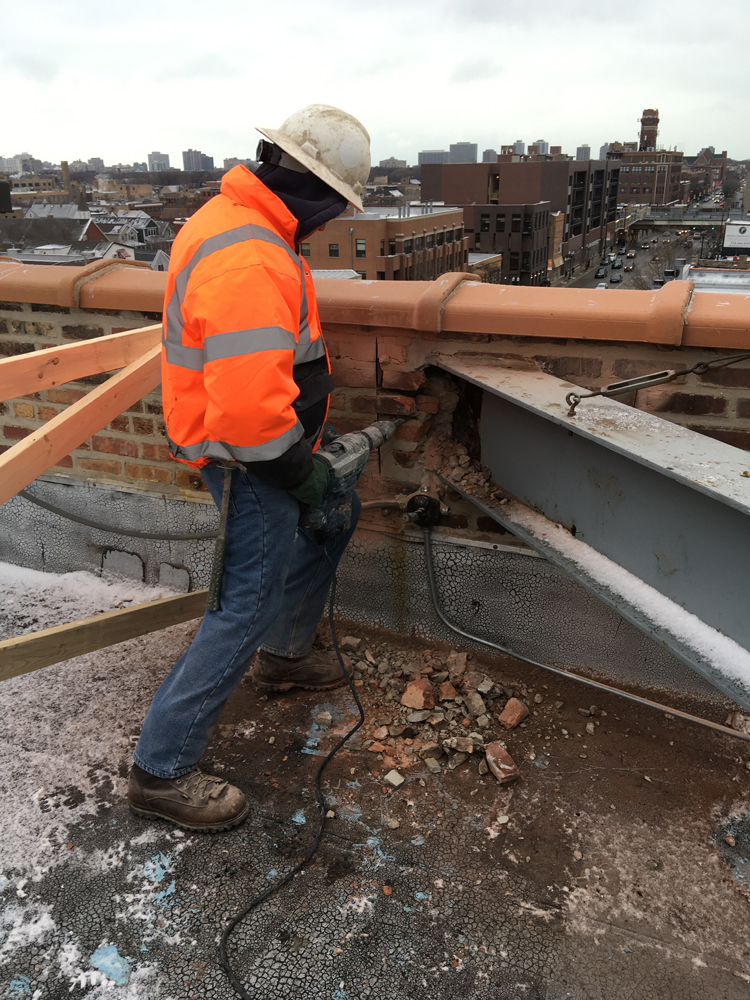
Careful Brick Removal
A craftsman removes damaged brick from the upper parapet wall, exposing the underlying structure for stabilization.
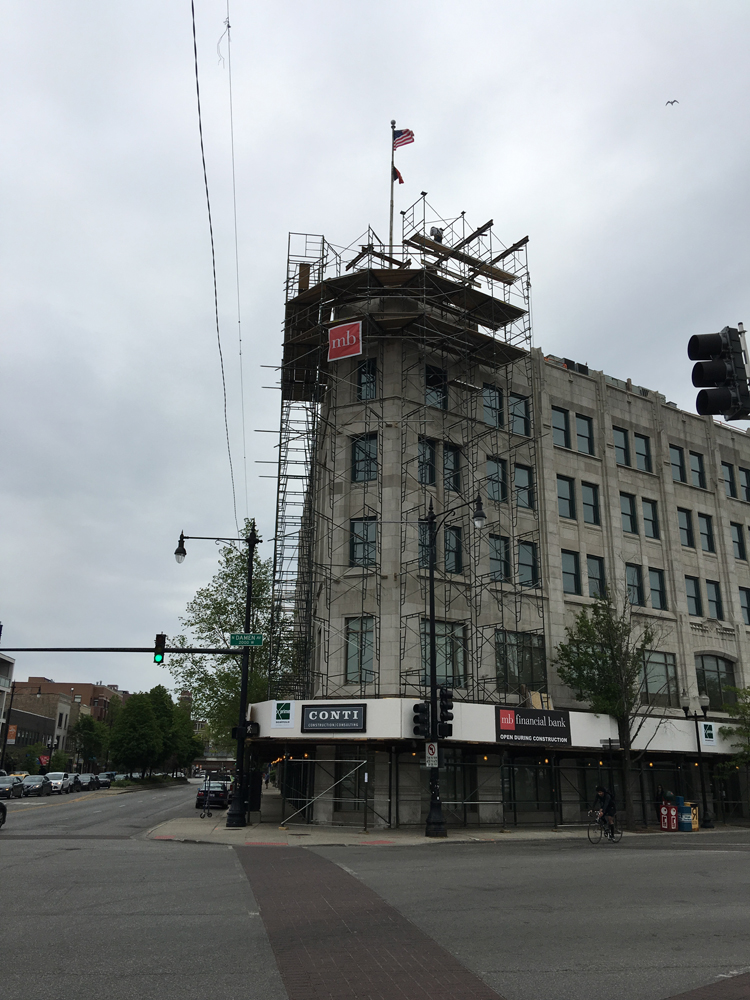
Full Building Under Scaffolding
The exterior of the building is enveloped in scaffolding, indicating large-scale masonry and stone restoration across the façade.
Rebuilding with New Brickwork
Fresh brick is laid into place alongside existing stone units, integrating new materials into the restored parapet wall.
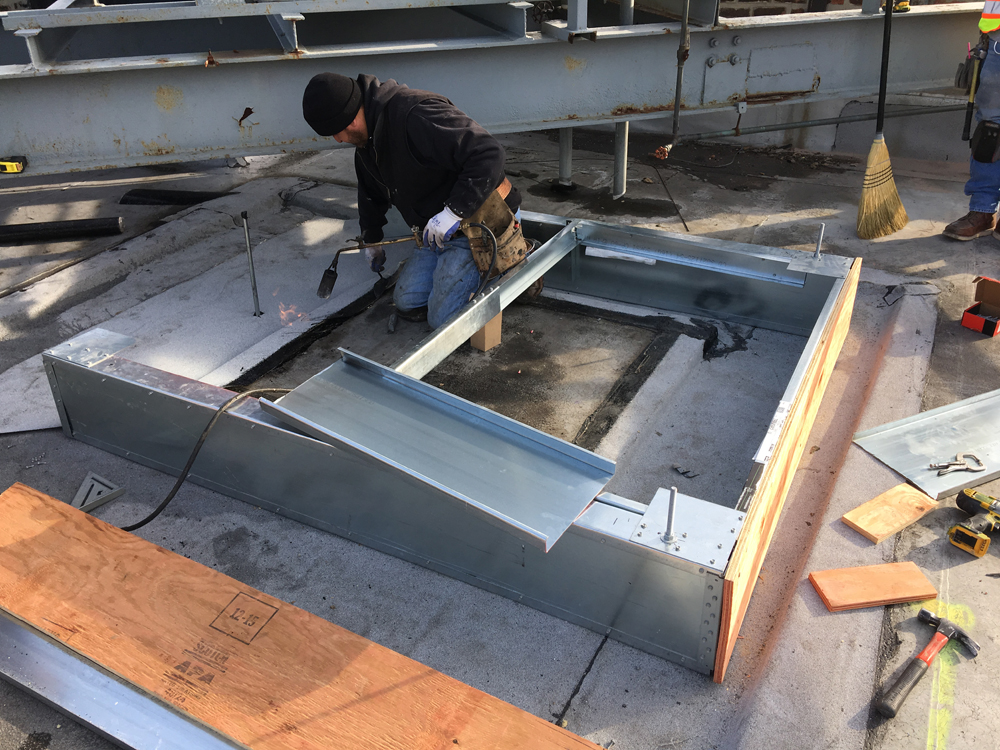
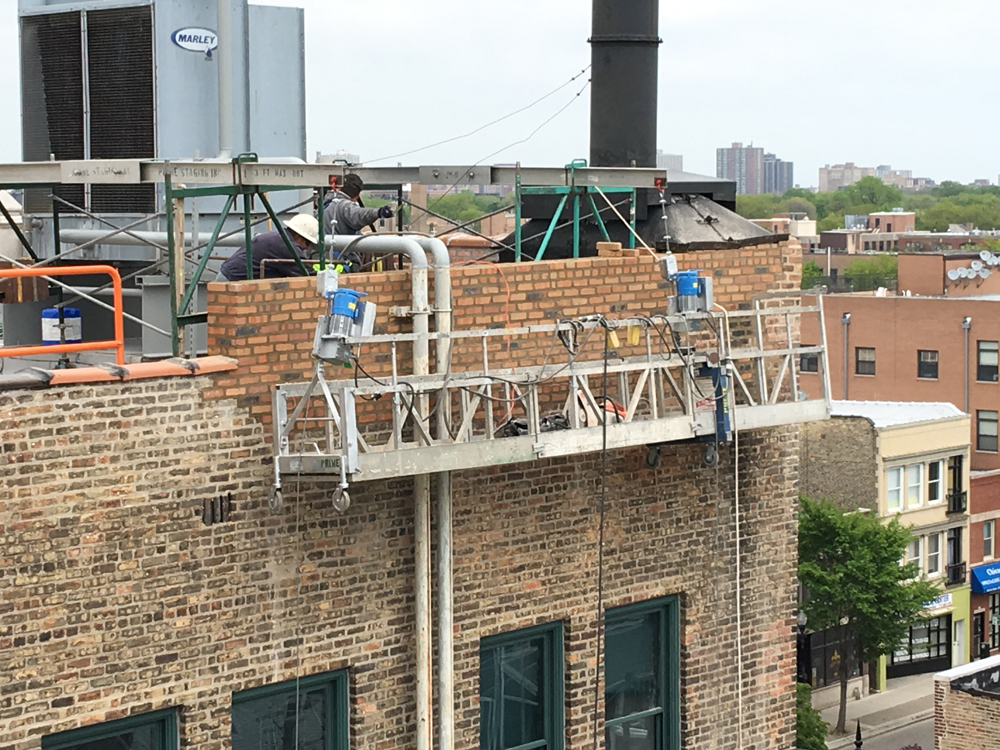
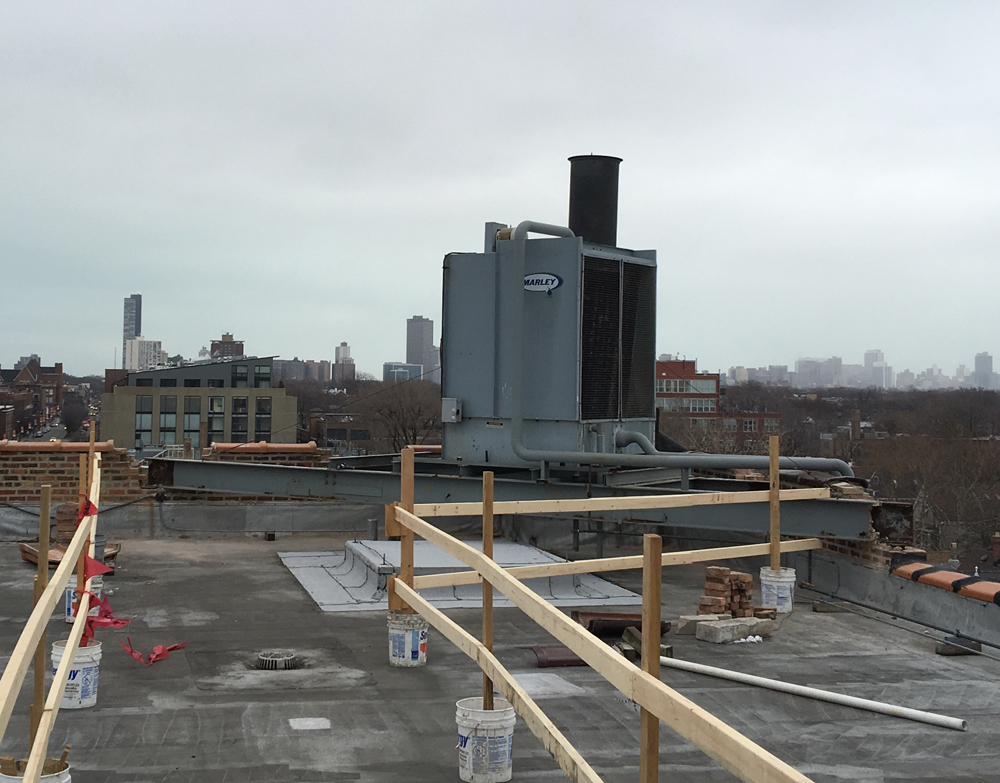
Cooling Tower Curb Construction
Equipment curb being framed, and roofing system being modified to accomodate the relocation of the existing cooling tower.
Demolition of Parapet Wall
Sections of the parapet wall are carefully demolished to expose and access embedded structural steel. This will allow for the removal of existing cooling tower support framing.
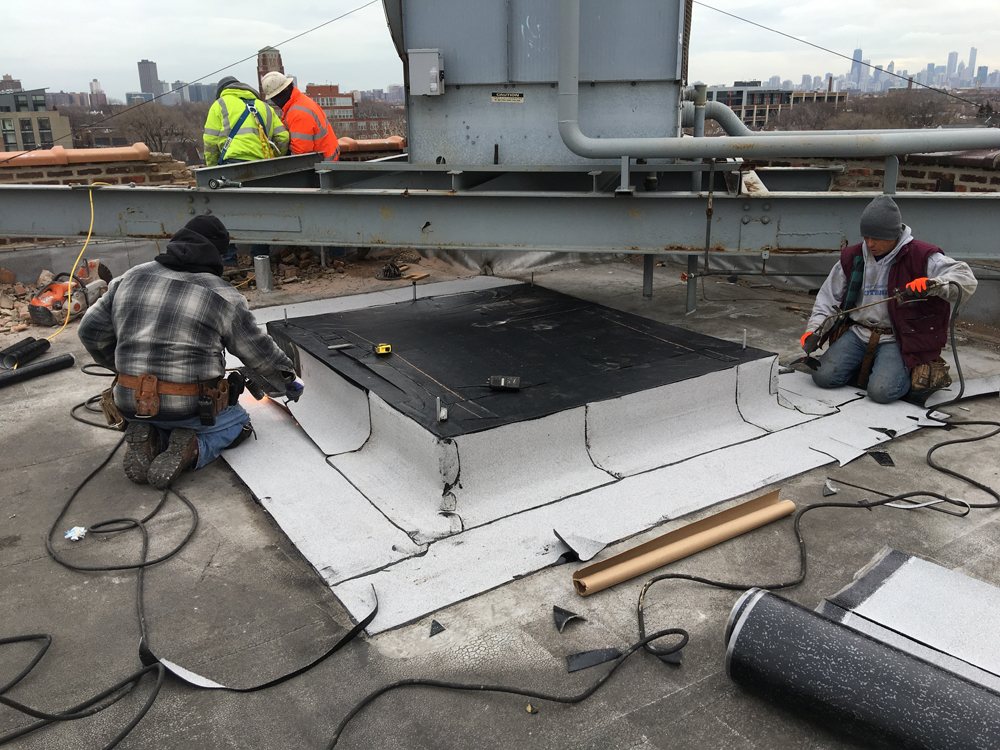
Roofing System Detailing
Crew members detailing the roofing system on and adjacent to the equipment curb to ensure a watertight assembly.
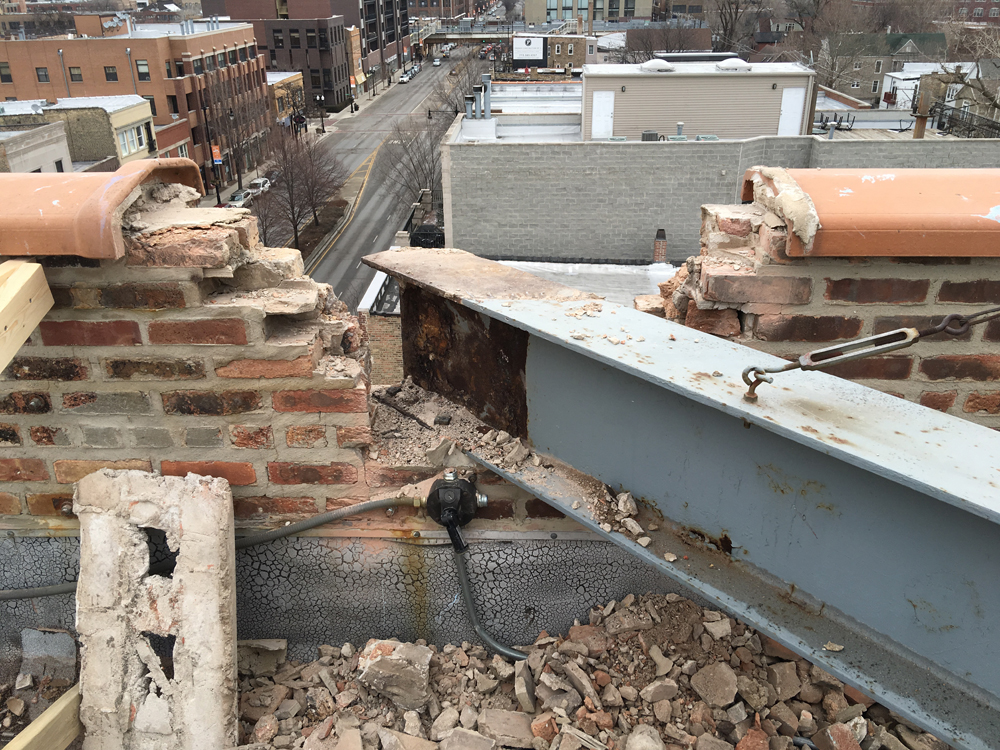
Exposed Steel Beam During Demolition
Existing cooling tower support framing is completely exposed and free from masonry for safe removal from site.
Crane Hoisting Existing Framing
Decommissioned support framing being lowered to a flatbed truck for removal from site.
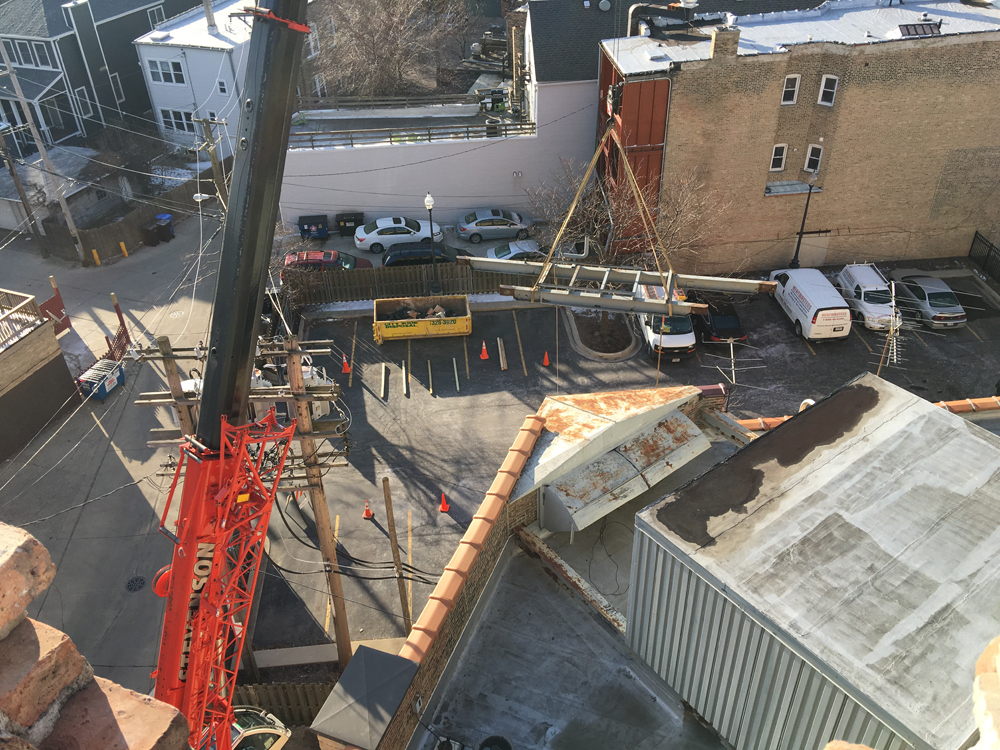
Crane Hoisting New Steel
A crane lifts new structural steel into position high above the city streets for placement on the rooftop.
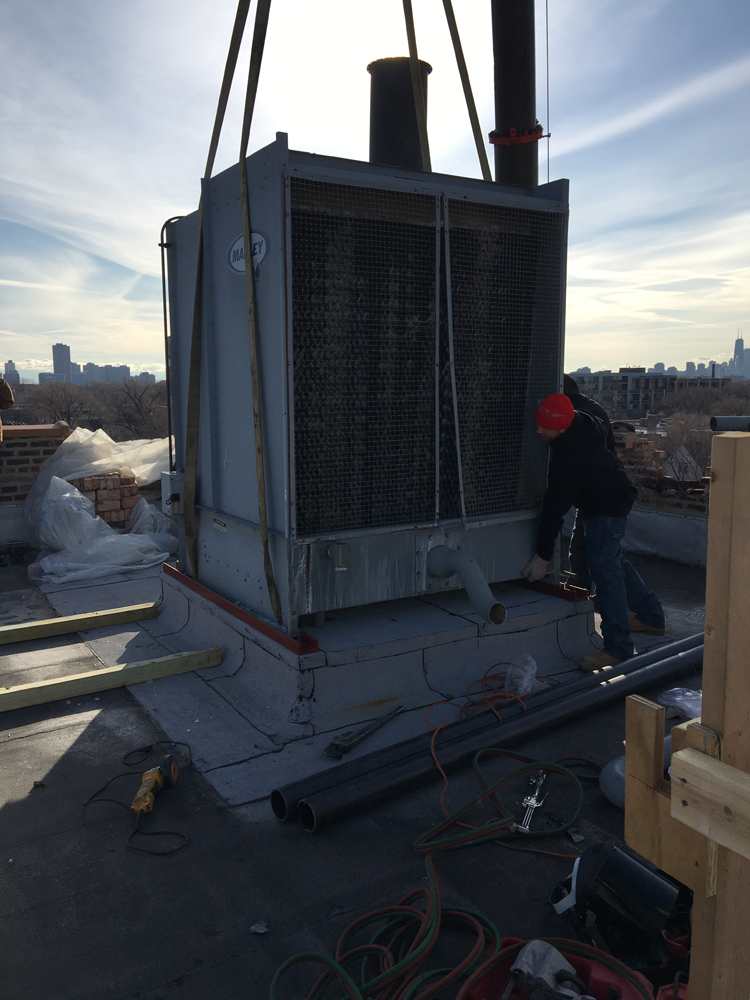
Setting Cooling Tower
Workers guide large mechanical equipment into place as it is carefully lowered by crane onto the prepared curb.
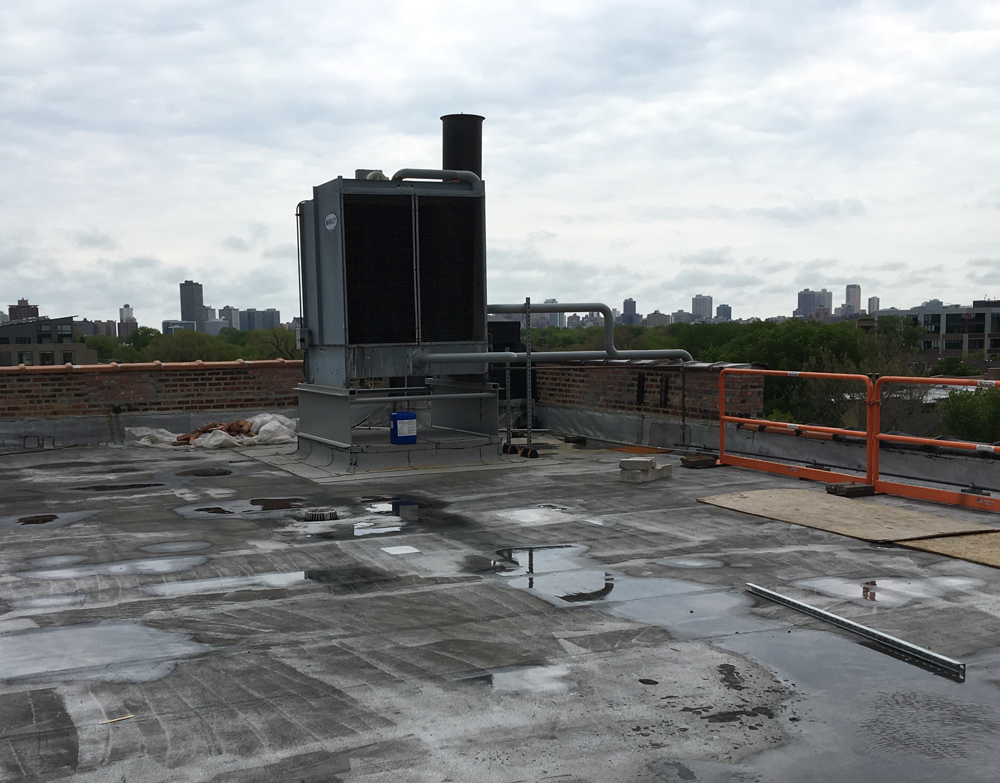
Completed Cooling Tower Installation
The finished cooling tower installation shows the mechanical unit fully set, with surrounding surfaces restored and ready for operation.
PROJECT #1
Hyatt Center
PROJECT #2
Millenium Park Plaza
PROJECT #3
120 N. LaSalle St.
PROJECT #4
Tribune Tower
PROJECT #5
MB Financial Bank / Lombard
PROJECT #6
Thermoflex Corporation
PROJECT #7
Sienna Court Condominium Building
PROJECT #8
MB Financial Bank / South Chicago
PROJECT #9
MB Financial bank / Lakeview

PROJECT #10
MB Financial Bank / Irving Park
PROJECT #11
Devon Bank
PROJECT #12
MB Financial Bank / Irving Park
PROJECT #13
Ritz-Carlton Residences
PROJECT #14
Ritz-Carlton Residences